Ableton Live is one of the software success stories of the last few years, with devoted users in fields as diverse as DJing, remixing, theatre sound and music production. Version 5 addresses requests from all these areas, whilst retaining the program's renowned ease of use.
Version 5 of Ableton's Live loop-sequencing environment is a serious, feature-packed update, and I can believe the Ableton team when they describe it as their largest development effort since the first version of the program. Ableton have integrated a lot of user requests in this release, and the good relations they maintain with their user base really seem to have paid off for both parties.
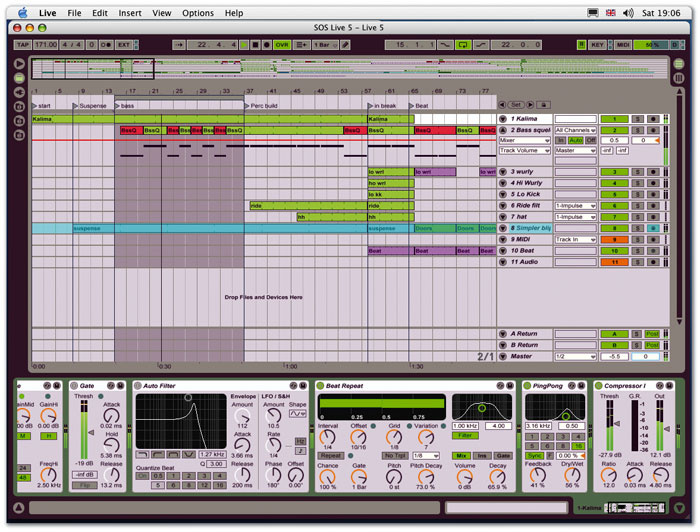
In terms of the user interface and graphic display of the software, Live 5 hasn't changed much since the last release, and if you're not familiar with the program I suggest you take a look at Sound On Sound 's reviews of Live 4 (September 2004) and the original Live (February 2002). There are a few enhancements, like the resizable mixer channels in Clip view, but overall, Live 5 doesn't look much different from its predecessors. To handle the much greater complexity of the program, Ableton have introduced a couple of new buttons to control the display, and a number of contextual menus that can the accessed via right mouse-clicking (Windows) or Ctrl-clicking (Mac). It is worth familiarising yourself with these menus early on, since they hide a lot of goodies, especially in the file-browser department and with regard to fine-tuning warp markers.
All Things To All People
While Ableton's aim with this release is to bring the software to the status of a serious DAW, they haven't forgotten their large contingent of DJ users and remixers, and some of the major improvements target these groups.
With the introduction of support for the MP3 file format, Ableton have made the entire contents of everyone's digitised music libraries instantly accessible for what they lyrically call 'guaranteed mash-up gratification'. Not being much of a DJ myself, I had a go and must say that I'm a lot closer to beat-matching than I ever was, while combining Rachel Podger's Bach Sonatas and Partitas for solo violin with select NWA beats made for interesting listening (for a while...).
There's also a new automatic track tempo-matching feature, which sets warp markers for imported audio files and is a huge time saver. The function works well, but in most cases it is worth following the manual's suggestions on how to help Live along to the best result. I found that often the general tempo of a recording was tracked quite accurately, but almost invariably the downbeat was missed, resulting in both a late trigger and an offset. Using the optional tools in the Clip Edit window (accessed by right-clicking or Ctrl-clicking on a warp marker) makes fine adjustments to the overall timing easy and painless, and spending about 30 seconds to prepare a track you want to 'mash up' doesn't seem too much to ask. Right-clicking on a warp marker in the Clip Edit window allows you to fine-tune Live's automated settings.
A nice touch is the ability to batch-process files by Ctrl-clicking a folder containing audio in the Live browser and using the Analyze Audio option (if you select a folder that only contains one audio file, this option doesn't appear, which had me fooled for a while — the logic, I guess, being that you're not really batch processing.) Using the batch processing I set up Live to anaylse my entire iTunes library overnight, and could get right into mash-up mode the next morning.
The new, dedicated 'complex' warp mode should be mentioned here. This is a frequency-domain warp mode that is specifically designed to handle composite, mixed-down signals. It works well, though it is very processor-intensive, exerting about 10 times the CPU load of the other warp modes. The new Freeze Track feature comes in handy in this context, but more about that later.
Another feature that is targeted at remixers is the new Clip Transport, though this has more far-reaching implications for the use of the Session view in general. In Live 4 it was impossible to audition an audio or MIDI clip from somewhere in the middle, making it necessary to play the clip from the beginning in order to hear a certain section. My way around that used to be a quick transfer over to the arrangement view, but this also had its drawbacks, namely that it was less then instantaneous, and sometimes got in the way of an existing arrangement.
In Live 5 you can now click anywhere in the waveform and the software will, true to Ableton's obsession with sync, jump there at the next global quantise value. In conjunction with the 'set' buttons introduced to define beginning and end points of a clip, on-the-fly editing of envelopes and events and positioning of long sections of audio or MIDI has become a lot quicker and more intuitive. Clip loops are now decoupled from the start and end points of the clips, which means that you can set up a section that runs continuously to a certain point and loops thereafter. Using the 'set' buttons you can also set this up on the fly. As with the vast majority of Live features, these functions can be mapped to MIDI controllers.
Opening DAWs
As I mentioned earlier, Ableton are looking to become a serious contender in the market for digital audio workstation (DAW) recording software, and have thus introduced a number of features in the Live 5 release that should help them here.
While it is undisputed that the simplicity, workflow, ease of operation and non-destructive nature of audio processing all make Live a very attractive tool to work on, there is an aspect to the system that needs specific attention when working in a pro audio, studio environment. Since Live is also a live performance tool, Ableton have built in a great deal of resilience and stability. The application hardly ever crashes, and you will need to push it very hard for the audio to stop completely. However, when you are edging towards that point of system overload both audio quality and timing accuracy begin to deteriorate. Both these artefacts are not acceptable in a professional studio situation, and other applications get around the problem by limiting the voice count and cutting audio that doesn't arrive at the output within spec. Set Live 5 going overnight, and it will analyse all the audio and MP3 files on your hard drive ready for instant use in the future...
In a studio situation, where you have the opportunity to work around such problems, this is good practice in my opinion, since it gives the engineer peace of mind as far as the digital audio quality is concerned. The dynamic nature of Live obviously conflicts with such an approach, and personally I wouldn't want to trade all the great creative possibilities Live 5 offers in favour of deaf trust in the audio. However, it should be pointed out that with Live you have to use your ears to judge the audio: there can be degradation well before you see obvious signs of processor overload such as jittery graphics, and it can be subtle until you know what you're listening for. Ableton's head developer responded to my query on this question as follows: "There is no short answer to this. The behaviour of Live 's audio processing under heavy load is a complex thing and heavily dependent on the processor type and system architecture (multiple processors or cores). Of course we took care to give the most critical tasks the highest priority (recording over playback, playback over interaction and display)."
It is always good practice to run a system with a degree of processing headroom and this applies even more here, since you are likely to have much more dynamic load variations on the processor than in more conventional applications. Having said that, Ableton have introduced a Clip Freeze function precisely in order to enable you to get more from your machine when running Live. Similar to other familiar DAW systems, Freeze generates a 'bounced' audio file to play back processed sounds off disk rather than running live via the CPU. Naturally the frozen processing cannot be manipulated in this state, but it is still possible to trigger clips in the usual way. This is great when you are working on a big arrangement and running out of processing power while you are still experimenting. However, I found that sometimes the frozen clips lacked the accuracy of material that was running live. Loop points sometimes seemed sluggish, and they also tended to shift slightly under moderately heavy load.
One drawback of running frozen loops is that audio processors on random cycles, or cycles which are longer than the loop length — such as slow phasers, long delays or the new Beat Repeat device — lose most of their variations. There is a cure to this problem, which is to perform the arrangement in Clip view while the clips are frozen, but then carefully consolidate and bounce the arrangement one part at a time in Arrangement view. Unfortunately this method only applies to a studio situation, but I would have thought that on stage nobody would want to push the system to a point where a lot of frozen audio becomes necessary. Having said that, the way Live recovers files from the undo history after a crash works very reliably, and I haven't really lost anything major due to a crash — yet.
Sound Content
Live 5 boasts a large new sound library, and the way Ableton have delivered it is different from previous versions, where most of the sounds came as sampled loops. Live 5 relies more on the sound-generating and processing power of the software to give the user the tools to write their own material, rather than chopping about pre-recorded sound bites.
Simpler and Impulse both come with an extended library of sounds that is designed to give you musical starting points and sound-design inspiration in an open ended way. The new Device management system, which saves entire processing chains in one go, allows the user to port complex Device designs between Live Sets. The large collection of clips goes one step further and provides audio and MIDI clips together with associated Devices, so that you can treat a clip as a musical starting point by using the MIDI provided, or play the instrument that comes with the clip manually to create something new.
The modular structure allows you to change effects chains that have loaded with a clip and save the result either in the Device format or as a new clip. To this the user adds his or her own variations and new material, so that almost any piece of audio sitting on your hard drive becomes a potential new sound configuration ready to use and recycle.
Live 5 clips are organised into categories such as Bass, Beat, Percussive and Pad — some in MIDI and some in audio form — and there is a lot here to play with. The sound quality is of the high standard we have come to expect from Ableton libraries, and while everyone will still want to use sound sources external to Live, it certainly is possible to create entire tracks using only Live samplers, effects and Operator.
Plug-In Delay Compensation
Two further new features in Live 5 help to improve overall timing. Automatic plug-in delay compensation is provided for all Live plug-ins at both the track insert and return points, and a per-track time shift-delay can be found under each fader, as is the case on a number of digital mixing consoles and other DAWs. This is there to enable you to deal manually with other constant delay issues, such as delays incurred by sending to a hardware processor. The delay compensation apparently also constantly works to minimise latency for plug-in instruments. With this feature Live is catching up with the competition where delay compensation comes (if not always reliably and not always on group returns!) as standard.
Ableton say that the delay compensation works reliably for third-party plug-ins that report the delay time correctly to Live, so it might still be a good idea to check for any unwanted timing errors on more obscure effects. Here the manual delay setting below the track faders will do the job. Incidentally, Sets created with earlier versions of Live will load with automatic delay compensation set to off, whereas anything from Live 5 onwards defaults to having it switched on.
Another feature not unique to Live, but nevertheless useful, is the introduction of arrangement locators, which can be set on the fly, named and recalled by mouse clicks, keystrokes or MIDI commands. Navigating though an arrangement this way makes it easy to mock up different structures and also helps when you are editing an arrangement in a more conventional DAW fashion.
Also very welcome to a lot of users will be the addition of Mackie Control support. I'm sure that controlling Live from that family of control surfaces must be great fun, but unfortunately I didn't have one at my disposal to try it.
Pocket Calculator
 The signal flows from top to bottom in each Operator algorithm, so the envelopes of the lowest oscillator in a serial configuration shape the overall amplitude and filter, while those above determine the harmonic content of the sound. A few months back Ableton released Operator, an FM synth following in the Yamaha DX tradition, with four oscillators that can be combined into 10 different algorithms, from all serial to all parallel. Live 5 comes with a demo version, but for full functionality you will have to purchase a licence for 129 Euros.
Frequency modulation (FM) synthesis is based on the fact that you can generate harmonic sidebands by modulating the frequency of one oscillator (carrier) with that of another (modulator). Each time this happens the resulting waveform becomes more complex, and thus more rich in harmonic overtones. This way it is possible to generate very complex waveforms from simple sources. The resulting, harmonically rich waves then get filtered in the traditional way in order to shape the sound.
Ableton have managed to package this potentially challenging synthesis concept into a very simple and ergonomically friendly design. Every parameter is accessed from the front panel, and once you have understood the basic concept, it is easy to get right in there and create sounds from scratch as well as tweak the patches from the impressive factory library.
Each oscillator is accessed on the left-hand side of the control panel where the pitch is set. 'Fixed' pitch can be used to add a 'clicky' percussive attack to sounds such as organs or a harmonically fixed overtone component for breathlike noises. When you click on an oscillator, the central panel switches to show the corresponding envelope. The envelope shape provides three rate parameters — attack, decay and release — and three levels, initial, peak and sustain. You can also set the oscillator's wave shape from a choice of 26, including noise, and a few other parameters such as phase, velocity sensitivity, velocity to envelope rate and key tracking are available. A neat feature, which turns Operator into an instant groove machine not unlike NI's Absynth, is the envelope loop function which repeats the envelope shape in a variety of ways, either beat- or tempo-sync'ed or free-running. A demo version of the Operator synth is included with Live 5.
Operator has seven envelopes in all, controlling the amlitude of each oscillator, the mod depth of each LFO, and overall pitch and filter frequency. All of these modulation sources make Operator a very flexible synth that spans the sound spectrum from the traditional FM domain such as electric pianos, bells, brass and synth strings, via electronic percussion and drums, to modern rhythmical sound beds — instant dance tracks in fact. The library is impressive, and the hands-on design of the user interface makes it easily tweakable so that users will very quickly make it their own. The low load Operator puts onto the CPU make it an ideal sound source for Live 5, and combined with all Live 's sound-manipulation plug-ins, it becomes a powerful sound design resource. But keep an eye on the voice count...
Instruments & Other Devices
A number of improvements and new devices have been introduced to Live 5 's armoury of instruments and effects. Since we reviewed Live 4 Albleton have launched Operator, a fully fledged FM synthesizer (see box). This instrument is not part of the Live package and must be purchased separately. However, all other Live plug-ins come free with the software, and in this release Ableton have added the intriguing Beat Repeat.
Beat Repeat is, in essence, a delay unit with subsequent pitch transposer and filter, and an input feed that can be triggered in a variety of ways, but basically in sync with the track. If, for argument's sake, you feed a drum loop into it, it will pick individual beats or sections and repeat them — if you wish, with a pitch-shifted feedback loop and subsequent filter. The resulting delay output can then be either mixed in together with the original signal in a dry/wet balance, used to replace the original in those sections it triggers, or heard on its own. Depending on the settings, you can achieve a variety of interesting effects, ranging from subtle rearrangements of a drum loop to mad harmonised effects not unlike those achieved with the MXR Pitch Transposer way back in the '80s. This is also very useful in the mash-up department, where whole tracks can be re-funked (try Cameo's 'Word Up'). Other remix applications would include vocal tracks, where you can achieve strange repeat and stutter phenomena if you're sick of the Auto-Tune yodel and want to try something a little different. Altogether, Beat Repeat is a very versatile and fun plug-in that yields many surprises.
Other new plug-ins include a phaser and a flanger. I always find phase-related effects hard to judge in absolute terms, since they so depend on the source material. These two plug-ins apparently have been modelled on '70s guitar pedals (although Ableton are a little non-specific on what pedals these are), do a good job from the subtle to the not-so-subtle, and certainly enhance the sound-design capabilities of Live. In an environment that is structured in such a modular fashion, phasing effects can always add colour to long processing chains. Nice.
Also new is a true stereo panner that provides you with four modulation waveforms (sine, triangle, sawtooth and random) that can be shaped towards a square wave in percentage degrees. The modulation of left and right signal can be in phase, which results in a tremolo to gating effect depending on depth, or phase-shifted by up to 360 degrees, with 180 degrees giving the maximum left/right depth. There is also a 'spin' mode, which gives the left and right signal different rates of panning, with the maximum 50 percent being approximately a 3/4 ratio between the two. As usual better tried out than explained, this is a versatile plug-in to add interest and movement to your mixes.
Designed to add warmth and fuzz, the new Saturator adds warmth and fuzz. Personally I find that kind of thing is best done in the analogue domain, but set the parameters carefully and make use of the Colour section and you can really add character to sounds, in a way that beats adding excessive EQ. Presets like 'Mid-Range Phattener' show the subtle side of this plug-in.
 New effect Devices in Live 5: from left, Beat Repeat, Saturator, Flanger and Phaser.
See You Later, Arpeggiator
By public demand Ableton have also added an arpeggiator, and as you would expect by now, it can do more than your standard up and down patterns. The Live 5 arpeggiator comes with a list of 18 play orders (Styles), from the usual up/down to chord triggers, converging and diverging arpeggios and more.
Rate and gate settings are self-evident, but the Retrigger section is a little more interesting. Here you can limit the number of repeats the arpeggio runs for each trigger (from 1 to 16 and infinite) and set it up to retrigger either on a regular rhythmical sub-division, per note or not at all. You can achieve interesting pseudo-polyrhythmic effects by setting an odd number of steps like 7 or 9 and retriggering the result on a half-note or whole-bar base. This way the arpeggio gets 'pulled back' into the overall rhythm while running on an unusual cycle.
An unusual and interesting addition is the Transpose section, which depending on your setting adds notes of a predetermined interval into the arpeggio. These notes can be forced into a scale for obvious harmonic reasons, or set to run free at the fixed interval. The Steps fader in this section controls how many of these intervals get added to the original trigger. It sounds more complicated than it is, and you don't need to know exactly what's going on to create a nice-sounding sequence.
Last but not least there is the Velocity section, where you can set a target velocity you want the arpeggio to reach over time. The arpeggiator will 'fade' from your trigger velocity up or down to the target velocity over the length of the 'decay' time (0.01ms to 60s). When the Retrigger mode is enabled in this section the velocity behaviour will follow the trigger setting selected in the Retrigger section of the Style settings. Using, for example, a synth sound with velocity-sensitive filter settings, you can create dramatic slow build-ups with a low trigger velocity and a high destination setting over a long decay time. Alternatively, you can generate looped effects with the retrigger mode set to Beat.
I could go into more detail, but suffice it to say that there are hours of fun to be had with this little beast. Ableton have managed to design this MIDI effect with relatively few parameters that all have a dramatic effect on the result, so when you tweak a control here you do hear the difference immediately. The new Arpeggiator MIDI Device.
Simpler Updated
With the inclusion of independent envelopes for filter, pitch and amplitude, the Simpler sampler is still simple (just) but a little more powerful. Glide control and an improved LFO (the rate can be related to key position — build you own Theremin from a sine wave!) are welcome additions. This instrument needs to be seen in context with the other processing power of the software, since in combination with all the other plug-ins it becomes a surprisingly powerful sound-design building block.
Organisational Tools
Apart from all the previously described improvements and additions, the biggest news in my opinion is the rethink the Ableton developers have had on the filing structure for Live. I love the way everything is integrated now via the new Live Clip format. As mentioned above, saving a clip now means that all the relevant settings for the sound generator, any MIDI processing and audio plug-ins get carried with the clip file, regardless whether it happens to be an audio file, sampler or synth. Also, whole Live Sets now appear in the browser as folders containing all the clips they are made up of. So if you remember a track you have worked on and want to reproduce a certain sound or setting from that in a totally unrelated project, it is as easy as browsing to the old track and dragging the relevant clip into the new Live 5 Set. The beauty is that this works for previous versions of Live, so anything you have done up until now is available to you without any re-saving or other complication. I also like the fact that this is the same for audio or MIDI clips, which means that you don't have to set up different housekeeping systems and can just think of your sounds as sounds.
Since this means that you are all of a sudden dealing with a lot more sounds (keep in mind the potentially large MP3 library you might have included) Live 5 also comes with an improved browser. All saving and loading of clips and Devices from within a Live Set can be done by drag and drop or simple save buttons, with Live creating the necessary tracks automatically on load. It is also possible to drag entire Live Sets into an already open Set, which merges the two. One suggestion I would like implemented is to include the drag-and-drop facility for the Replace/Locate button in the clip display, since it can be a little tedious to have to browse from the root directory all the way to a sample location that might be open in the browser already.
What this way of archiving sounds and ideas has that really sets it apart from any other file-management system I've come across is the way it so totally integrates with the operating system. Suddenly all your hard disks become library material — everything you work on can be combined with anything else seamlessly, regardless of whether it is in the audio, MIDI/sound-generating or mix-processing domains. The integration of MP3 files with all my samples and sound processors even awoke my curiosity in the process of DJ mixing.
Altogether the new browsing and filing system is a huge step forward, making Live 5 even more immediate and incredibly quick for accessing all your sounds. I should also mention Device Groups at this point; in essence, Live allows you to combine a number of plug-ins into a group, which can then be loaded and saved as one object. For example, suppose you have a chain consisting of an arpeggiator and a MIDI scale device plugged into Operator, through a ping-pong delay and compressor, to give you a patch that can be used as an instant trance generator. By shift-selecting all these plug-ins together and choosing the Group command from the Edit menu you can create a Device Group. Saving this just takes a mouse-click on the Save button of the Device Group, and once the Device then shows in the browser window you can rename it. What takes a little getting used to is that Ableton have opted for this format to save the settings as well as the instrument architecture, meaning that you cannot have multiple presets for a single Device Group — the Device Group itself is the preset. Once I got my head around that concept, though, I began to appreciate the simplicity: you never have worry about remembering how you created a sound again, just what it sounds like and where you archived it. Naming and archiving therefore becomes a key to a good library, and it is worth spending a little time on setting up a folder structure that will make it easy for you to manage your sounds. The fact that the browser is now searchable from within Live 5 helps a lot, and you can also create folders without having to leave the software.
It just remains to say that in all of this I didn't experience any unpleasant crashes, and although it is quite obvious that a powerful audio program like Live 5 will suck up any processing power you allow it to, I was surprised by its moderate CPU consumption and reliability on my trusted G4 workhorse. Nevertheless, Live 5 is so much fun that it still made me crave a more powerful machine — and finally convinced me to get one! My main problem in writing this review was simply to get to the point where I stopped playing with Live 5 and started writing the review. Several nights in a row I sat down to finally put pen to paper, only to end up playing and exploring until the early hours yet again, and it took serious strength of will to close it down and open my word processor!
Pros
- Unique, powerful and simple compositional and recording tool providing a huge fun factor with serious results.
- Completely puts you in control of all the little bits of audio that make up your hard drive: every file is instantly usable.
- A big selection of sounds and sound-design Devices, with some interesting new sound-manipulation tools.
- More powerful Arrangement view with MIDI/key-controllable locators.
- Reliable.
Cons
- Too few to spoil the experience.
Summary
If you liked previous versions of Live you'll love this. Ableton have stayed true to their simple design and interface while adding high value to the software, expanding its capabilities in a very creative and usable way. I love it!
information
£299 including VAT.
M Audio UK +44 (0)1923 204010.
+44 (0)1923 204039.


