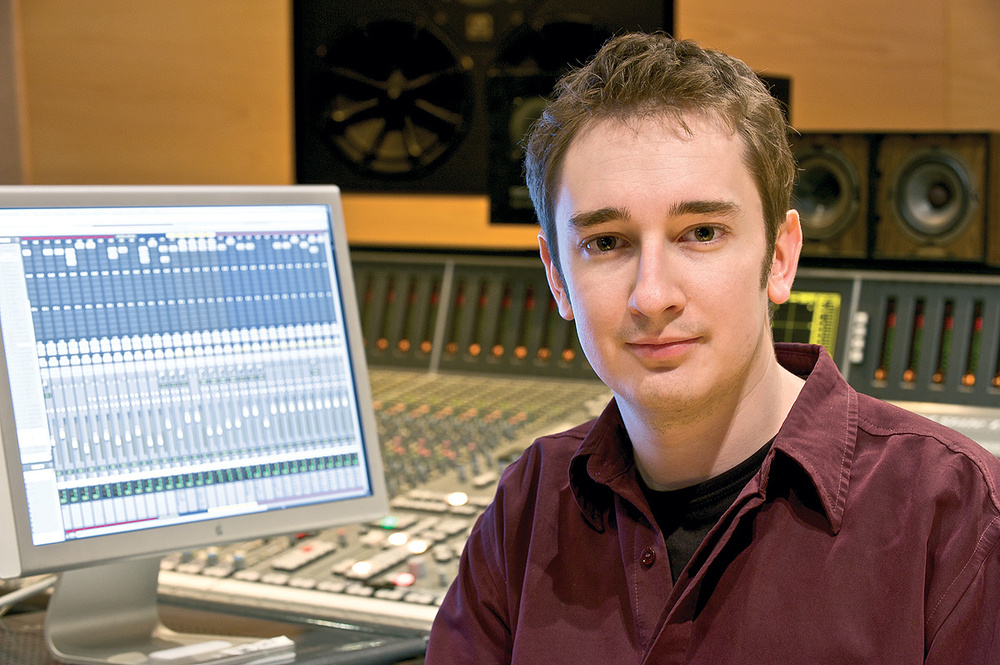
Transatlantic number one 'Just Dance' was not only a breakthrough for Lady Gaga, but also for her producer RedOne and mix engineer Robert Orton.
Until the end of 2008, New York singer Lady Gaga was barely a blip on the radar of the US media. On its original release, her debut album The Fame, and its first single, 'Just Dance', did little to change her profile in her native country, although the single did make it to the top in Canada. All this changed when 'Just Dance' finally arrived at the top of the Billboard singles charts in January 2009, 22 weeks after its release.
The song is also the first major hit for featured singer Colby O'Donis and producer RedOne, and the single and album arrived on mix engineer Robert Orton's desk only a few weeks after he left Trevor Horn's employment to begin a freelance career in March 2008 (see box on the last page of this article).
'Just Dance'
 Written by Lady Gaga, RedOne and Aliaune ThiamProduced by RedOne
Robert Orton first heard of Lady Gaga and RedOne when his manager, Martin Kierszenbaum, head of A&R at Interscope and CherryTree Records, sent Orton the rough mix of 'Just Dance'. "I flipped,” recalls Orton. "You can never tell for sure whether something is going to be successful or not, but the second I heard it, it sounded like a huge hit, it was just amazing. That's how I got involved with that project, and with RedOne, for whom I've since mixed quite a few things. I received the file via Digidelivery, which is how a lot of mixes are sent these days. Nobody else was present for the mix, it was just me at Sarm 3. I spoke to RedOne on the phone before and during the mix, and to Lady Gaga afterwards, to get a sense of exactly what they wanted, and I made adjustments to the mix from that.
"I find it really important to listen to the rough mix, because a lot of effort has gone into it. People work their guts out when working on a record to get a really good sound, and the rough mix is one of the last stages of that process. There's often a lot of attention to detail in a rough mix and you need to make sure that you don't miss this. It will contain many small nuances that people will miss if they're not in the final mix. For them these nuances are part of the vibe. There may be problems with rough mix, but it will usually have a good vibe. In my view, to come in and disregard the rough mix is a little bit arrogant. RedOne had done a really good rough mix of 'Just Dance', and the label and Lady Gaga liked it very much. There was nothing wrong with it. I was simply asked to take it to the next level.
"You get an idea of what you can do for a song fairly quickly. If you work hard enough on something you can make it better, but you have to be careful that you don't lose what's good about the rough mix. So I first will spend a lot of effort on replicating all the important elements from the rough mix, and in the case of 'Just Dance', one of the things that really stood out was the way the kick drum interacted with the snare, giving the impression of a four-on-the-floor in the first half of the bar. That really makes you want to get up and dance. To keep and enhance that feeling was crucial. There were about 100 tracks, half of them were programmed drums and keyboards, the other half were vocal tracks, by Lady Gaga, Colby and RedOne. Not least because there were so many vocal tracks, I worked hard on making them sound as good and up-front and present as possible.”
Tidying Up
 Part of the Pro Tools Edit window for Robert Orton's 'Just Dance' mix.
"In general, I spend a lot of time listening to the vocals. The lead vocal is what people latch on to, and when you can get that sounding as good as possible, a lot of the other stuff falls into place. I'll start my mixes by laying out the Session in the way that I like and colour‑coding everything, so it's easier to orientate myself and I intuitively know where things are. I'll then solo the vocals, and will listen to them on their own, paying attention to the sound, the lyrics, the melody and the rhythm of the singing, and from that I'll work out what kind of effects will work on the vocals. I often find that when you get the effects right on the vocals, they will suit the other stuff in the track. I'll first work on the sound of the vocals, seeing if they need EQ or compression, and once I feel that I have the right sound, I'll start looking for delays and reverbs, that kind of thing. I'll try to accentuate rhythmic aspects of the vocal. The vocal by itself, without the track, tells you a story, and other parts of the track enhance that.
"Once I feel I've taken the vocals as far as I can without hearing the backing track, I'll mute them and I'll work on the drums and then the bass, and will do my best to get those to work together. I'll then get the vocals back in, and will work on getting the vocals to sit well with the drums and the bass, and after that I'll bring in the other elements one by one, building them around the vocals, bass and drums. Of course, I'll be going to and fro a lot then between all the different elements to fine‑tune things. A delay that I added to the vocals may not work in the track, and I'll take it back off, and so on. In the beginning of the mix process I'll be working equally with the [Pro Tools] Edit and the Mix windows, using the Edit window to move things about, changing the timing of things or tidying things up. Like in 'Just Dance', there was a synthesizer that spilled over from the intro into the verse, and it had much more impact to have a clean cut straight into the verse. Working in the Edit window can also be good because it gives you a visual clue as to what's in the track while you're listening to things.
"Towards the end of the mix I'll spend a lot more time just with the Mix window. I'll send the different elements in the Mix window to a series of VCA faders, which are like masters of different groups. In the case of 'Just Dance', 'A' is Lady Gaga's vocals, 'B' is Colby's vocal, 'C' is RedOne's vocal, 'D' is the drums, 'E' is the bass, 'F' the main synths, and 'G' the rest of the keyboards. I like working with VCA faders, because you can still influence track levels post any automation that you set on individual tracks, whereas with groups, once you've set the automation on an individual track, it's fixed. When I move the VCA fader, all the tracks that are sent to it move. Working with VCA faders is also a way of simplifying the Session. Because I had 25 tracks of effects returns, which you can see to the left of the VCA faders in the mix window, I was working with a total of 122 tracks. A lot of the vocals were stacked, and with everything organised in groups via the VCA faders, things were a lot easier to deal with and I was quite happy to have that many tracks. You don't really need to see or deal with them all the time.”
- VOCALS: URS EQ, Bomb Factory Fairchild 660, Waves Renaissance Vox & De-esser, Digidesign Revibe, Lo-Fi & Digirack EQ, McDSP Filterbank E6, Sound Toys Echoboy, TC Works Chorus-Delay.
"On Lady Gaga's lead vocal [the track labelled 'GgLdC'] I have: a URS EQ plug-in, adding a little bit of top end to her vocal; the Bomb Factory Fairchild 660 compressor, which just takes out some of the peaks; the Waves Renaissance Vox for some more gentle compression, levelling everything out slightly; and the Waves De-Esser to take out some of the harder 'esses'. I put it towards the end, because the compression and the EQ bring up the 'esses' a little bit. There is a vocal 'verb send to the Digidesign Revibe, set to a very short reverb, just to add a little bit of space behind the vocal, filtered with the McDSP Filterbank E6, which brightens the reverb a bit to give it some splash.
 Multiple delays were used to add emphasis to specific words within the lead vocal.
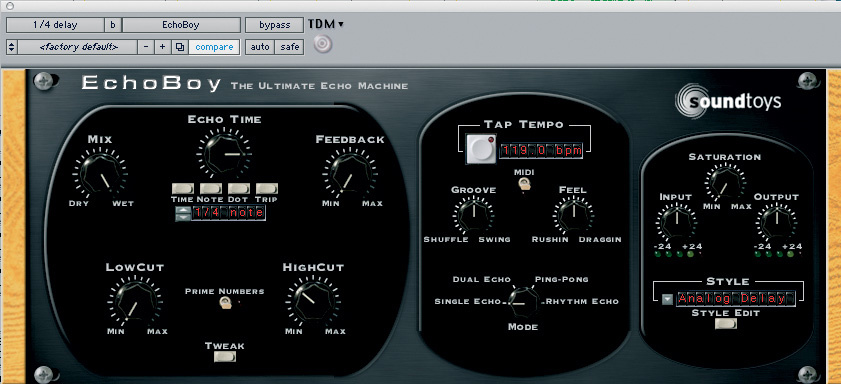 "I also used a lot of delays on Lady Gaga's lead vocals. A lot of the time you're looking for effects to draw the listener in, and static effects sometimes work, but at other times you want something more dynamic, like a delay in a pre-chorus, that kind of thing. When soloing the vocals, I added half-, quarter- and eighth-note delays, and I think there's also a dotted eight-note delay, all using the Sound Toys Echoboy. All the delay plug-ins are set on effects returns, partly because it means I can also send other tracks to those delays, partly because not having a plug-in on every track saves on system resources. The eighth-note delay is panned to the right, and comes in the choruses and some words in the verses. The send is automated. The half-note delay is panned to the left, and captures certain words; for instance, in the chorus each time the word 'dance' occurs at the end of a line. The quarter-note delay is also panned to the right and is automated to happen on certain words. All the delays catch words differently, to keep it interesting. They're also set to different styles on the Echoboy — TubeTape, Analogue, etc — to get different textures. Sometimes you want quite a dark delay that's hidden behind the vocals just to give it more body, at other times there are some gags with a word that clearly repeats, in which case the delay has to sound up-front and clear.
 Backing vocals at the bridge were hard‑panned and treated separately using EQ, plus Digidesign's Lo-Fi effect on the left-hand group.
 "The plug-ins on the bridge vocal, Lo-Fi and Digirack 7-band EQ, were added later on in the mixing process. While mixing with all elements in the track, I felt that it was difficult to get a sense of what she was singing in that section. There are four vocals in the bridge, two on the left and two on the right, and the ones on the left sounded like they were a delay of the ones on the right, even though they weren't. I wanted them to sound more independent from each other, so the first thing I did was send them all to two auxes, and EQ the vocals on the left ['2 aux'] differently than those on the right ['1 aux']. I then added some Lo-Fi to the 2 aux, taking the sample rate down to 22kHz and changing the anti-alias, which has the effect of removing the 'esses' from the vocal. All this separated the vocals and made them sound less like a delay.
 TC Works' Chorus-Delay plug-in helped to thicken the backing vocals.
- DRUMS: Sonnox Oxford EQ & Transient Modulator, Focusrite D3, Empirical Labs Distressor, SSL channel compressor, Digidesign Digirack Delay & EQ, Digidesign Smack!, Waves SSL Compressor.
"As I said, the kick drum is one of the main elements in 'Just Dance', almost sounding like a four-on-the-floor in the first part of the bar, where it does three hits. The snare is on the second hit, and you almost feel kick more than the snare, which then clears out and you have a regular kick-snare pattern, in a two-bar loop. It was really important to emphasise that, and this was done by automating the kick and the snare, by pulling down this first snare a little bit.
 The main kick sound was slightly EQed and compressed to bring out its room ambience.
 "'Kick 1' is the main kick, and it has a bit of ambient room sound to it, which is quite important. I EQ'ed it with the Oxford EQ and then added a little bit of Focusrite D3 compression, which brings up the ambience a bit more. 'Kick 2' just plays on one and three of each bar, and is quite thin and pokey‑sounding and just helps to get the kick to cut through the track a little more. It's not adding weight or bottom, it's just adding some mid/high frequencies. Like the snare, I sent it to an outboard Distressor set to an old-style 1176 setting, and this helps to push the snare and the kick in the mix. I call that effect the Thwacker in the Mix window. There was also a sub-kick with quite a lot of bottom end on it, which only comes in for the bridge.
"I used the Oxford EQ to brighten the main snare up a little bit, while also ducking it around 5k, to remove a frequency I didn't like. Like on the kick drum, there's a little D3 compression, in this case with a very fast attack to take some edge off the snare, so it sounds more full-bodied. I also sent the snare to the Distressor, and I duplicated it to another track, and sent that to a channel on the SSL board. I quite like what the SSL channel compressor does to the sound of drums: when you turn the ratio right up and lower the threshold it kind of grabs the sound in a way that no other compressor does, giving it a really sharp-sounding front end. However, towards the end of the mix I still felt as if I hadn't quite captured something about the kick-snare relation in the rough mix, and it appeared to be coming from some sort of compression over the whole mix. So I downloaded the Waves SSL plug-in bundle, and decided to do a shoot-out between that and the desk, and was really gobsmacked by how close the plug-in was. It was amazing and it was exactly the kind of pumping sound that I was after.
 An eighth-note delay was added to the quarter-note hi-hat part, and treated with transient modulation and EQ.
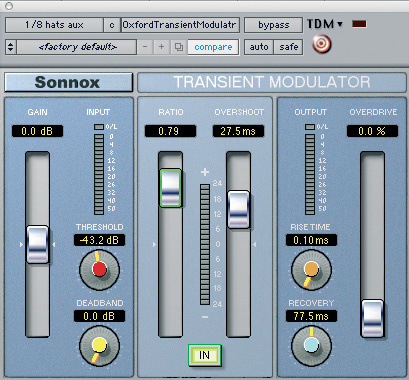 "There are various other effects on the drums. I added an eighth-note delay with the Digirack to the hi‑hat, which was playing quarter notes. The idea was to give the hi-hat a little bit more impetus in the chorus. The delay then goes through a Sonnox Transient Modulator, which pushes the transient up a little bit, so you get more of a sense of rhythm without actually hearing the delay. I also EQ'ed the delay with the Digirack 7-band EQ, cutting below 702Hz and at 11kHz, and boosting at 4.65kHz and 10.68kHz. It's quite a drastic EQ, but the end effect is very subtle and I mixed the delayed hi-hat in behind the original part. The clap has just an Oxford EQ, boosting 12dB at 3.2k and rolling off some of the extreme top. It's like a low-pass filter at the top end, around 8kHz.
"There was also an effect ['drms'] that's a send from several drum tracks to a Digidesign Smack! compressor. The output of that compressor is tucked in behind the entire drum mix. Sometimes when the drums are not quite coming through in a mix I will copy the drum mix onto a send that goes to a compressor, and I'll compress that quite hard and maybe brighten it up a little bit, and mix that in behind the original drums. Not too loud, because it can wash the drums out, but a little bit helps the drums cut through. That's what I did in this song.”
- SYNTHS: Bomb Factory Moogerfooger delay & low-pass filter, Digidesign Digirack 7-band EQ, D-Verb, Lo-Fi, Line 6 Echo Farm, Chandler EMI TG12413, McDSP MC2000 & Filterbank E6, Sound Toys Echoboy.
 A Moogerfooger Analog Delay plug-in was added to the main synth bass part.

"The song had a few keyboard bass parts, which sounded really good, so there was no particular challenge. One of the parts was kind of a sub-bass, the other sounded like a sampled pick bass, which also cut through on small speakers. Keyboard basses can sometimes sound great on big speakers but disappear on little speakers, but I didn't have that problem here. One of the most important elements in the synthesizer parts was called the main synth and it sounded a bit like a synth bass, but with a lot of bright stuff going on in the top end. It's stereo and runs pretty much through the entire track, apart from the bridge. I wanted to emphasise the stops in that part, so I put a very short Bomb Factory Moogerfooger analogue delay on it, I think it was a 16th‑note, which had the effect of fattening up the sound. I then automated the delay return, muting it in parallel with the main part, because I didn't want the delays to sound in the gaps in the main part. You can only hear the delay when the main synth is playing. The only other plug-in on the main synth is the Digirack 7-band EQ, just to brighten it up a bit.
"There's also a synth sound ['RdOnsgntr'], which is a bit of signature sound of his [RedOne's]. It has quite a long D-Verb reverb going into a quarter-note Echo Farm delay, set to 'MemoryMan'. The whole thing is compressed with the Chandler EMI TG12413 limiter. 'Answerblp', just above 'RdOnsgntr', is a sort of answer to the main synth sound in the pre-choruses. It's a really cool part, and I felt that it needed a little bit of help in the mix, so it has quite a few plug-ins on it. I added some distortion with the Lo-Fi to give it more presence, after which it's going through a Moogerfooger low‑pass filter, which is a really cool plug-in I use a lot, because it allows you to change the envelope of the sound. I wanted this sound to be less direct and for it to swell more in the pre-chorus. It's only there for a moment and adds the dynamic movement in the track. It's then going through quite a bit of multi‑band compression with the McDSP MC2000, which evens it out frequency‑wise. After that it again goes through a Moogerfooger low-pass filter, to again sculpt the envelope, and finally there's a Trim plug‑in so I can have the fader in a reasonable position.
"'Audiolnst8' is audio instrument 8. A track title like that is a sure-fire sign that the song was created in Logic, even though it was given to me as a Pro Tools file! It's a little figure in the choruses. The plug-ins on it do very little, to be honest. There's the McDSP E6 Filterbank EQ, just adding a bit of top end, the McDSP MC2000, the Lo-Fi, the Echoboy eighth-note delay, and Digidesign's 7-band EQ. Normally my philosophy during mixing is to try and do as little as possible. It's really easy to think that you're improving things, whereas you're in fact making them worse.”
Making A Difference
"In general, I would say that my main challenge in doing this mix was to make sure that I didn't spoil what was good in the rough mix, particularly the kick and snare relationship, which was largely down to the SSL compression over the whole mix. I also added the Waves L2 over the stereo mix bus, which is a kind of brickwall limiter. I don't like the loudness war thing, and I'd much rather not have to compress my mixes too much, but the reality is that you're competing against other mixes, and people will compare its loudness to that of other mixes. I need to be mindful of that, but at the same time I won't go crazy with the limiter, because I do like my mixes to sound good. Having said that, I don't find sample rate that important. Most of the stuff I do ends up on MP3, so whatever sample rate I use doesn't make a big difference. I used 44.1kHz/24-bit for 'Just Dance'; 96k does sound great, but the large file sizes are a hassle: everything takes twice as long and it's a pain to do backups. There are other factors that make a far bigger difference to the sound than just the sample rate, and I prefer to focus on them.”
Robert Orton: Mixing In The Box
"I started playing piano at age five,” explains Orton, "and from that age I knew that I wanted to work with music. When I was 18 I went to the London College of Music in Ealing, where I did a two-year course in Music Technology and a one-year course in Media Technology. After this I worked for nine months at CTS studios in Wembley, and in June 2000 I began working for Trevor Horn as his Pro Tools tech. When you leave college you feel like you know a great deal, so I was shocked by how I was thrown back to the bottom of the learning curve! But I soon did little bits of engineering for Trevor on my own, and a year and a half later I did the engineering and some additional production on tATu's first Western album, 200km/h In The Wrong Lane, [2002] which was in part produced by Trevor. I wasn't initially going to mix it, but the record company preferred my rough mixes to the official mixes, and that's how I got into mixing.”
During his eight years with Horn, Orton's credits included Pet Shop Boys, Seal, Lisa Stansfield, Elton John, Texas, Celine Dion, Kelly Rowland and Macy Gray. "I learned a lot from working with Trevor,” the mixer elaborates, "like the importance of paying attention to detail, and of knowing that if you can keep working on something you can probably make it better. Most important of all, it's to never lose sight of the fact that it's music you're working on. One of the biggest traps that many engineers fall into is thinking too much about the technical aspects. Many times when mixing, you find that the engineer and the musician in you will be in conflict. It's important to realise that the musician should nearly always win those conflicts, within certain boundaries. Finding those boundaries and knowing which ones you can push and how far is a key skill in mixing that I learnt very much through working with Trevor.”
"I mix in the box entirely,” continues Orton. "For me, the quality I get is every bit as good as when mixing on a board. You get a slightly different sound, perhaps, but it's certainly not worse. In fact, I feel that I get a slightly more up-front sound from mixing in the box. People say you don't get the same air when mixing on the board, but I find that you can get perfectly airy mixes in the box using plug-ins like Eiosis's Air EQ, URS's Fultec, and the Abbey Road Brilliance Pack, which is amazing for adding air to the top end.
"I think that there's far too much emphasis placed on whether a mix is done on the board or in the box. All that matters is finding a way to articulate the message in music, so listeners can understand it. In the end it's about how you have learned your chops. If you're used to working on an analogue board and you have your bag of tricks and outboard gear with which you know how to make things sound great, you're going to struggle in the box, because it's a totally different way of doing it. It works the same the other way. I learned many of my chops from two of the freelance engineers Trevor used, Steve MacMillan and Brad Gilderman — Steve has been at the forefront of Pro Tools since its first release as 'Sound Tools'. Even Trevor has become a complete convert to this way of working. I'm totally comfortable with that way of working now, and with using a trackball and a keyboard.”
Today, Orton owns his own "pretty large” Pro Tools HD system, which predictably is "loaded to the teeth with plug-ins”. Not so predictably, he continues to prefer working in a commercial studio, if possible Sarm Studio 3, where 'Just Dance' and the rest of The Fame were mixed. "I have a couple of Distressors and I may occasionally run something through those, or through an SSL, but the real reason I mix at Sarm 3 is because it is one of the best-sounding rooms in the world. I can't stress the importance of mixing in a good-sounding room enough, and Sarm 3 is amazing. Particularly the bottom end is very true, and when you're mixing in a room as good as that, you don't have to worry about what the room is doing, and you can solely focus on the music. I move my rig back and forth between my home, where I have some Quested VS2108 monitors and a pair of NS10s, and Sarm and the other places where I sometimes mix, for recall or for projects with smaller budgets.”