In the second part of this short introductory series, we cover the more technical aspects of film-making, demystifying some of the jargon that might trip up the video newbie.

The first part of this short series provided a practical overview of the basic process of creating a music video, from storyboarding, through choosing a camera, to editing. Now we're going to dig a little deeper: how does the moving image actually 'work'? How do digital video cameras capture images? Why do aesthetic phenomena occur under particular conditions? The technical details we'll cover this month will help you to understand what digital video hardware and software are capable of, what factors separate professional and consumer equipment, and which ones affect the decisions made when shooting your next video project.
The Moving Image
The moving image is an extremely effective illusion, a series of sequential stills played
quickly enough to appear as motion. A great deal of study has gone into the area of 'apparent motion', and many modern texts conclude that the way our visual centres deal with real motion is exactly the same way as they deal with a sequence of close-together images designed to portray motion, such as a video on a monitor. This is apparently due to how the human visual system deals differently with short- and long-range movement, rendering the apparent motion of stills displayed in sequence, close to one another, as effectively 'real'.
 is cranked by the viewer, and a flip book inside rotates to display a moving image.") This Mutoscope, an early moving-picture device, was coin operated! The handle (on the front with this particular model) is cranked by the viewer, and a flip book inside rotates to display a moving image.Photo: Linda SpashettThe earliest motion-picture devices were spinning boxes such as the Zoetrope, which displayed a series of stills through slots in a spinning drum, and the Mutoscope, a large flip-book with a viewing port on the top and a hand-crank on the side! Modern systems are more advanced, but the process of displaying a series of images to give the illusion of motion remains, at its core, the same.
This Mutoscope, an early moving-picture device, was coin operated! The handle (on the front with this particular model) is cranked by the viewer, and a flip book inside rotates to display a moving image.Photo: Linda SpashettThe earliest motion-picture devices were spinning boxes such as the Zoetrope, which displayed a series of stills through slots in a spinning drum, and the Mutoscope, a large flip-book with a viewing port on the top and a hand-crank on the side! Modern systems are more advanced, but the process of displaying a series of images to give the illusion of motion remains, at its core, the same.
Filter Facts
To realise a particular creative vision, whether traditional or experimental, an understanding of the technologies you can use, and their boundaries, can be very useful. In the simplest terms, light passes through any filters in front of the camera lens, then through the lens itself, hits a sensor, is converted to digital data, which is most often compressed, and is then written to a storage device for later editing.
Optical filters work by hindering the passage of certain frequencies of light to the sensor. The visible light spectrum (the part we're concerned with) ranges from low‑frequency wavelengths of deep red to higher-frequency violet. At either end of this range is an invisible but powerful band, infra‑red at the low-frequency end, and ultra-violet at the high frequency end. Most cameras feature an IIRCF (Internal Infra-Red Cut Filter) to reduce the amount of invisible light from the red end of the spectrum reaching the sensor and distorting the visible light that's detected. Usually, filters are positioned in front of the lens to create effects, or to allow the use of certain camera settings when lighting conditions would not normally allow them to be used succesfully.
Filters are available in both screw-on varieties that attach to the front of the lens, and glass blocks that slide into a 'matte box'. This box is positioned over the front of the lens, usually using mounting rods attached to a plate fixed to the base of the camera. Matte boxes can also have 'French Flags' fitted to them, the angles of which can be adjusted to block ambient light entering the lens, reducing the appearance of lens flares from off-subject light sources. A slot in the box allows sheets of glass or other materials with appropriate filtration properties to be placed in front of the lens. Whether you use a matte box or screw-in filters, there are several kinds of filter commonly used in video production.
Colour: Can be used for subtle 'colour‑temperature' alteration or dramatic tonal changes. Often found in graduated form, where one edge is coloured and the opposite edge is clear, or a different colour. Useful for changing the colour of sky and ground, and can be seen in heavy usage during the driving montages of the BBC's Top Gear series.  A matte box fitted to the front of a camera lens and attached to mounting bars. Note the large French flags, set up to prevent ambient light from entering the lens.Photo: Reinis Traidas
Diffusion: Softens the image by diffusing light. Responsible for the 'soft-focus' look, often used to flatter female characters, used in many classic movies.
Neutral Density (ND): These filters absorb all visible frequencies of light equally, effectively reducing the amount of light coming in through the lens. An ND filter may help prevent over-exposure in bright conditions, especially where you may want to use a wide aperture and low shutter-speed for aesthetic reasons. Also found in graduated form.
Polarising: This filter helps to cut down reflected light, and can be rotated to control the level of the effect. Great for removing bright reflections from water or snow.
Star: These filters create multi-pointed stars originating from light sources, for adding a touch of bling!
Ultra Violet: Filters the invisible light at the blue end of the spectrum, which can make an image appear 'washed-out'. Often found permanently attached to lenses as a form of protection.
Most professional and semi-professional camcorders will have two or three ND filters fitted internally, which is very useful indeed. Special mention should also be made of Fader ND filters, popular with DSLR users. These use two elements; a rotating circular-polarising filter mounted over a linear-polarising filter, with the the ND filtration factor increasing as the top filter is rotated in one direction. These are convenient, though some users report image softness and artifacts with certain models, especially when using low focal‑length (wide angle) settings with high levels of filtration.
Looking At Lenses
In many ways (including the exhaustive attention to detail exhibited by their collectors and enthusiasts), lenses are the photographer's and cinematographer's equivalent to microphones. In order to capture an image with a sensor, light must be accurately guided to its surface. This job is carried out by the lens, a number of glass or crystal elements precisely shaped in order to guide light reflecting from the subject onto the sensor. Lenses are commonly referred to as 'glass' by camera users. One might say, for example, with a celebratory tone, "I spent a small fortune on glass this weekend”. Video camera lenses tend to have a have a control for focus, focal length (zoom), and aperture (also called 'iris'), as do still lenses. The changeable lenses of larger HD video cameras may also include a 'back focus' control.
The focal length control is more commonly known as 'zoom', and determines the 'angle of view'. Focal length is determined both by the focal-length setting of the lens (expressed in millimetres) and the size of the sensor capturing the light. Lower focal lengths result in a wider angle of view. A 15mm lens on a 35mm (full frame) sensor can capture around 100 degrees about the axis (centre) of the lens, while a lens with a 35mm focal length will capture about 55 degrees. A zoom lens of 100mm will only capture 20 degrees about the centre point, enlarging the subject at a distance.
A smaller sensor will give a longer equivalent focal length, in that it will capture an area in the centre of that which would be captured by a 35mm sensor. A camera using a 1.6 cropped sensor (also known as APS-C or Advanced Picture System-C) will display a more 'zoomed in' picture than a full-frame sensor at the same focal length. For example, a 35mm lens will show a picture 1.6 times more zoomed, appearing the same as a 56mm lens on a full-frame camera.
Some lenses do not have a focal length control. These are known as 'prime lenses', are often picked for their optimum image quality at a given focal length, and generally have a wide maximum aperture setting. They use fewer glass elements, resulting in less distortion and sharper focus — but, of course, re-framing the shot means moving the camera! Most camcorders come with zoom lenses, but devices with interchangeable lenses may be compatible with certain prime lenses, or be adaptable to fit them.
Focus On Focus
A focus control adjusts the glass elements in the lens, in order to bring subjects at a specific distance into sharp focus. Rotating a focus ring will either physically move the elements, or instruct a motor to do so, shifting the focal distance nearer to or further from the lens. The focus control is affected by aperture, sensor size and focal length, which all help to determine the depth of field — a term that describes how much beyond or before the selected focal distance will also be in focus. Imagine standing at the end of a white picket fence, pointing your camera down the length of it. If the post five metres away is in focus, and the adjacent posts up to one metre on either side of it are in focus (with all the others out of focus), this area is the depth of field.
A smaller area would be a 'shallow' depth of field, and if all of the posts were in focus we'd see a 'deep' depth of field. If the depth of field is shallow, focus can be 'pulled' from one object to another, shifting the viewer's attention from one part of a scene to a different part of it. The out-of-focus area of an image is sometimes called 'bokeh', a Japanese word that can be translated as 'fuzziness' and is used to describe the aesthetic quality of a blurred background. The smoothness of bokeh is held in high esteem, as out-of-focus objects that are not smoothly blurred can distract from the subject. Smooth bokeh is also easier for compression systems to deal with, improving the overall picture quality, especially in high-motion scenes. Bokeh is affected by the overall lens construction, as well as the number of blades used to create the aperture (more on this in a moment).
Where there's sufficient budget, productions will hire a separate crew member as 'focus puller', and this member will concentrate on keeping focus sharp whilst the camera operator operates the rest of the camera and responds to directorial instruction, or instructions from other crew members. This becomes more difficult to do as depth of field becomes shallower, and distances are often marked on set for actors, in order to make focus pulling repeatable. Larger camera setups and DSLR rigs use a 'follow focus' wheel to aid this task.
A back-focus setting adjusts the distance between the rear lens element and the sensor, a fine adjustment sometimes necessary if you're using high-quality HD video-camera bodies that have interchangeable lenses. If the back focus is badly adjusted, the zoom won't 'track', and focus will change as zoom progresses.
Many camcorders have an auto-focus setting, which attempts to analyse the image and adjust focus to keep the correct portion sharp. With intelligent auto-focus systems, a manual override is possible, allowing the camera operator to pull focus from the automatic setting to another object manually. Some cameras also allow zoom and focus data to be stored, so that a transition between two states can happen automatically over time.
All About Aperture
The 'aperture' or 'iris' control widens and narrows a hole, formed by converging blades, toward the rear of the lens, just before light reaches the sensor. Not only does this control throttle the amount of light that can reach the sensor, it also controls the cone angle of the light reaching the sensor. The width of theaperture is expressed in terms of 'F-stop', which is the ratio between the diameter of the aperture and the focal length of the lens. A setting of f2 using a 50mm lens denotes a width of 25mm, or 50 divided by two. The 'stop' refers to the diaphragm itself, and the 'F' to the f-like symbol used to point out the focal ratio.
As the F-stop is raised, the hole closes, narrowing the cone angle, reducing the amount of light at the sensor and deepening the depth of field. Lenses with a larger maximum aperture (a lower F-stop) are generally more expensive and heavier. They are called 'faster' lenses because they can expose a sensor at a higher shutter speed than a lens with a higher F-stop. Stanley Kubrick's film Barry Lyndon famously includes scenes shot in very low light, using lenses with the largest relative F-stops in cinema history: f0.7, some exotic and painfully expensive glass!
Lens Mounting
 lens is in PL-mount form, complete with gears for additional manual or motorised focus and aperture control. (The lens is also available with EF mounts for Canon DSLR.) Left: A Fuji Fujinon one-third-inch lens. Bottom: An adaptor that allows PL-mount lenses to fit onto JVC one-third-inch camcorders.") Top: This Carl Zeiss Compact Prime 2 (CP2) lens is in PL-mount form, complete with gears for additional manual or motorised focus and aperture control. (The lens is also available with EF mounts for Canon DSLR.) Left: A Fuji Fujinon one-third-inch lens. Bottom: An adaptor that allows PL-mount lenses to fit onto JVC one-third-inch camcorders.
Top: This Carl Zeiss Compact Prime 2 (CP2) lens is in PL-mount form, complete with gears for additional manual or motorised focus and aperture control. (The lens is also available with EF mounts for Canon DSLR.) Left: A Fuji Fujinon one-third-inch lens. Bottom: An adaptor that allows PL-mount lenses to fit onto JVC one-third-inch camcorders.

Changeable lenses come in different 'mounts', a mount describing the system by which the lens is fixed to and removed from a camera. Many high-end cinema cameras use the industry-standard PL-mount system, while Panavision cinema cameras often use their own PV mount. More affordable camcorders such as the Sony Z7 are fitted with one‑third‑inch bayonet mounts, with larger mounts such as half-inch and two‑thirds appearing (for the most part) on progressively more expensive cameras, due to the larger sensor sizes in these devices. Adaptors can fit lenses to different sized mounts, though some entail compromises such as loss of certain automatic functions.
Some still-camera lens-mounting systems include Canon's EF and EFS systems, Nikon's F-mount, Pentax's various K-mounts and the cross-manufacturer 'micro four-thirds' format. However, at the time of writing, only the Canon EOS DSLRs have seen widespread acceptance as video capture tools, due to their full 1080p recording at variable frame rates and full manual control in video mode.
Pixels & Sensors
Most cameras currently use either CCD (Charge-Coupled Device) sensors or CMOS (Complementary Metal-Oxide Semiconductor) sensors, which employ slightly different methods to capture light using silicon, and to convert the image to digital data. It's best to leave the worms in the can when it comes to which type of sensor is 'better' and simply to say that each camera should be judged on its merits as a whole and its usefulness for any given shot or project.
When each frame is captured, the image is sampled at the sensor (or sensors), and goes through an analogue-to-digital conversion process. The surface of a sensor (using current technology) is covered in silicon photo-diodes, which convert the incoming light (photon) energy into a voltage. This voltage is then amplified to the point where it can be converted to a digital signal (as is a microphone voltage by a preamp). The A-D converter in a camera system will operate at somewhere between eight and 14 bits per pixel, and the greater the dynamic range capability of the sensor, the more bits required for an accurate conversion.
In practical terms, the dynamic range of the sensor refers to the amount of detail it captures in the darkest and lightest areas of a correctly exposed shot. If the dynamic range of a given sensor is 1000:1 (or around 60dB) then a 10-bit ADC is theoretically accurate enough to convert these voltages to digital data. Many high-end cameras, however, will increase this figure to account for sensors with even higher dynamic range, allow a margin for error, or provide the smoothest tonality. This bears a direct relationship to digital audio, where 16-bit recordings give a maximum 96dB of dynamic range, while 24‑bit recordings give us 144dB.
Human vision responds to light in a non‑linear way, whereas sensors capture it in a linear manner. For this reason, a tonal or 'gamma' curve is applied to the data in some cameras, to make it pleasing to the eye. A 'linear', high dynamic-range format is one where the data remains linear after capture and conversion, a large amount of detail is captured in the darkest and lightest areas of the shot, and the post-production process is used to give the image a pleasing look. This method of working gives the user more of a blank palette to work with when creating a 'look' in 'post', as long as the scene is evenly exposed and well lit. Top-end cameras such as the RED One and the Arri Alexa are used for big-budget movie making, due to their ability to provide a feed of uncompressed linear footage at very large frame sizes.  and RED One (above) are high-end cameras used in big- budget productions, pictured here with only the camera bodies. Editing the kind of footage they are capable of producing requires a lot of computer power and storage space. Getting the best from this kind of equipment requires a lot of extra supporting gear and much knowledge and skill.") The Arri Alexa (top) and RED One (above) are high-end cameras used in big- budget productions, pictured here with only the camera bodies. Editing the kind of footage they are capable of producing requires a lot of computer power and storage space. Getting the best from this kind of equipment requires a lot of extra supporting gear and much knowledge and skill.
The Arri Alexa (top) and RED One (above) are high-end cameras used in big- budget productions, pictured here with only the camera bodies. Editing the kind of footage they are capable of producing requires a lot of computer power and storage space. Getting the best from this kind of equipment requires a lot of extra supporting gear and much knowledge and skill.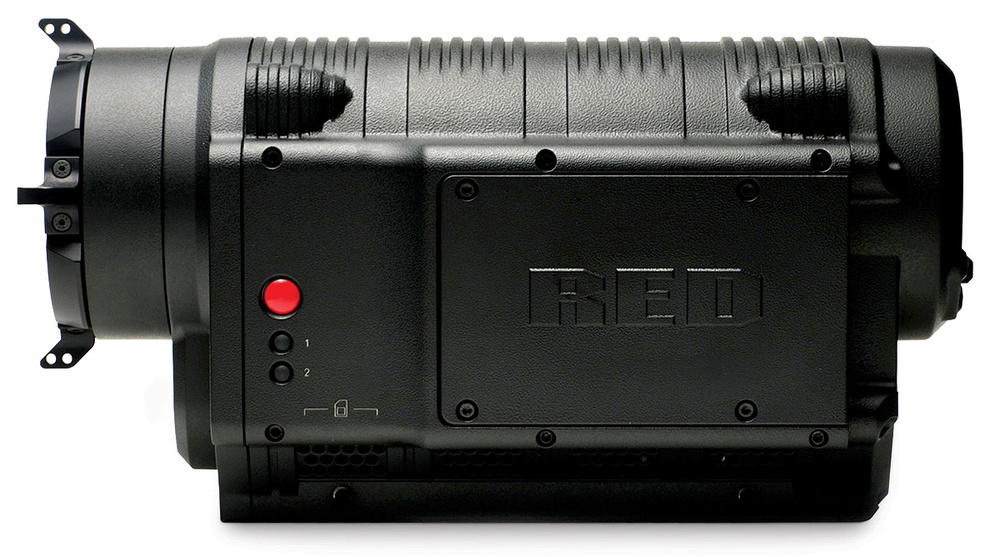
In some cameras, a single sensor handles all frequencies of light, whereas most video cameras will use a prism as a crossover filter (much like those found separating frequencies in monitor speakers), splitting the light that enters the lens into three different bands: red, green and blue, each with their own dedicated sensor. Such systems are known as 3CCD and 3CMOS, and benefit from higher resolution per colour than single-sensor systems. Where three sensors are not present, a single one is used, alongside various algorithms and filtration to determine colour and lightness information.
Just as audio sampling has bits‑per‑sample, with 16- and 24-bit recordings being the most common, visual sampling uses bits per pixel. The Red One digital video camera, for example, has a single sensor and 12-bit ADC, and outputs 12-bit linear data, sampling each colour channel (red, green and blue) four times. If the user streams this data from the camera without relying on any other encoding, they will have 12-bit linear 4:4:4 video, which provides optimum picture quality. It also requires a huge amount of computer processor power to edit in real time at HD resolutions, as well as high data-transfer rates (RAID hard-disk arrays) and a lot of high‑speed RAM. Until this equipment is priced for the consumer market, most users will shoot video with some sort of compression at the camera, and some kind of conversion to a less compressed format for editing.
In audio production, mono, uncompressed data (that provides, for most purposes, a faithful rendition of the full frequency range) takes up only 1.16MB per second (48kHz, 24-bit). Uncompressed HD video can require gigabytes per second! Since we won't want to reduce the number of frames per second and our resolution is fixed, we need another method to reduce this astronomical data rate. A compression method called 'chroma sub‑sampling' is used, alongside other methods for reducing file size, such as GOP (Group Of Pictures) compression. These methods are often found in the camera body itself, squeezing the data coming from the ADC in real time and writing it to tape, hard disk or solid-state memory.
Sub-sampling & Codecs
 Here, the 'rolling shutter' effect shows that the subject has travelled before the whole frame has been exposed, bending vertical objects off to one side.
Our visual system responds far more to variations of brightness than it does colour, so it makes sense for any compression system to give more space over to the lightness or 'luma' content of an image than to the colour or 'chroma'.
The luma channel is a greyscale version of the image, with colour (or chroma) information stripped out. Half of the number of horizontal samples can be taken of the red and blue channels, resulting in the 4:2:2 format, with the green channel being calculated from the other chroma channel information. The bit-depth of the samples is often lower in less expensive camera systems — 8-bit as opposed to 10-bit, for example. The mathematical technique is complex, but the resulting 4:2:2 format takes up about a third of the space of 4:4:4 and results in little loss of quality to the eyes of most viewers. Such a sub-sampled format is referred to as YCbCr (Luminance Chroma‑blue Chroma-red), while raw footage would be RGB, referring to Red, Green and Blue. Sometimes YCbCr is also called YUV, which is technically the analogue version of YCbCr, so don't get confused if you see the two terms interchange! Having a separate luma channel also allowed colour pictures to be compatible with older black-and-white systems, back when colour broadcasting was introduced.
 The first image is broken down into RGB components, while the second is split into YCbCr. RGB provides the purest reproduction of colour, but is very wasteful in terms of data repetition.
 For shooting footage to the tape or memory card of many cameras and transferring video on-line, even more compression than this is required. Although MPEG2, for example (the codec used on DVDs), can contain 4:4:4 data, it is most often found in 8-bit, 4:2:0 format, with three-quarters of the chroma information discarded by 'Cb', and 'Cr' being sampled at half the horizontal and vertical resolution of 'Y'. This sounds like a lot information to throw away, but the images are still quite satisfactory for playback purposes. Formats such as MPEG2 and MPEG4 also use a GOP (Group Of Pictures) compression system to reduce file size. A GOP 'header' frame, also known as an I-frame (Intra frame), is selected, and this is stored as a full picture. P-frames (predictive coded frames) only include the temporal data that has changed since the I-frame. If we have a section of footage that is still except for one moving mouth, it certainly saves space to store just the mouth movement, rather than each frame as a full picture. B-frames (Bi‑directional predictive‑coded frames) are also present in MPEG2, and can refer to both the previous and next frames. As we will all have experienced, this kind of compression can result in 'pixelly' artifacts in the video, especially in areas of smooth colour gradient, where banding appears.
Just like constant and variable bit-rate MP3, there are the same codecs in video. HDV, a common MPEG2 codec used to capture HD images to DV tape, is a constant bit-rate codec, as the speed of the moving tape remains constant. This speed puts a cap on how much data can be written per frame, and for this reason the picture can get a little messy in high-motion scenes.
Once again, the mathematical techniques used are beyond useful knowledge for most of us, but what is important to understand is that editing is usually best carried out in an I-frame format, one where every single frame is a whole picture, even if those pictures themselves are chroma sub-sampled to reduce the file size. Editing with long GOP codecs can cause problems with quality loss at edit points and is partly equivalent to recording, editing, and bouncing audio as MP3, which is something we all know to be inadvisable. Transcoding video is a good option for editing, and Apple's Final Cut non-linear editor includes several ProRes codecs, . Here, the user is about to select Apple ProRes 422, a high‑quality I-frame codec for editing. Other modes use lower bit-rates, for either less powerful computers or where such high quality is not needed.") This Quicktime menu appears when choosing a format for transcoding in Apple Compressor (part of Final Cut Studio). Here, the user is about to select Apple ProRes 422, a high‑quality I-frame codec for editing. Other modes use lower bit-rates, for either less powerful computers or where such high quality is not needed. which vary in file size and apparent quality loss, for just such a purpose. Do be careful with multiple transcodes between formats, as these can introduce 'concatenation' errors, resulting in a messy picture.
This Quicktime menu appears when choosing a format for transcoding in Apple Compressor (part of Final Cut Studio). Here, the user is about to select Apple ProRes 422, a high‑quality I-frame codec for editing. Other modes use lower bit-rates, for either less powerful computers or where such high quality is not needed. which vary in file size and apparent quality loss, for just such a purpose. Do be careful with multiple transcodes between formats, as these can introduce 'concatenation' errors, resulting in a messy picture.
An important point to note is that compression systems such as 4:2:0 are less than ideal for the purposes of chroma keying, a process colloquially known as green-screen or blue‑screen, as it involves shooting a video of the subject in front of a smooth, coloured background and telling a computer to remove this colour in post-production and replace it with other imagery. Crisp, clean edges are vital when using such a technique, and chroma sub-sampling takes its toll most visibly at high-contrast edges, making keying effects less convincing. This lack of information also makes colour correcting with such compression systems less than desirable.
Shutter Speed & Film 'Look'
 An image shot in front of a 'green screen', designed for chroma keying. The green background can be replaced in post-production, but with this clip the detail of the the hair may cause the outline to be inaccurately keyed unless it's been shot with very high resolution and little compression.
As we mentioned last month, a set of fairly standard frame-rates (the number of still images displayed every second, expressed as 'frames per second', or fps) are used in video recording. Countries using a 50Hz power supply will generally use 25fps, while countries running power at 60Hz use 30fps (technically 29.976fps). Traditional film has settled at a speed of 24fps. This speed was fixed by SMPE (the Society of Motion Picture Engineers) who later became SMPTE (the 'T' standing for Television), an acronym you may have seen associated with timecode in DAWs. This rate was deemed fast enough to display relatively smooth motion during projection, and to allow the optical audio recording devices of the time to capture high frequencies with a good signal-to-noise ratio. The number also shares a common factor with 60Hz (the rate of US power), making it simple to manufacture motors for US cameras running at 1440rpm, or 24fps. Traditionally, films shot at 24fps would be broadcast in 50Hz countries at 25fps, raising the pitch of the sound by 79 cents (nearly a semitone) and reducing running time by four percent! With digital technology, it is now relatively simple to correct the pitch issue, though many films are still broadcast in their sped-up form. Though many will cite 24fps as being ideal for film 'look', for PAL users 25fps is close enough.
Many video-editing packages include algorithms for stretching and fitting video to other rates, though it's generally accepted, as with audio, that recording at the desired rate is better than converting afterwards. If shooting for slow motion, it's best to shoot in multiples of the frame rate. For example, to create a half-speed scene in a 25fps project, shoot the scene at 50fps and play it back at 25fps. This will avoid the need for frame interpolation, where the software builds new frames between the originals.
There are other factors contributing to the look of film than the amount of pictures per second, from lighting, through lenses, to the dynamic range of a scene. It's important to use a 'progressive' recording mode (a frame-rate suffixed by a 'p') if you're going for film-like movement in your video.
Another important factor to consider when trying to achieve film-like motion with video is shutter speed. Imagine a still photograph for a moment. If one were to expose a sensor to light for a tiny fraction of a second as a man ran across the scene, the resulting picture would capture him frozen in one position. If we were to attempt the same picture again, but this time expose for a quarter of a second, the resulting image would show more motion blur as he moved across the sensor. The result of high shutter speed in video is a series of more distinct images, while low shutter speed results in smooth movement. Higher shutter speeds are often used to enhance the tension and adrenalin of violent scenes, and can be seen in film in the beach scenes near the start of Saving Private Ryan, and as used on 'prosumer' video cameras throughout Crank and Crank 2: High Voltage.
On a film camera, the shutter is a rotating disc, and a standard shutter-speed when running at 24fps would be 1/48th second. This means that each frame of film is exposed to light for 1/48th second. If one frame passes in 1/24th of a second, half of the 360-degree shutter disc would have to be open in order to achieve a 1/48th shutter speed. For this reason, it is described as a 180-degree shutter angle. When dealing with progressively scanned video, a 180-degree shutter can simulated by selecting a shutter speed at double the frame rate. In a 50Hz country, for example, your frame rate would be 25fps, leading to a 180-degree shutter speed of 1/50th of a second. Higher angles than 180 degrees result in a large amount of motion blur within each frame, and the resulting 'smeared' motion is far less likely to look like film, and more likely to resemble interlaced video. Having said that, not everyone would like to achieve a traditional look, so try out all the settings you have, and see what they offer a given project. Sometimes breaking the 'rules' can be creative and very rewarding, so hire or buy a camera, and see what works for you.
That's A Wrap
The world of video production is just as full of thrills and spills as that of audio production, and there's just as much fun to be had from experimenting and trying to recreate what you've seen on the silver screen as there is from trying to recreate the sound of your favourite record. Every section we've covered in both parts of this two-part article could be the subject of thousands upon thousands of words of deconstruction in its own right, with detail ranging from practical advice to pure maths, but I hope that what's been covered here will have helped relative beginnners with the most important concepts.
The Video Media section of Sound On Sound will continue to cover aspects of video production, from news and reviews of the latest hardware to technique articles and guides, so if your interest has been piqued, there's plenty more to look forward to. It's time to make some movies!
The Post-production Stage
 The Three Way Color Corrector in Adobe Premiere Pro CS4 allows adjustment of shadow, mid-range and highlight colour. Input levels can be used to 'crush' the black for a dramatic look.
Once your video has been cut together, you'll want to make it look good on as many different monitors and formats as possible. For most home video producers, post-production won't involve very much in the way of special effects, computer-generated environments or characters, so colour processing will be as far as it goes. As with monitors in the audio world, which are designed to give the user an uncoloured sound that will translate well onto a wide variety of playback systems, there are video monitors designed to do the same. But let's say, for the sake of argument, that you don't want to blow a grand on a monitor and would like to use your standard display instead. For a few hundred pounds you can buy a device that mounts temporarily on your screen and examines the output of the monitor, making adjustments via special software in an attempt to get the monitor looking as neutral as possible, much like room‑correction devices for audio setups. The analogy doesn't stop here, though and, just as with audio, performance is limited by the quality of the monitor itself. Most LCDs will crush the black level and display different gamma curves, needing a lot of adjustment to display close to 'true'. An inexpensive option is to keep referencing your video on different monitors and try to strike a balance, or burn DVDs and make exports regularly for testing. Consumer monitors may not be designed to display the extremes of white, black and all colours, so do compare different outputs.
Accurate monitoring is preferable, as you are about to adjust the colour of your piece to suit each shot. The two stages are generally known as colour correction, which involves tweaking balance problems, and grading, which involves being a bit more extreme with the settings for a particular aesthetic. This is something of an ideal, as such processes naturally bleed into one another, but the concept helps to keep in mind the goal you're seeking at each stage. Most NLEs have colour correction plug-ins built-in, and some include separate software. Apple, for example, include a grading programme with Final Cut Studio, called Apple Colour.
Colour correction and grading can be a long process, but the nicer your original footage looks, the less time you're likely to have to spend colour correcting. Common processes are crushing the black range a little (so that blacks are deeper and not washed out), shifting the centre point of the 'mid' tones, and subtly changing the colour hue of the dark, middle and lightest sections of a shot. These tasks are usually carried out with either one or three colour wheels, and the best way to get used to their controls is to yank said controls about with gay abandon. Grading can be used to make a shot look as natural as possible, or it can be used to very dramatic effect. The blockbuster movie 300 was shot in studios, and the raw footage looked very washed-out, with little contrast. The producers decided to rely on post-production processing for the look of the film, using chroma-keying to replace the green studio walls with computer generated backgrounds. In the grading process, they crushed the shadows and the highlights, adding strong colour casts to the mid-tones. The result was an extreme comic-book effect that suited the graphic-novel origin of the adaptation. It's important to use as close to uncompressed a format as your hardware will handle when colour correcting and grading, as higher bit-depth and sub-sampling rate (10-bit 4:2:2, etc) give finer detail and smoother results.
For those who do want to add in animations or use computer-generated elements, it's a good idea to look into motion graphics and animation software. You'll find a short list in this issues' '5 Best Buys' section, detailing some of the major animation and graphics packages used in professional video production.
The Balancing Act of Camera Settings
Balancing aesthetic and technical considerations can be difficult. In general, it's best to keep your ISO or gain setting (see last month's article for more) as low as you can, but in some situations it isn't possible. Let's say you are shooting in low light with a relatively shallow depth of field, and are using a shutter speed of 1/400th second, in order to enhance a fast movement, crossing the shot. The shot is under-exposed, so what do you do? If you open the aperture further, the depth of field may become too shallow. If you slow the shutter down, you will lose the flickering motion. The only choice here is to use gain. Using higher ISO settings is not a crime, and is sometimes necessary, but it's always a shame to come to the edit and find that the image is lacklustre and grainy because of too much gain, so bear it in mind. In the opposite situation, where there is too much light for the setting you wish to use, employ a neutral density filter to reduce the amount of light reaching the sensor and you'll find your creative options less limited by nature.
Sensors: CCD Vs CMOS
The most important difference between these two sensor types lies in how they scan the image. CCDs (Charge-Coupled Device) sensors capture the whole frame at once, known as a 'global shutter', while CMOS (Complementary Metal-Oxide Semiconductor) sensors scan a line at a time from left to right and top to bottom until the frame is complete, a system described as 'rolling shutter'. For this reason, CMOS systems can be unstable in lateral motion, causing the images to bend off to one side, because by the time the bottom line is scanned, the subject has moved, something that is not the case with CCD sensors. This results in the 'jello' effect, where what, with a CCD camera, could be a charming hand-held look becomes a surreal contortion of the image that resembles filming through jelly, or 'jello', as our cousins in the States would put it!
CCD sensors can exhibit 'vertical smear' where any bright light source can produce a vertical line extending in both directions from its point of origin, though this problem is not presented by some high-end models. CCD sensors also tend to draw more power compared to CMOS models, shortening battery life.
If you want to make a film with a very mobile camera, a CCD system would probably suit you best. If you don't want to rush around too much, but want something resembling cinematic quality on a budget, perhaps a DSLR is for you. However, if you want both in the same project, perhaps you should consider both, each for appropriate shots.