 Wild Hope: left to right, Ben Henricksen, Rachel Beavan, Clara Kousah and David Walsh.
How much treble is too much? As this month's Mix Rescue discovers, it's easy to overdo things at the recording stage, but not quite so easy to correct them at the mix.
My first reaction on hearing Wild Hope's Don't Take Me Home EP was that a 'rescue' wasn't going to be required. For the most part, the mixes sounded well-balanced and overflowing with energy, giving a pretty fair representation of how the band come across on stage. However, the band felt that one track in particular, 'One Step Backwards', wasn't working as well as the other songs. Although the instrument sounds were pretty good and the balance wasn't far off, the mix as a whole wasn't quite punching its weight.
Rescued This Month
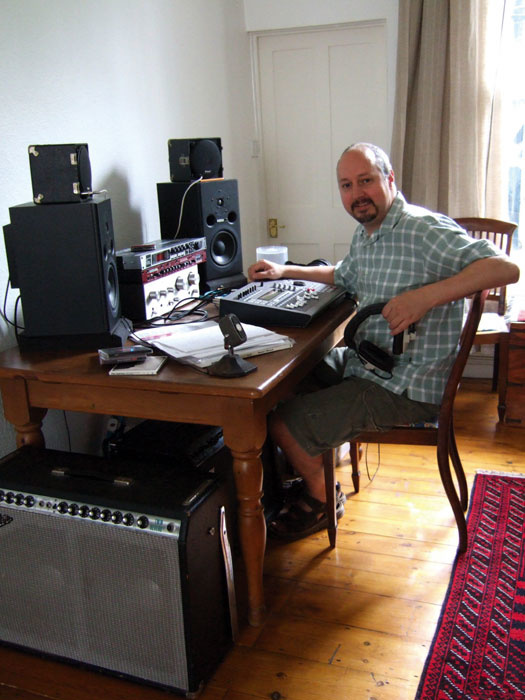
Wild Hope are a four-piece band from Cambridge, with a good following in the area. They claim as influences acts like Mazzy Star, Jeff Buckley and Suzanne Vega, and they have both a powerful live sound and some memorable songs. The two focal points of the band are Clara Kousah's vocals and Ben Henricksen's abrasive electric guitar playing, which reminds me slightly of Bernard Butler in his Suede days. The band record to a Yamaha AW16G digital multitracker, and Ben called up the Mix Rescue hotline after running into difficulties with 'One Step Backwards', one of the five tracks on their Don't Take Me Home EP.
The Diagnosis
Listening to 'One Step Backwards' alongside some reference material in a similar alt-rock genre, it was clear that the mix was pretty bright, and in comparison, it sounded a little thin. The electric guitars, drums and vocals all seemed to be very trebly, which meant that the bass was almost the only thing making a significant contribution below 1kHz or so. Perhaps as a result, the bass seemed very high in the mix, and its dry, DI'd tone made it sound 'stuck on,' especially as there was clearly a fair amount of reverb and delay going on elsewhere.
To my ears, the drums were also missing a certain amount of power and solidity. The kick and snare were getting a bit lost in the mix: rather than being the engine that drives everything forward, they were becoming obscured behind the wall of guitars, and the snare sound arguably lacked body.
Elsewhere, the vocal sound was by no means bad, but I felt it could be improved. The lead vocal was shadowed all the way through the song by multitracked harmonies, but there were a number of places where the timing on the harmonies was a little ragged. This, and the overall brightness of the vocals, was leading to a situation where 'S' and 'T' sounds threatened to burst out as a distracting shower of sibilance. Since I also felt that the lead vocal needed to be brought up a little, I could see this becoming a problem.
Starting At The Beginning
The recording had used all 16 tracks of Ben Henricksen's Yamaha AW16G, and he dumped these out as 16-bit, 44.1kHz WAV files, which I loaded into Pro Tools M-Powered. I decided to begin with the drums, since I suspected that this would be the most difficult element to get right.
 The drums had been recorded in a very nice-sounding church hall.He had captured Rachel Beavan's kit using stereo overheads, plus close mics on the snare and kick. Soloing the drum tracks showed that he'd done a good job: the church hall used for the drum recordings had a lovely acoustic, which was apparent on the overheads (a pair of CAD 179s), while the kick and snare tracks (Audio-Technica Kick/Tom and Shure SM57 respectively) were both very usable. The lack of close mics on the toms was not a problem, because the toms weren't played at all in this song. However, Rachel is an orchestral percussionist first and foremost, and soloing the drum tracks made it apparent that her timing was a bit more fluid than you'd expect from a typical rock drummer (it's also possible that she wasn't used to playing to a click, which can be hard to get to grips with). I suspected that this was contributing to the lack of solidity and punch that was affecting the mix as a whole, so I began my remix by using Pro Tools 's Beat Detective feature to bring the drums into line.
This worked well enough, and I soon had a set of drum tracks that sounded more solid in isolation. Unfortunately, bringing the other elements of the mix back in revealed an obvious problem. Everything else had been overdubbed to the uncorrected drum track, and was out of time with the corrected one, which made the mix as a whole sound a whole lot worse than it had before I started messing about with it. Even when I pulled back the Beat Detective Strength slider, to make the timing correction partial rather than complete, the results just sounded bad. Eventually, I ran out of patience and turned to the problem I'd originally spotted with the drums: getting the kick and snare to punch through.
Punching Weight
The other key factor in achieving a punchy drum sound is the relative levels of the instruments within the kit. It often seems to be the case that what feels to the drummer like a natural balance of snare against cymbals and hi-hat doesn't quite work in a recorded context, and I felt that this was what had happened in this case. In the overheads, the snare was getting lost behind a wall of cymbals. Bolstering it with the close-miked snare helped, but brought up the hi-hat too much. The cymbal crashes were also leaping out of the overheads by comparison with the rest of the instruments.
I was initially reluctant to augment the kick or snare with samples, because the kit had been well recorded in a good-sounding hall, and I wanted to preserve that sound if possible. I've run into this problem before, and there are various tricks that can help bring up the relative level of a snare drum at least to some extent, so I began by trying these out. First, I used Pro Tools 's Strip Silence function to gate out the hi-hat spill on the snare track, so that I could bring up the close-miked snare in the mix without bringing up the hi-hat with it. However, this chopped off the decay of some of the snare hits, so I threw a reverb across the snare track to try to disguise this.
 The 'stabbing' guitar part was reshaped using multi-band compression and band-pass filtering.This improved things a bit, but nowhere near enough, so I decided to see whether the apparent level of the snare in the overheads could be raised. The best way I've found of doing this is to use an upward expander across the overheads, triggered from the snare track. The idea is that whenever the snare hits, the expander applies a brief gain boost on the overheads, thus exaggerating the level of the snare hits compared with the bits in between.
One of the big advantages of Pro Tools compared with some other mixing platforms is that it's very easy to set up this sort of side-chain triggering. Waves' Renaissance Compressor is my first choice as an upward expander, because it allows you to set the compression or expansion ratio very precisely, which is important in this sort of application. By juggling the Ratio, Threshold and Release controls, I found I could trigger 5-6 of gain increase on each snare hit without too many side-effects.
That improved things further, but I still wasn't getting as much snare as I wanted, and the cymbals still had their uncontrolled quality in the overheads, so I decided to experiment with multi-band compression. The idea was to control the highest frequency region, where most of the energy was coming from the cymbals, using fairly heavy compression, while bringing up the mids, which were mainly occupied by the snare. Waves' C4 seemed to do the job, and I was finally getting to a stage where the snare was as loud as I wanted it to be.
Dealing with the kick was a lot easier: I rolled off the bottom end in the overheads using a high-pass filter, and compressed the kick track fairly hard using the Chandler TG plug-in set to Limiter mode.
I used these drum tracks as the basis for my first mix, but after listening to it a few times, the band and I agreed that the combined effect of all this processing had led to a drum sound that was (in Ben's words) too 'garagey', so we decided to give samples a try. I used TL Labs' TL Drum Rehab to generate additional kick and snare tracks. Blending these tracks into the mix gave more consistent results. I undid the existing dynamics processing on the overheads and substituted a full-range compressor (URS's 1970 Compressor) with a fairly fast attack to smooth them out a little. I kept the original kick and snare in the mix, too, and sent varying amounts of both snare tracks and the overheads to a plate reverb patch in Nomad Factory's Blueverb DRV2080, in order to try to glue them together a little.
The new drum mix sounded more solid, but the machine-like quality of the replacement snare was showing through in some of the fills, so the final touch was to use level automation to boost the overheads and duck the replacement snare a little at those points. There was also a percussion track, in the shape of some handclaps, which I shaped a little with EQ and drowned in reverb, because I felt like it.
Bass
Sorting out the bass guitar was by far the easiest step in this particular mix. It had been tidily and evenly played using a plectrum, and the obvious thing to do was to warm up the cold DI'd sound using an amp simulator. I loaded up a basic Ampeg emulation in NI's Guitar Rig 2, and used the tone controls to add a gentle boost around 400Hz, since there was clearly going to be plenty of space in that area of the mix. I was happy with that sound and immediately bounced it to disk to clear Guitar Rig 's hefty CPU overhead.
Guitars
When I first listened to the mix, I had expected the drums to be the biggest challenge, but I ended up spending a lot of time on the guitars. There were six separate guitar parts, and although two different amplifiers (a Fender Twin and a Laney LC30) and two different mics (the SM57 and the CAD) had been used in recording, in each case the guitar sound had a serious presence peak somewhere in the 1.5 to 2.5 kHz region, and relatively little substance lower down in the mid-range. This caused obvious difficulties. First, it meant that the guitar tracks were fighting with other important elements of the mix, such as the snare and the vocals. Second, it meant that they were fighting with each other, so that it became very hard to distinguish the individual guitar parts. And third, it was the main cause of the overall frequency imbalance that was apparent in the original mix, whereby there was too much energy in the high-mids and not enough in the low-mids.
 Some fairly extensive level automation was needed to even out the processed guitars. The second 'stabbing' guitar was also edited so that it only plays in the choruses.Of the six guitar parts, two were separate single-note leads that took up the slack where there were no vocals, and the other four were rhythm parts. One of these was aptly described as a 'stabbing' part on Ben's track sheet. This was complemented by a second part using a similar sound, which doubled the first in places, differed from it in other places and didn't play in yet other places. The other two parts were jangly rhythm tracks which, again, doubled each other for much of the song, but not all of it, and used similar but not identical sounds. One of these rhythm tracks was clipping on peaks in fairly unpleasant fashion, but fortunately the rest of the guitars were cleanly recorded.
I decided that fairly drastic action would be needed to counteract the build-up of treble and separate the guitar parts out so they were all clearly audible, and the first step was simply to edit out a lot of the double-tracked sections. Double-tracking can work very well when you're using two different guitar sounds to fill out the mix, but that wasn't really happening in this case, since the double-tracked guitars were using very similar sounds. I felt the mix would be more manageable, with less treble overload, if the number of guitars playing at any one time could be cut down where possible. For the verses, I ended up using just one of the 'stabbing' guitars and the non-clipped rhythm track, panned hard right and left respectively. I kept the second 'stabbing' guitar and the rhythm guitar in various other sections, the first because it was playing a different part at those points, and the second because, despite the clipping, it helped to kick up the overall energy level in the chorus.
The next step was to work on the guitar sounds themselves. The energy in the 'stabbing' sound was largely concentrated between 1.5kHz and 3kHz, while the rhythm guitar parts combined a lot of near-bass at 100-200 Hz with a similar amount of treble, though perhaps sitting a little further up the spectrum. As is so often the case, the low-frequency component of this sound just muddied the mix, without any obvious benefit, so I used a high-pass filter to get rid of it (as, I suspect, had Ben on his original mix). This left me with two very trebly guitar parts and a low-mid hole in the mix.
The obvious way of dealing with the problem was to use EQ to make a swingeing cut at around 2kHz, combined with a boost lower down the spectrum, but I didn't really like the results I got from EQ alone, so I reached for the harder stuff, in the shape of multi-band compression and band-pass filtering. I felt that at least one of the guitars needed to be remodelled in such a way as to eradicate the trebly presence peak and fill a hole lower down, and the 'stabbing' guitar seemed the obvious candidate. I began by using a combination of Digi's EQ III and Waves' C4 to make a serious cut between 1kHz and 3kHz, with compression and gain boost bringing up the region below this, but I couldn't find a happy medium between fizzy, over-bright and just plain dull-sounding, so I decided to try something else.
 The backing vocals were edited to bring their timing into line with the lead.I don't quite know why, but I've always found Fabfilter's Volcano filter plug-in particularly effective for changing the timbre of distorted electric guitar sounds, and so it proved in this case. Volcano has two filters, which can be used in series or in parallel, and after a fair amount of trial and error, I ended up using them in parallel, set to band-pass mode, with different but overlapping centre frequencies (I would tell you what those frequencies were, but Volcano doesn't report its settings in useful values such as Hz). It was a situation where tiny adjustments would make major changes to the character of the part, but eventually, with the EQ and multi-band compressor still active, I hit on something that seemed to work. It wasn't a 'natural' guitar sound, in the sense that the band-limiting made it sound as though the guitar had been played through a static wah pedal or something, but it was suitably chunky and substantial, rather than buzzsaw-esque.
I tried the same sort of processing on the second 'stabbing' part, which now only appeared in the chorus and at a rather lower level in the mix, but decided that I was happy here with the fizzier sound that came from just using EQ and multi-band compression.
The rhythm track, by contrast, was a much more 'jangly' part, and wouldn't have suited such obvious band-limiting. Again, though, it did require more tone-shaping than I could easily achieve with EQ alone, and I ended up using a combination of EQ and multi-band compression to thicken the low-mids, drastically reduce the 1.5kHz region, and create a small boost higher up the spectrum around 3kHz, where the jangle could cut through with less competition from other parts.
For the second rhythm track, which I'd pruned back so that it appeared only in the choruses, I used an EQ boost even higher up the spectrum, centred around 5kHz. This made the part sound a bit odd in isolation, but meant that all four of the 'stabbing' and rhythm guitar parts now occupied their own territory within the mix. The main 'stabbing' part filled out the low-mids, the rhythm parts offered high-mid jangle, and all of them still contributed more than enough in the 1.5-2.5 kHz region. Pruning back the doubled sections and using rather less reverb/delay than in Ben's original mix also helped to create some separation in the mix.
Making tonal changes like this can mean that the apparent level of the resulting guitar parts varies a lot, and I found it necessary to use some detailed automation moves to iron this variation out. I also routed both 'stabbing' and rhythm guitars to a stereo bus, where I could use another Renaissance Compressor to dip them slightly every time the kick and snare hit. This helped give the drums more impact. I routed a small amount of the lead vocal to this compressor's key input in some sections of the song, too, to create a little more space for it.
Remix Reactions
 Ben Henricksen: "The bass is much more solid. I have bought a Sansamp bass driver to get the same sort of sounds for the bass guitar in future. The guitars sound much tighter and punchier, and are better for a bit of editing, cutting out layers which get cluttered. Giving them different frequency bands to work in helps too. Overall the mix is punchier and more lively, with space in it. I think I will have to move to mixing the tracks in a DAW to be able to get the same level of finesse in level automation, editing and applying compression. I still like the AW16G for ease of tracking and portability, though. Going through this process has helped to point out where my mixes could be improved and gives me plenty to think about for the next recording."
Lead Guitars
Ben had recorded two lead guitar parts. One was a simple muted line alternating between two notes, the other a slightly more expansive affair that was treated with heavy delay in his original mix. Once again, a steep presence boost in the mids was apparent in both cases, and it was hard to separate the two from one another, or from the mix as a whole. As with the rhythm guitars, the challenge was to fit them into a place of their own in the mix.
 Effect sends from the lead and backing vocals were automated to avoid sending sibilants to the reverb or delay.It was clear from Ben's comments that he felt the delayed guitar was the more important, and he wanted to retain the delay as part of the sound. That was easily achieved using the basic Pro Tools Medium Delay plug-in; shaping the tone so that it stood out more was less easy. I ended up using another instance of Volcano to focus the sound fairly high up the spectrum, while taming the really fizzy top end. For the intro, where the part fades in, I also added some reverse reverb, to try to make the build-up more atmospheric.
I liked the muted guitar part and didn't want it to disappear in the mix, but felt as though I was running out of places to put it. In the end I hit on the idea of pitch-shifting it up an octave rather than using EQ to sculpt the sound. Doubling the pitch-shifted part with the original seemed to give it the edge it needed without making it overly fizzy or harsh.
Vocals
Soloing the vocal tracks revealed that the basic vocal sound was good. The lead and backing vocals had been tracked using a CAD M9 mic into a Mindprint En-Voice preamp, in a bedroom heavily damped with mattresses to create a dead space. The lead vocal was an excellent performance, which I felt deserved more prominence than it had had in the original mix. The four tracks of backing vocals — shared between Clara and Rachel — were cleanly recorded and in tune but, as I'd suspected, weren't always in time with each other and the lead vocal. The first step, then, was to edit each of the backing vocal parts, with a particular ear to making sure that any loud consonants fell in exactly the right places. Where they were particularly loud, I ended up cutting some of them out altogether.
The basic sound of the lead vocal was fairly light and breathy, and my initial idea was to thicken it up a little with an EQ boost around 700Hz. However, the band preferred the bright vocal sound from their own mix, so I switched to a more conventional EQ curve, combining a high-pass filter at 100Hz with peak and shelving boosts from 5kHz upwards, and decided to try to make it sound more substantial by adding reverb and delay. I ended up using two reverbs: a tiny amount of the stereo plate that was already in place for the drums, and lots of a second, short reverb, which just consisted of early reflections generated in Waves' Trueverb. This sort of reverb acts more like a loudness enhancer than a room simulator, and I used it on several of the other elements of the mix, too.
 Waves' Trans X Multi made a surprisingly effective de-esser.Given that the mix was quite busy, though, I felt that a delay was a better option than a reverb as a main effect for the lead vocal. There was a fairly large gap between each vocal line, so I cranked up the feedback a little and set up a compressor, keyed from the lead vocal, to create a 'ducking delay' that would stay out of the way until the end of each line was reached.
Clara's vocal performance was very controlled, and required relatively little in the way of compression or level automation, but adding the high-end boost and effects began to make sibilance a real problem. As is often the case, de-esser plug-ins were of limited use, so I resorted to using automation to manually duck the levels of all the sends whenever a suspect consonant came along. This might sound like a pain, but it doesn't take very long, and once you've done it for one send, you can paste the automation to all the others.
Automation dealt with the distracting effects of hearing sibilance in the delay and reverb signals, which was the most obvious problem, but there was still an issue with sibilance in the vocal itself. The offending noise was high up in the spectrum — mostly above 10kHz — and more obvious on 'F' sounds than on 'S's or 'T's. Again, putting a de-esser across the lead vocal track didn't make much difference. One way of dealing with this sort of problem is to cut out the problem sounds and apply off-line EQ, but that's pretty tedious, and it occurred to me that Waves' multi-band transient processor, Trans X Multi, might be able to do something. It turned out to make a very effective de-esser for this purpose: I bypassed the bottom three bands, and set the top band to reduce the level of transients above 8kHz or so. It was then a question of increasing the Duration setting to the right level. A longer duration made the de-essing more effective, but introduced more side-effects on other sounds; 60ms or so seemed to be a happy medium. Emboldened by this success, I used the same plug-in on an even more extreme setting to kill high-frequency transients in the backing vocals, which made them sound smoother.
Mix Bus
I tend to prefer limiting to compression when it comes to processing the mix bus, but having gone to some lengths to create a solid and powerful backbeat in this mix, I couldn't resist trying to add a little more bounce using Digidesign's Smack!. I used fairly conservative settings to achieve around 3dB gain reduction at most, which seemed to help glue things together and make the mix as a whole slightly more punchy. I then used Waves' L2 Ultramaximiser to bring the whole thing up to the level of a typical commercial recording. I initially did this rather casually when generating a rough mix for the band to listen to. Later, I decided that I'd probably gone a bit too far, but by then it was too late, and I felt as though I was stuck with that amount of limiting.
Lessons Learned
I think the problems Ben had mixing this track in the first place reflect the importance of thinking about the bigger picture when choosing sounds at the recording stage. All his guitar sounds were great in isolation, but rather than dovetailing to make a balanced mix, they all piled up energy in the same part of the frequency spectrum. From my point of view, working on Wild Hope's music showed how important it is to communicate with the artist. I felt that their original mix was too bright; they, in turn, felt that the initial mixes I was sending them were too dark, and I had to do several different versions before getting to a result that we were all happy with. In fact, my final mix is almost as bright as the original, and the most obvious differences now are probably the most basic: ultimately, improving the bass sound, cleaning up the arrangement and cutting down the amount of reverb brought more benefit than any fancy processing.