
Your DAW makes it easy to fake old-school doubling techniques, and gives you much more control than producers had in days gone by.
Ever since the dawn of pop music, producers have worked hard to make vocals and instruments sound 'larger than life'. Over the years, various tactics have been used to this end: equalisation, compression, distortion, enhancers, delays and reverbs all being familiar examples. But one of the most fundamental means of adding heft to a sound is through doubling or layering — and in this article, we'll take you through several easy and effective techniques you can try in your DAW.
The Wall Of Sound
We'll start at the beginning, or thereabouts. Phil Spector's famous Wall Of Sound sparked a revolution in 'thickening' techniques based around the literal doubling of instruments. In Spector's productions, the same part would be played more than once, or by more than one instrument. He used his musicians like an orchestra, with large ensembles of guitars, pianos, basses, horns, vocals and more combining to create a thick, dense sonic texture. To replicate his approach accurately, you'd need access to huge studio spaces and an unlimited supply of top-notch session players. You'd probably also have to be mildly insane!
But if the general sonic texture appeals to you, you could attempt to fake it in a more affordable way in the box, by layering multiple virtual instrument parts. Don't just use the same MIDI part to trigger each one, though, and don't use the same sampled piano for each part — ideally, you'd play each part in with a different instrument, and be careful to avoid over-quantising them, since the minute discrepancies in tone and timing are important. You'd then treat the audio output of each instrument with some analogue processor emulations and a reverb that emulates or recreates a large studio space, such as UA's Ocean Way Studios or IK's Sunset Sound Studio Reverb.
Would you want to go to those lengths, though? While there's still something slightly magical and appealing about the thick textures of the Spector sound, it has its downsides. It can make sounds seem diffuse in the stereo field, for instance, and the more instruments you layer, the more blurred note onsets seem to become. Thankfully, then, Spector's tactic gave rise to a whole load of other over-dubbing and processing techniques that, with a little ingenuity and technology, were not only a little more wallet-friendly, but arguably also more effective.
Double-tracking Basics
The most basic of the overdubbing techniques is old-school double–tracking. Essentially, this boils down to singing or playing the same part more than once, and recording each take onto a different track in your DAW so they play back together. As with the Wall Of Sound, the minute pitch and timing differences result in a thicker sonic texture, but you can be a little more selective about which parts you apply the technique to. Most commonly, but not exclusively, it's used to thicken vocals and both acoustic and electric guitars.
The traditional, and the simplest, approach is just to perform the part twice, but in some genres it's common to lay down more doubles. That might involve three parts — one in the middle, one panned left and one right — to create a widening effect as well as a thickening one. Or it might be quad-tracked multiple distorted guitar parts, which some genres practically demand. Still, as with the Wall Of Sound, you need to be aware that if you keep on stacking things, you'll soon reach a point where it doesn't help and can even weaken the sound, with note onsets in particular becoming less well defined. So if you find yourself using more than one or two doubles, be sure to ask yourself why. Listen carefully and be sure it's achieving the intended effect.
When done well, double-tracking isn't always obvious to the listener — the sound is just somehow bigger. Apparently, a key aspect of ZZ Top's studio sound is that many of Mr Gibbons' guitar parts are double-tracked to create a larger-than-life sound. Such 'stealth' double-tracking only works if your phrasing is really consistent — but as I said earlier, duplicating a single take won't work. Even the most consistent performer will introduce slight pitching and timing differences between the two takes, and that's what creates the appealing effect. That said, if you find yourself with a single recorded take to work with, and you want a similar thickening effect, there are ways and means...
Thick As Thieves
Before you look to sophisticated processing and effects, consider whether you might be able to 'steal' a suitable duplicate from elsewhere in the song. Assuming you work by recording a whole pass of the song (rather than piecing together the arrangement by copying and tweaking identical sections), you can often create the double-tracked effect in this way. For example, you might copy the lead vocal from the first chorus and use it to double that in the second chorus, and vice versa.
The more consistent the singer, the easier this is to do, but even where there are distracting timing variations, it can work — simply use your DAW's editing or warping tools to bring things into closer alignment. Some DAWs offer quicker ways to do this than others (and dedicated auto-alignment tools such as VocAlign and Revoice Pro can be useful if you plan on doing this a lot), but it's not usually too much work to tighten things up sufficiently for this effect by splitting the second vocal into words or phrases, and then moving each clip to line up with the original part.
Pay attention to words that linger too long or not long enough. For shorter words, you may have to resort to time-stretching, but longer ones can often be made to work with a simple fade-out. Similarly, for words that end in pronounced T (or other unpitched, fricative) sounds, if you can't get the Ts exactly in line, you can try fading the end of the copied word. This was a popular technique in the days of tape and it still works well.
One aspect of this type of double-tracking that's often overlooked is that it's just as important to align breaths as it is the sung lyrics. If you take breaths out altogether, the vocal loses some intimacy. Stacking breaths usually creates a very positive effect, but again the timing needs to be right. For guitar parts it's a similar story with finger squeaks and other fret noises — pay attention to the whole sound, not just the pitched stuff.
Natural isn't always what you want; often, you just want to achieve a thicker sound in a musically pleasing way.
Fake That
 Waves Reel ADT and Sonnox VoxDoubler: two ready-made real-time doubling effects that can mimic the old-school ADT effect pretty convincingly.
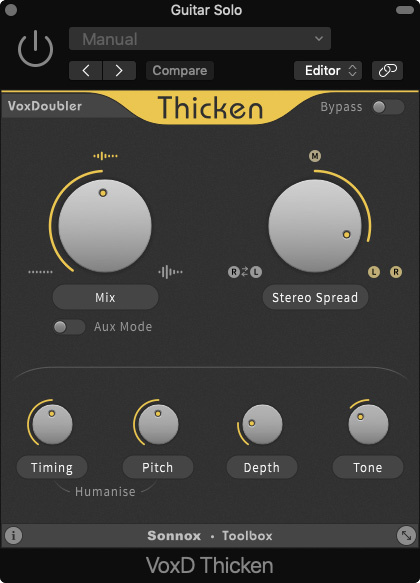 But what if 'real' double tracks aren't an option at all? Well, there are various ways to fake it. Some sound more natural than others, but natural isn't always what you want — often, you just want to achieve a thicker sound in a musically pleasing way.
The traditional option is known as 'artificial double tracking', or simply 'ADT'. This was essentially an extension of the simpler 'slapback delay' effect heard on countless Elvis and rockabilly records, whereby a delayed version of a vocal was added to the original. The shorter the distance between the tape machine's record and playback heads and the higher the tape speed, the shorter the delay time was, and the more it began to resemble a double-track. Unless the machine suffered from excessive wow and flutter, though, it didn't emulate the natural pitch variations between tracks.
The engineers at Abbey Road created the more familiar ADT effect (favoured by John Lennon in particular, and heard on many Beatles records) by making manual varispeed adjustments to short tape delays. The speed changes resulted in the small pitch and time variations that made this effect sound much fuller and richer. And by hooking up two tape machines so that the relative delay between the two could be adjusted down to zero or even be reversed, tape phasing or flanging was produced, with more extreme speed variations creating a more trippy ADT effect.
As the name implies, Waves' Reel ADT plug‑in recreates this effect, and it does it well; it's well worth exploring if you're after that specific sound. Sonnox's VoxDoubler is also capable of this effect, as well as subtler ones, and there are no doubt other dedicated plug‑in options. But if you don't already have such a plug‑in, don't despair — there are also several ways to create a realistic ADT sound using plug‑ins you already have.
Pitching Ideas
 A simple stereo doubler effect in Logic Pro. One part, panned left, is pitch-shifted up a tiny amount. The other is panned right and pitch-shifted down by the same amount. This thickens the sound but the average pitch remains about right. Note that the two plug-ins have slightly different delay times.An old faithful trick is to duplicate the track and feed each version into its own pitch-shifter plug‑in. Set one a few cents sharp, the other the same amount flat (between two and six cents usually does the trick) and you'll notice that sound gets much richer. Add a delay of between 20 and 40 milliseconds (using either a plug‑in or the track delay feature) to one of the tracks and the effect becomes even more convincing. Pan the two parts slightly if you want a wider sound. You can take this a step further by leaving the unprocessed original in the centre, and performing this pitch up/down process on two duplicates, and then opposition-panning the duplicates and delaying each one a touch. This trick was originally performed using Eventide Harmonizers and AMS delays, and dedicated doubling plug‑ins such as SoundToys' Microshift are available, but you can use your DAW's basic pitch-shifter.
In my DAW, Logic Pro X, plug‑ins can be installed in a dual-mono configuration so I don't need to copy the track — I just set the left side of the plug‑in differently from the right side, and as Logic's pitch plug‑in includes a delay slider I can also delay one side without needing a separate plug‑in. Regardless of how you achieve the effect, the principle is the same: you introduce a pitch difference between the original and copied sound(s), and separate them with just enough delay to make things sound reasonably natural.
 A more sophisticated version of the same sort of DIY doubler. Again, the duplicate signal is delayed a touch, but this time pitch-correction is applied, to add subtle variation to the differences in pitch. Many pitch-correctors allow you to apply a few cents' offset too.
A slightly enhanced version of this effect, which can work well as long as the part you're doubling is monophonic, not pre-treated with effects and is not suffering from excessive spill, uses a pitch-correction plug‑in. Again, start by copying the original track and adding a short delay to the copy or copies. Then insert a pitch-corrector on the delayed track(s) and adjust the correction speed until the effect sounds strong enough; obviously there's some artistic leeway here, but your ears will tell you when it's working well. If using two duplicates, you'll want to apply a pitch offset as in the simpler version of the effect, but most pitch-correctors allow this, so you can usually do it all in the one plug‑in.
The advantage of this method is that the pitch difference between the parts is always varying, as the pitch-corrector plays catch-up with the original. Be sure to evaluate the result with the whole mix playing, though; what sounds excessive in isolation can easily be lost in context. You may also find that you can get away with more assertive fake ADT on backing vocals than you can on a lead part. In most cases, you can leave the pitch–corrector set to the default chromatic mode, though if you know which notes are used in the song, setting a scale to include only those notes can help.
 If you have an offline pitch-correction tool such as Melodyne or Revoice Pro, you can generate fake doubles. One benefit, as with real double-tracking, is that you can then use your DAW's editing tools to refine the result.
 This technique works brilliantly on electric guitar, but you can ramp up the difference between the original and the 'double' by feeding the copied track through an amp and/or cab model, changing the sound of the copied guitar part, as well as the pitch and timing. You may also be able to get away with a slightly longer delay time than with vocals, effectively creating a big stadium-rock kind of sound. Whatever other effects you'd normally use on the guitar track can be applied to the copied track too, but try adjusting the parameters slightly, so that any delay or modulation effects don't run at exactly the same rate on both tracks, and perhaps choose different reverb types.
A more subtle variation on this theme is to use fairly aggressive pitch-correction on a send feeding into a reverb that's set up to produce strong early reflections. Pitch-correcting only what goes into the reverb processor means the vocal stays sounding natural, but the process lends an enhanced sense of depth and texture to the end result.
Variety Show
Insert plug‑ins aren't the only way to achieve this effect. If you have an offline pitch/time-correction tool such as Melodyne or Revoice Pro, you can throw some timing variations into the mix. These programs, along with built-in DAW tools such as Cubase's VariAudio, allow you to generate copies of an audio file with randomised deviations in pitch and timing. If you're after a natural-sounding fake double-track, this can be more effective than inline pitch-correctors. But the most natural-sounding thickening still comes from recording real doubles, and as I said earlier, 'natural' isn't always going to be the most musically pleasing option.