With your lead vocal performance comped and tuned, and its timing tightened, is there anything else to do before you start mixing?
Over the past couple of months, I’ve written about comping vocal performances from multiple takes and correcting any tuning/timing issues they might have. And, up until about decade ago, that was pretty much all there was to the mix‑preparation process, as far as vocals were concerned. In recent years, however, facilities for manipulating individual audio regions/clips within your DAW have continually improved, and professional vocal producers now routinely use the hell out of those functions to refine lead‑vocal sonics and lyric intelligibility. In this article I’m going to explore some of these techniques, and how you might get the best out of them.
A Fader For Everything
The first vital tool is the humble ‘clip gain’ setting, which lets you apply a simple level offset to any audio region, and it’s advisable to use this to even out big level disparities between words/phrases before you apply any general mixdown compression.
But isn’t compression supposed to sort this kind of stuff out anyway? Well, yes, but compressors often won’t actually do what’s most musically appropriate. For example, if your singer accidentally moved closer to the mic for one phrase, then the compressor will just see more signal level and will compress more aggressively, potentially giving that phrase a different sound flavour or emotional character. By using clip gain to turn down the overloud phrase instead, before it hits the compressor, the compression and vocal sound remain more consistent. Similarly, if you’ve set up your compressor with a slow release time in search of a fairly natural sound, but then the singer suddenly hits one particularly loud note, the compressor may trigger heavy gain reduction that lingers too long, making subsequent notes too quiet. Again, a simple clip‑gain move neatly side‑steps this problem.
 Here you can see two versions of the same vocal performance. The wide dynamic range of the upper track will likely make it difficult to find a musical‑sounding compression setting at mixdown, which is why applying clip‑gain adjustments to some regions (highlighted) makes a lot of sense at the editing stage.
You might also want to use clip gain for more detailed rebalancing within vocal phrases. So where you’re planning on creating a heavily compressed vocal sound, say, it can make sense to fade down the breaths and sibilants with clip gain, knowing that these will invariably be overemphasised by most compressor designs otherwise. Plus some elements of a vocal recording are inherently more difficult to bring out in a busy mix than others, so I regularly use clip‑gain adjustments to improve the intelligibility of low‑energy consonants such as ‘h’, ‘l’, ‘m’, ‘n’, ‘ng’, and ‘v’. That said, sometimes singers will swallow a consonant so badly that there’s actually nothing there to boost! In those cases, I’ll often search for a replacement consonant from an alternate vocal take if possible, and occasionally a consonant from elsewhere in the timeline will also work, although your success there will depend heavily on the specific adjacent vowels in each instance.
Equaliser Sharpshooting
Although clip‑gain settings are already tremendously useful on their own, the real power of region‑specific adjustment lies in the ability to apply EQ to individual audio snippets. For instance, if your singer has ‘popped’ the mic, resulting in strong low‑frequency wind‑blast pulses on plosive consonants such as ‘p’ and ‘b’, the best way to sort this out is by high‑pass filtering just the offending moments. Admittedly, you might be able to get similar plosive reduction by just high‑pass filtering the whole vocal channel, but that runs the risk of thinning out other sections of the performance too, unlike the more precisely targeted region‑specific strategy. Furthermore, it’s easy to apply different high‑pass filter settings to different plosives if some of them are more severe than others (as is often the case) — or even to deal with other sporadic low‑frequency problems such as the thumps of accidental mic‑stand collisions or a musician absentmindedly tapping their foot on the stand base.
A similar tactical approach can also elegantly address over‑prominent breaths or noise consonants (such as ‘k’, ‘ch’, ‘s’, ‘sh’, and ‘t’ sounds), because you can tailor the EQ processing to respond to each moment’s unique demands. For example, many studio condenser mics have a strong brightness peak in the 10‑12 kHz zone that doesn’t subjectively enhance vowel sounds nearly as much as it does noise consonants, so it’s easy to end up with an apparently paradoxical mix scenario in which the singer simultaneously seems to lack ‘air’ (because the vowels need more high end) and sound abrasive (because the noise consonants are over‑hyped). Applying simple 12dB/octave low‑pass filtering to just the abrasive consonants can sort this out instantly, although you may want to tweak the filter’s cutoff frequency on a per‑case basis too — after all, a sharp ‘t’ sound may feel a lot more abrasive than a mellow ‘sh’. On occasion, I may use more elaborate EQ settings too but, to be honest, most of the time that’s just chasing diminishing returns and a quicker alternative fix might be to copy a better‑sounding consonant from another vocal take.
Granted, you could use a mixdown de‑esser to handle some of these tasks in a more set‑and‑forget manner, but even if that plug‑in manages the sibilance flawlessly, it’ll still struggle to tame strong ‘k’ or ‘t’ sounds as effectively, and it may also end up killing some of the vocal’s delicate ‘air’ frequencies into the bargain. Moreover, even the best software de‑essers rarely work equally well on every instance of sibilance in a given performance, whereas region‑based EQ can be made to measure. What I’ll often do with a particularly thorny sibilant, in fact, is loop it while I set up the EQ. It’s not a pleasant listening experience, as you can probably imagine, but it does make it much easier to home in surgically on the most unpalatable frequencies.
Inconsistent Vocal Timbre
When mixing vocals, it’s usually desirable to achieve tonal consistency throughout the performance. In other words, you’re trying to make every single syllable sound great, not just some of them. This might seem like an impossible task when faced with real‑world vocal recordings, but region‑specific EQ processing is the magic ingredient you need.
 If you’re trying to match the tone of vocal takes recorded on different sessions, the necessary equalisation curve can be quite difficult to work out by ear. Fortunately, there are plug‑ins such as Logic’s Match EQ, Melda’s MAutoEqualizer and Tokyo Dawn’s VOS Slick EQ GE that can analyse the frequency profiles of the different takes and calculate sensible EQ suggestions automatically.
Some tonal problems arise from recording technique. If the singer doesn’t maintain a constant distance from the mic, for instance, then the mic’s proximity effect may cause dramatic and unmusical fluctuations in the subjective warmth of different notes. I’ll usually use a low‑frequency EQ shelf to restore balance here, with the shelving frequency adapted to suit the nature of the voice and the register it’s singing in. Again, if you loop the syllable in question (another mildly unsettling listening experience) and examine its frequency content on a spectrum analyser, then you’ll see the note fundamentals pretty clearly, and setting the shelving frequency just above those will often be a good place to start.
At the other end of the spectrum, the amount of ‘air’ in the vocal tone can often be frustratingly variable, not only because open vowel sounds (‘ah’, ‘eh’, ‘ee’) naturally have less airiness than more closed ones (‘oo’, ‘aw’, ‘uh’) when captured close up, but also because high frequencies are very directional, so small movements by the singer can end up firing some of them far less strongly into the mic than others. A simple band of high‑shelving EQ around 10kHz can work wonders remedying this, though, boosting the upper spectrum for each ‘air’‑deficient region to even out the tone.
Of course, you may also encounter a performance which has been comped from two separate tracking sessions with different vocal sounds, and region‑based EQ can deal with that as well. However, such tonal differences can sometimes be quite complex, making it pretty challenging to arrive at a decent timbral match by ear. This is where a specialist ‘EQ ripper’ plug‑in such as Logic’s Match EQ, Melda’s MAutoEqualizer or Tokyo Dawn’s VOS Slick EQ GE can lend a hand, analysing audio from both sessions and calculating a multiband EQ curve to map the frequency profile of one onto the other. A word of caution here, though: sometimes these algorithms come up with overly extreme settings, especially at the frequency extremes, so be prepared to take their suggestions with a large pinch of salt. I’ll usually take the precaution of at least bypassing each of the suggested bands to double‑check by ear that it’s actually doing something sensible.
Battling Nature
Other tonal inconsistencies derive from the basic mechanics of the voice itself. When a male singer switches from chest voice into falsetto, for example, the tone will usually change radically, trading midrange focus for a combination of pillowy low end and extra breathy highs. However valid this may be from an expressive standpoint, it can nonetheless present a mix‑translation problem. You see, the midrange carries better over small speakers, so it’s easy to end up in a situation where falsetto notes that seem to be at the right level on a full‑range listening system become less easy to hear in the balance on mass‑market playback devices. Some judicious region EQ delivering 3‑6 dB of peaking boost at around 1‑2 kHz can really help square that circle.
Another common issue is where some vowel sounds on certain (often higher‑register) notes generate powerful individual harmonics in the vocal spectrum, giving the voice an unpleasantly whistling/piercing timbre at unpredictable moments. The solution to this is usually a narrow‑band region‑EQ notch or two, but you need to aim accurately in the frequency domain if they’re going to sufficiently tame the harshness. This is another time when it can make sense to loop small sections of the audio while watching a high‑resolution spectrum analyser, since the vertiginous spectral peaks you’re looking for should be clearly visible on that.
Editor’s Choice
If you use all of these editing tricks sensibly, you’ll discover that the mixdown process becomes a whole lot more straightforward, because you’ve pre‑balanced all of the vocal’s many sonic components better against each other. After all, it’s much easier to get musical and predictable results from your channel EQ and compression if you’re not having to use it for serious remedial work too.
I’ll offer you one final piece of advice, though: if you find that you have to split up the audio in order to apply clip gain or plug‑in processing to a specific region (you will need to in some DAWs), then remember when crossfading your split points to use equal‑gain crossfades rather than equal‑power ones — otherwise, you’ll get little gain ‘bumps’ at the crossfade points. The equal‑gain type is usually displayed graphically as a straight ‘x’ shape, whereas the equal‑power fades are usually shown as curved.
Dealing With Hiss
No recording chain captures audio perfectly, so every vocal recording inevitably contains some background hiss. With modern recording equipment, this is seldom worth worrying about for music applications, but if noise begins to feel intrusive then there are specialist tools you can use to reduce it at the editing stage. Plug‑ins such as Acon Digital DeNoise, iZotope RX Voice De‑noise and Sonnox DeNoiser are all capable of great results, although it definitely pays to dive into the settings with whatever option you go for, because small differences in configuration can have a significant impact on the sense of ‘air’ and breathiness of the processed vocal tone. In my experience, you’ll get best results if you use the software’s ‘learn’ mode to train the noise‑reduction algorithm on a section of isolated background noise, and it’s also better not to reduce the noise levels any more than absolutely necessary, because unwanted processing artefacts tend to accumulate the more you push things in this respect. I’d also suggest tackling noise reduction prior to your tuning or timing edits, because pitch/time‑manipulation engines usually operate better on cleaner (and therefore more mathematically predictable) audio signals.
Another thing to bear in mind with background noise is that, while you may not consciously notice it while it’s constantly in the background, it’ll become a lot more noticeable if it suddenly cuts in or out. So if you want to maintain the illusion that your vocal is one natural take without technical manipulation, then don’t reflexively cut out all the ‘silent’ parts of the vocal recording between phrases or song sections, because that’ll kill the hiss and draw attention. If there’s unwanted shuffling around or coughing from the singer during those gaps, then by all means patch things up with cleaner sections of hiss from elsewhere in the take, but if that’s not possible then at least try to mute the noise at a section boundary or on a strong musical beat, where the sudden textural change will be less obtrusive.
Mouth Clicks & Lip Noise
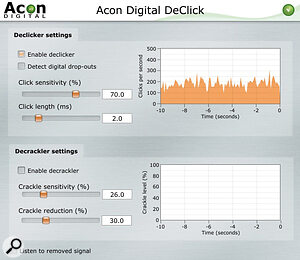
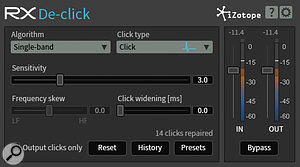
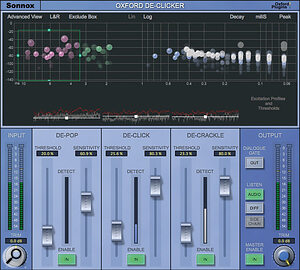
 While simple audio editing methods can deal with the majority of mouth clicks, occasionally you may need to bring in specialist click‑removal tools such as Acon Digital DeClick, iZotope De‑click and Sonnox DeClicker.

The physical mechanics of a singer’s lips, mouth, and tongue moving against each other while performing can naturally give rise to tiny little high‑frequency snicking sounds often referred to as ‘mouth clicks’ or ‘lip noise’. These are normally so low in level that they rarely cause a problem with full‑bodied vocal performances, but can become a massive pain in the arse if you’re close‑miking the kind of whisper‑quiet singing style that’s become so fashionable in the wake of Billie Eilish. Making sure your singer takes regular sips of water can help somewhat, but you’ll not fix the problem entirely without a good deal of careful editing besides.
Where the mouth clicks happen during gaps, breaths, or noisy consonants, it’s usually very straightforward to get rid of them. First, zoom right in on the waveform so you can see the click — it’ll usually be extremely short, roughly one or two milliseconds in length. Then snip either side of it, slide the audio within the snipped region to one side (so that the click is effectively replaced with a copy of the audio immediately before/after it), and then put miniscule crossfades at the two edit points. Sometimes you’ll get little bursts of two or three mouth clicks that seem to happen all at once, but once you zoom in you’ll still typically see a gap of several milliseconds between each one, so you can deal with them in exactly the same way.
Where mouth clicks get trickier to manage is in the middle of sung notes, often triggered by vowel‑consonant transitions involving ‘l’, ‘m’, ‘n’, and ‘ng’. Here, my simple little slice‑and‑slide method would cause audible lumps and bumps in the note’s sustain, so my first port of call is to find the waveform cycle the click appears in, slice at the zero‑crossing points on either side of it, and then drag the audio within that region to replace it with the waveform cycle before or after the click. If you use short equal‑power crossfades, this’ll give a totally transparent fix 90 percent of the time, but if it doesn’t work, another option is simply to render the click’s tone less distracting by isolating it into its own region and applying a low‑pass filter at around 2kHz.
Alternatively, if nothing else works, you can try specialist click‑removal software such as Acon Digital DeClick, iZotope De‑click or Sonnox DeClicker. As always, I’d recommend applying such plug‑ins only to the specific affected syllable, rather than as a blanket process, because by the time they’re working assertively enough to fix prominent mouth clicks, they’ll also merrily remove all sorts of other desirable transient detail too.
Additional Resources Online
To support this article, I’ve set up a special resources page on my website, where you’ll find audio and video demonstrations of the editing techniques discussed in this article, downloadable multitracks with unedited vocal takes (so you can practice your region‑based editing), and links to further reading.


