Even once you've got to grips with your camera and today's easy‑to‑use software editors, there's still the small matter of creating an edit that truly fits the song...

The edit is the part of the video creation process where the original vision starts to become a reality. It's also where you get the first chance to repair any production errors, and where you can tie the music and images together. Assuming all the footage has been captured as planned and there are plenty of takes and angles, it's the edit that can make or break a video.
Even if you've storyboarded your video quite tightly, it's often the case that new ideas will have appeared on‑set. Even if they haven't, the effectiveness of an edit can still alter dramatically with the shift of a few frames, so you'll probably need to make some tough decisions along the way. As with any process of refinement, what you choose to leave out is often just as important as what you keep in.
Editing is often talked about in technical terms. Although this is useful when you're learning the software, it doesn't help much with aesthetic decisions, so I'm going to present practical examples of how to improve a music video edit that should work regardless of what software or hardware you're using. I'll be referring to a recent music video project of my own, Jealous Don't You Know by The Heartbreaks (http://youtu.be/xgh-RSJh_Qw), sharing some of the editing tricks that were used in creating it, and using a few other videos as examples.
Pace Yourself
Before you start to hack away at your footage (or before you shoot, if you're doing that job too), take a look at a really effective music video and analyse the motion within the frame and the pace of cutting. Consider how these factors reflect the content and mood of the music. If you're doing this before you shoot, break the video down in your head or on paper, and think of how many takes and separate setups you'd need to create something similar.
Once you're at the edit stage, you probably won't be able to shoot any more footage (unless you're very lucky) so you'll have to use the available material to best reflect the pace and mood of the piece. Movement and pace can be created in an edit by both selective cutting between angles and different situations, and the use of 'keyframes'. Cutting in or out of sync with the beat can push the focus back and forth between the sound and image, respectively, while keyframing can be used to liven up still shots.
Keyframing is the video equivalent of automation. Creating a post‑production 'zoom', by scaling the clip, or post‑production pan and camera shake by scaling and moving its position, are very useful tricks when you're dealing with a lot of still shots.
Under The Influence
If I can direct you to YouTube for a moment, I'd like you to watch three different but equally effective promotional videos. I'll explain how I see movement and editing being used in different ways to maintain interest, pacing and empathy, in keeping with the track. All three of these videos were influences when shooting and editing my video for The Heartbreaks, though of course my result is quite different to each of them.
- Glasvegas 'Flowers And Football Tops'
One of my favourite promotional videos is for 'Flowers And Football Tops' by Glasvegas. It's wonderfully shot, the colour and lighting is very atmospheric, and there's good use of compositing (digitally combining multiple footage types and effects). One thing that you might not immediately notice is that even in this video, with its relatively slow and sombre editing pace, every single shot has some kind of motion. The camera is panning, tracking or moving in a handheld style, and always with roughly the same kind of speed.
When it's relatively still, the frame itself always contains movement or something of interest. The pace of movement suits the song, which keeps roughly the same energy throughout the arrangement, with a slight lift for the choruses. It's a very 'mature' edit, not too pacy but not overly lingering.
 I've set 'in' and 'out' points for a clip, using only the most interesting and eye‑catching parts for the edit. The genuine moment of expression captured here creates plenty of empathy, which, even if it's only on screen for a short time, serves to draw the viewer in.When editing a video, one technique often used to increase viewer interest is to take only the key part of a whole clip. If you need to select only one bar's‑worth of a 10-second pan, choose the parts with points of interest: lens flares or really nice expressions from one of the performers, for example. If you can do this with all of your clips, you'll end up with a kind of 'best‑of' edit, interesting from start to finish.
This is one of the reasons why it's good to work with as many takes as you can: the more times you shoot a performance, the more nice serendipitous moments you'll be able to choose from, come the edit. Great examples in this video occur from 1:22 to 1:25, where the good expressions from the band members will have been picked from a longer take.
If you're not working with tracking footage as we see here, but have used a 'locked off' shot (on a tripod), don't be afraid to use your NLE to scale up the video and pan a little, or zoom in by a few percent. You really can get away with quite a bit of software scaling before the softness shows. Keeping the interest of your viewer is far more important than a few pixels worth of sharpness.
- Mona 'Teenager'
'Teenager' by Mona is a bright rock video with a slick, cinematic, stateside feel (it's also another video full of quiffs, incidentally). Here, the pace of the editing and the amount of motion in the frame changes throughout the piece, reflecting the difference in energy between the verses and choruses. You can really feel the energy in the band's performance, and a lot of this is down to the pace of the edit.
This video is a really good example of how to use quick cutting to increase the level of visual energy for a bombastic chorus, as well as how to use multiple points of view to give a sense of space to the performance area. Editing effectively between near and far cuts needs to be quick in this kind of piece, but not too quick! Sticking to the beat for 4/4 pieces (with occasional two‑beat and two‑bar cuts to keep things from becoming monotonous) is a decent enough rule of thumb, unless a section is particularly frantic or you feel that interest is waning.Even in the verses, the pace is pretty fast and you're not really given too much time to analyse most of the shots, just enough to absorb an atmosphere.
Note how the viewer's point of view cuts in and out between wider shots and intimate close‑ups. It can really reduce the viewer's sense of involvement if their point of view is static, and this is something that often happens in amateur videos.
- Fever Ray 'Keep The Streets Empty'
If a song is very 'deep' or you're not using performance footage, you'll often have more freedom to hold still and let shots breathe, as you're not having to keep up with the energy of the track through cutting. Holding totally still on a shot forces the viewer to concentrate on and look around the image itself, rather than focus on the pace and energy of the edit. For this reason, it's especially effective with slower songs. One great example of this kind of video is the promo for Fever Ray's 'Keep The Streets Empty'.
This brooding black and white piece cuts, for the most part, slightly off from the start of the bars, with plenty of shots lasting about three and a half bars before cutting. Cutting out of sync with the main musical events tends to help the viewer to focus on the content of the shot itself, with a little less focus on the music. Conversely, this can also draw a viewer into the piece as a whole (especially when the song is atmospheric, which is what we see here). This piece is a good example of how a slower edit can lend itself to both narrative and pseudo‑narrative videos.
Organise Now, Relax Later
 Naming your clips and separating them into 'bins' is a very good idea, and saves a lot of time later on. Here you see just a few of the nearly 200 clips I shot on the production days.After all that inspiration, the temptation is to start dragging clips onto the timeline and emulating favourite videos. You'll quickly become tangled in your files, however, if they don't have descriptive names. There's an important but dull job you'll have to get out of the way before the fun can start!
Once you've copied everything to your footage drive, take the time to name the files in your NLE. If you or someone else on set has kept a good log of shots, you'll have an easier time, but if not, it's just a matter of scrubbing through each clip to get a feel of what it contains, and naming it accordingly.
Create a number of 'Bins' or folders for your footage. The phrase 'bin' is taken from days when metal bins of film reels were used for editing, but luckily digital bins take up a lot less space! Descriptive clip names are advisable, such as: "Band: STILL 2 (close)” denoting the second, still close‑up of the band, for example. It is laborious to tag everything but you'll thank yourself later, when you're not looking for "that take” in a heap of anonymous clips. Imagine when you have a day left for the edit and need "just one more nice shot of the solo”: it's much easier to do if the clip is named 'Band: SOLO 2 (good)' and not 'MOV_4578'. Without this kind of organisation, it becomes increasingly harder to transfer the edit from your mind's eye to the screen, especially as more and more cuts are made.
Many NLEs allow the use of sub-clips, or sections taken from individual clips. Use the preview monitor within your NLE to 'scrub' back and forth through footage and pick some of your favourite sections, and name the files accordingly. Most NLEs have two monitors: the left‑hand monitor for preview and trimming of clips, and the right‑hand monitor for showing the content of your main sequence. You can place these sub‑clips in a bin, or drop them onto the timeline itself for storage until you need them.
For Jealous, Don't You Know, I had recorded a total of 196 clips, ranging in length from a few seconds to around four minutes. Putting in the extra effort naming them all at the start was something I thanked myself for later, as the ideas began to flow.
Editing In Layers
As long as your NLE has access to multiple layers, you'll be able to use some classic methods for music video editing. After dropping the uncompressed audio file onto an audio track, you can pick one of your best performance shots, sync it up, and place it on the bottom video track as a 'bed'. Having a bed track to cut back to helps to get the edit flowing, even if you don't use much of this shot by the time you're finished.
For The Heartbreaks video, I selected a wide still shot of the whole song (always a useful backup shot to have) to act as a bed, and began by layering performance takes over the top, cutting out sections I liked and deleting the surrounding filler material. Obviously, the more takes you have, the longer this process will be, so allow sufficient time to run through most of your shots in real time. By the final edit, only 10 frames of this base track remained, but it certainly helped me reach my goal.
Once you're committed to a section, it's a good plan to put all the video clips on the same horizontal track, to save vertical space and confusion. When two clips are placed flush with one another, you can use the 'rolling edit' or equivalent tool to move the cut point between the two clips, independent of the rest of the edit. This becomes very useful as the edit progresses.
Although it's not something I often do, you can 'nest' sections when you think they're finished, by placing them in their own sequence, and bringing this back into your main edit. Just as easy, though, is to put all of these clips onto a single track and move it to the top or bottom, out of the way but maintaining easy editability.
Performance First
For the most part, the purpose of the promotional video is just that — to promote the band — so unless you're going for a purely narrative piece (most often produced for established acts whose image is already well known), you'll need to balance any narrative and atmospheric content with a performance during the edit. If your piece is for an instrumental, there may not be any shots of the composer or musicians, though even then that's a rare aesthetic choice.
With this piece, I'd shot plenty of footage of the band performing, from all kinds of angles and levels of zoom, with both still and moving shots. Since the band are the focus, I approached the edit by trying to cut together a piece that made them look good, first and foremost. The other content is a kind of 'garnish' for this: something that elevates the piece if it's done right. It shouldn't take away from the point of the promo: to promote the band. As usual, there are exceptions, but it's rare that you'd want to make your artist look bad!
After creating a satisfactory performance edit, reflecting the pace and mood of the song in your cuts and selections, and taking tips from videos by similar artists, you'll find that there are quite natural places for cutaway and narrative content to appear. Sometimes these are dictated by arrangement, but often by areas you want to patch over, due to lacking the right performance footage for the section.
Atmosphere
 throughout a solid performance (below) creates a video with a nice sense of direction — more so than keeping the footage types completely separate, or scattering them at random throughout.") Placing purposeful, atmospheric and cutaway shots (above) throughout a solid performance (below) creates a video with a nice sense of direction — more so than keeping the footage types completely separate, or scattering them at random throughout.
Placing purposeful, atmospheric and cutaway shots (above) throughout a solid performance (below) creates a video with a nice sense of direction — more so than keeping the footage types completely separate, or scattering them at random throughout.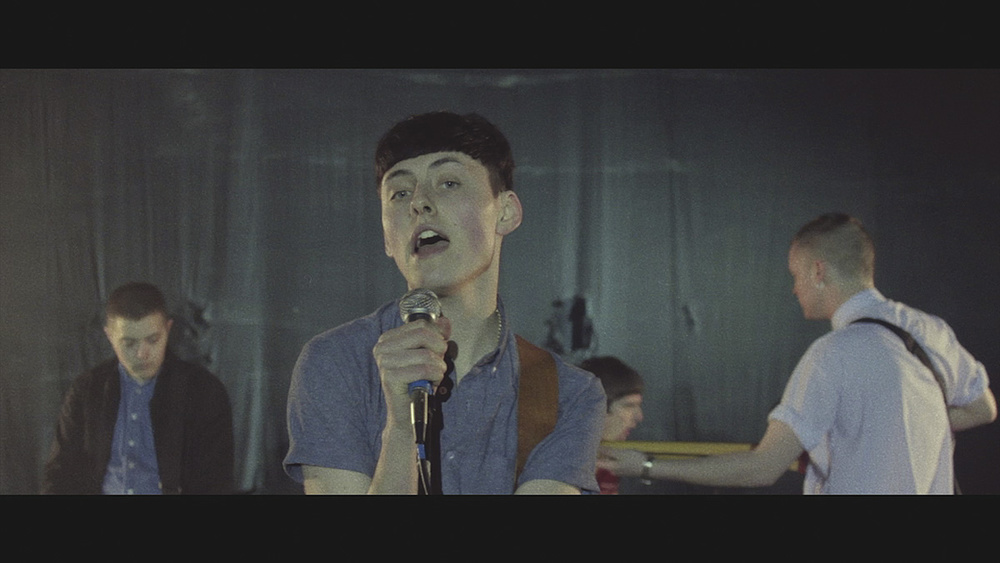 It usually works well to spread any narrative or atmospheric content selectively throughout the piece, so the narrative unfolds bit by bit, paced by the performance. This holds the viewer's attention, as they are watching both a 'story' and a solid performance.
That's not to say that creating distinctive sections doesn't work, but they should really reflect the musical arrangement. In Jealous, Don't You Know, there's a notable mood and style shift towards the end, with a lighter breakdown followed by some energetic, uplifiting power‑chords. Sticking with precisely the same kind of footage here would have failed to exemplify the lift in mood, so I saved all of my non‑performance footage of the band for the breakdown section onwards. It works because the footage itself is as much a change of scenery as the visuals are. Try to imagine a different edit, with these clips spread throughout the edit. The result would have less impact.
For the more active sections, I took some of the energy of the Mona video, cutting between near and far shots to establish the band in situation, while the video for the Glasvegas track was a big influence on both the breakdown section and the black‑and‑white dancing parts. Though the Fever Ray track was something of a far cry from The Heartbreaks, it still helped me to remember that holding a little longer on a shot than you think is necessary can be very effective, something I did for a few parts of the track.
Signing Off
![]() Here's the final edit of my video, flattened onto a single video track. Note the high frequency of cuts across a four-minute song. This probably wouldn't suit a slow ballad, but fits with a faster pop track. The 'black video' above is positioned to create 'cinemascope'-style black bars at the top and bottom.Even if you're working alone, there must come a point where you 'sign off' the edit and call it complete. Editing, more than any other discipline, seems to bring the desire to tinker obsessively out of all who attempt it, so setting a deadline is advisable. If you're working for someone else, this will probably be out of your hands. If you're working alone, resist the temptation to endlessly revisit the piece.
Here's the final edit of my video, flattened onto a single video track. Note the high frequency of cuts across a four-minute song. This probably wouldn't suit a slow ballad, but fits with a faster pop track. The 'black video' above is positioned to create 'cinemascope'-style black bars at the top and bottom.Even if you're working alone, there must come a point where you 'sign off' the edit and call it complete. Editing, more than any other discipline, seems to bring the desire to tinker obsessively out of all who attempt it, so setting a deadline is advisable. If you're working for someone else, this will probably be out of your hands. If you're working alone, resist the temptation to endlessly revisit the piece.
When you're happy or have hit your deadline, flatten the edit into a single track and save a new version. If you're only applying simple colour correction, you may want to do this in the NLE itself, but I'd still advise against making too many further edits: the temptation is too great to tweak. If you're applying any advanced post‑production, you'll be off to another piece of software anyway, so your hands will be tied!
Now is a good time to play your video alongside the videos you like and ask yourself honestly if it stands up. As with all creative disciplines, editing becomes easier with practice and constructive feedback. Watch and analyse plenty of videos, and keep the song and the band at the heart of your piece. Edit, and edit often — even with rough practice footage — and you'll be cutting great promos before you know it.
Organising The Timeline
Editors have different ways of arranging their clips so that they make sense. I've found that layering clips one above the other works well for me, though by the end of an edit you can end up with a very 'vertical' timeline!
I tend to use a video track for each type of clip (band, cutaway). The result is a rather vertical edit, but allows me to find any type of shot by the track it's in, much like when using an audio mixer. Much of the time, I prefer to drag the clips across into a single track once I'm happy with a section. Using your NLE's function to disable clips is a good idea if they are not 'visible' but are present on the timeline. This will save your computer from having to process video that can't even be seen!
Save & Save Again
It's standard practice for all creative software, but regular, incremental saving of video work is a must for a couple of reasons. Video editing tends to stress the computer more than audio work, and in my experience crashing is more likely.
Secondly, you may find that you need to revisit an earlier edit before a large change was made, or combine sections of different drafts at the band's request. For this reason, names with notes can be very helpful, such as 'The Heartbreaks — Jealous Don't You Know — 25 (before chorus swap)'. The note reminds me when I saved this edit. If the band like the original chorus, I'll be able to return to it quickly.
Transcoding
Although the technical aspects are a matter for a separate article, it can be sensible to transcode footage into another format before editing, especially if you computer isn't particularly powerful. This is because 'acquisition' formats used to record compress footage to camera memory cards take a lot of resources to play back.
Some NLEs like Adobe Premiere and Grass Valley Edius will happily edit footage without trascoding or constant re‑rendering, if your computer is powerful enough, while Final Cut Pro versions before Final Cut X, as well as Avid Media Composer, prefer to use their own editing formats.