With the increasing size of audio files and high‑quality sample libraries, a Macbook hard drive that seemed capacious just a couple of years ago may now be straining at the seams — but swapping it for a bigger one is easier than you might think.
The last time I thought I might try and upgrade the hard drive in a laptop was in 2003, when the 20GB drive in my iBook G3 (sporting a 600 MHz Power PC processor — feel the burn!) was under a little strain. At the time, an upgrade to 60GB seemed appropriate, and the 7200rpm model I chose would surely give me unheard‑of audio track counts for a laptop. Although I did succeed in installing the replacement drive, the complexity of the process, involving a credit card at one point to 'jemmy' open the case, left me in awe of the guys who work in Apple's repair shops (check out Sniper Twins feat. Rob Collier on YouTube, to find out what these guys really do — I must admit that this is the only time I have heard a shout‑out to Presonus in a rap lyric!). In all, I ended up taking over 30 photographs of the process, and combined with the fact that the promised track counts were never achieved, and that the cooling fan never switched off again, this meant that the article detailing the process that I'd proposed to Sound On Sound never happened! Until now…
Drive Time
My current laptop is a late 2006 2GHz Core Duo 2 Macbook with 2GB RAM and a stock 80GB Toshiba hard drive that runs at 5400rpm. When purchased, that size seemed generous, but recently I have had to rely on an external drive to support the increasing amounts of data required by modern music production. The 500GB Lacie D2 Quadra I initially purchased as a backup drive fast became an integral part of my previously portable system. For example, I had installed Logic's loops and samples library on the Lacie, as there was not enough room on the internal drive. This left me red‑faced at a Logic training event where I didn't have any content to demonstrate the program, having forgotten to take the external drive along. Enough was enough! I decided to attempt a drive transplant once again, with a new Seagate Momentus 7200 320GB model running at 7200rpm.
I'm happy to report that the installation procedure this time was pretty much painless, and the test results are very gratifying indeed. Installation took about 10 minutes (including initialisation of the disk) and the performance is stunning. I've provided step‑by‑step instructions below if you'd like to do the same, but one word of warning if you're thinking of following the procedure described: do check with your vendor as to whether your remaining warranty will be affected.
Step By Step
You'll need a suitable coin, a Phillips 00 screwdriver and a Torx T7 screwdriver. The process is applicable to all white and black Macbooks.
1. Back up all your data to an external drive, then shut down the computer.
2. Lie the Macbook upside down and unlock the battery with a suitable coin. 
3. Lift out the battery and place to one side. 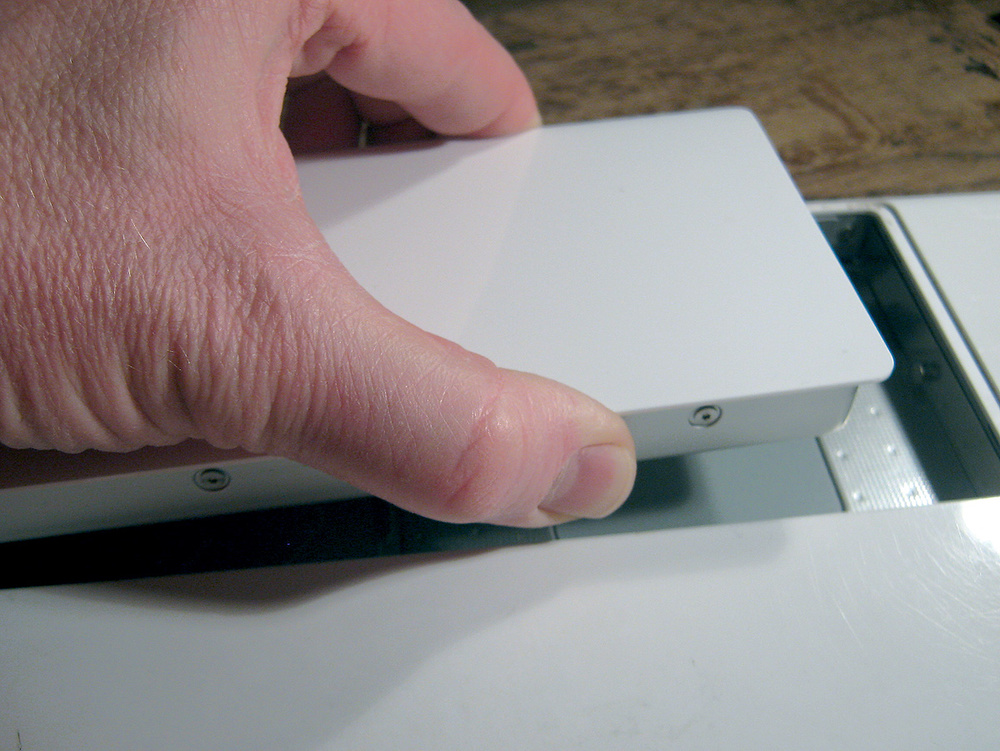
4. Using a suitable screwdriver, undo the three retaining screws that hold the metal strip around the edge of the battery compartment.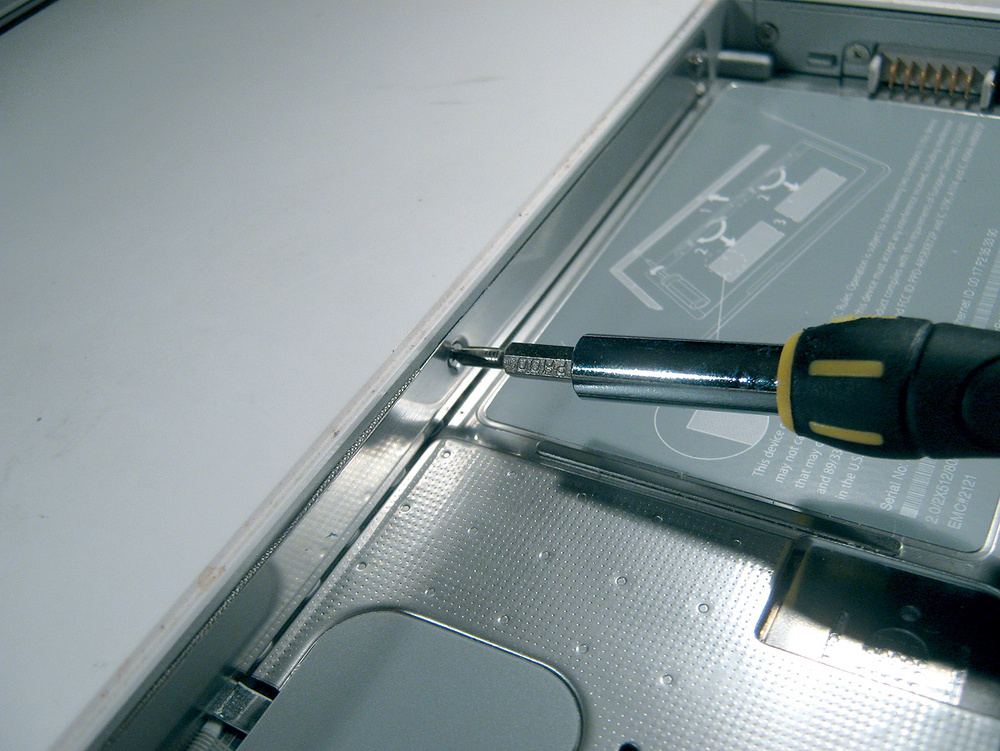
5. Carefully lift off the protective strip and place to one side.
6. Using a screwdriver (or a pencil will do), tease out the plastic flap that will be tucked in on itself. Note the two years worth of grime accumulated in the edge of the battery compartment!
7. Pull the white plastic flap to the right to remove the hard drive caddy. It should come away easily, as it only needs to 'unplug' from the MacBook chassis.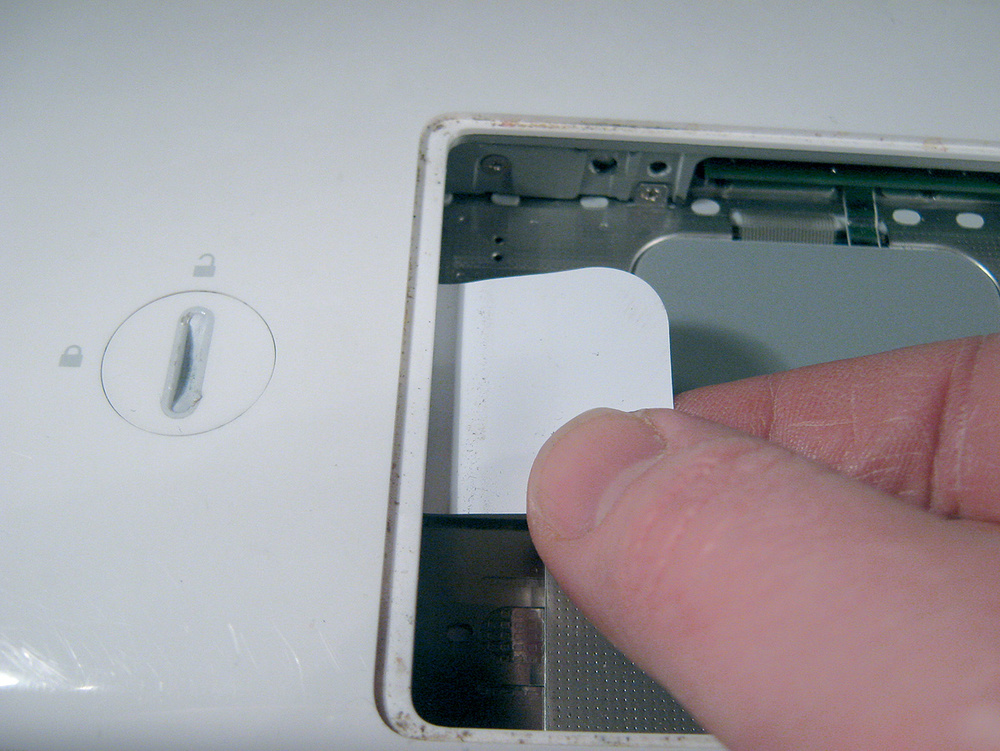
8. Undo the four screws that attach the drive to the caddy, and place to one side.
9. Reverse the process above, replacing the original drive with the new one.
When you boot from your external drive, Mac OS will report an unreadable disk and offer to initialise it for you. An alternative is to launch Disk Utility and initialise from there. This whole process took me around 10 minutes, with the appropriate tools. By far the most time‑consuming part (and the most important) was backing up my data before proceeding! There are several videos on YouTube to help you out with the upgrade procedure if you are unsure. It should be pointed out that the document on Apple's web site, while useful, misses out the part where you remove the drive from the caddy and replace it with the new one!
Test Case
With the new drive safely installed, I was able to do some tests to compare its performance with the previous drive.
All audio files tested were 24‑bit/96kHz, with sample rate in Logic Pro set to 96kHz. The audio interface was a MOTU 896 that uses the Firewire 400 protocol. The Core Audio driver preferences were set with the I/O buffer size at 512 samples, and the Process Buffer Range was left set to Medium (the default). For my 'small files' test, each track consisted of 16 audio files per beat, with the project tempo set to 120bpm. Each region was converted to a discrete audio file by using the 'Convert Regions to New Audio Files' command in the local Audio menu of the Arrange area, in Logic Pro.
Starting with a basic folder duplication test, the stock Toshiba drive took three minutes and 16 seconds to duplicate a 1.67 GB folder. The same task took the new Seagate drive less than half the time, at one minute 23 seconds. First round to Seagate!
Using QuickBench from Intech Software (available from www.speedtools.com), I obtained an average sequential read speed of just over 18 MB/s for the stock Toshiba drive. The replacement Seagate drive scored 43 MB/s for the same test. This is backed up by practical application. The Toshiba drive played back 43 tracks of 24‑bit/96kHz audio in Logic Pro, which is fairly impressive for a 2.5‑inch drive. The Seagate replacement, however, managed 109 tracks before giving up. Logic playing back 109 tracks of 24‑bit/96kHz audio, using the new Seagate Momentus drive in a Macbook.
For multiple short files, the result was a little disappointing, however, in that both drives came out equal, with 18 tracks. As noted in my article on Firewire hard drive speed tests (/sos/aug02/articles/firewire.asp), it is most likely that some other factor is the limit in this case, probably processor speed and bandwidth, as the Seagate trounces the Toshiba in QuickBench's 'Random Reads' test (13.4 MB/s as opposed to 6.7 MB/s)
Surely there must be a drawback. With that kind of track‑count power, the Seagate must drain the battery faster than a first‑year medical student can sink a bottle of peach schnapps, right? Well, running a test that involved playing back 33 continuous tracks of 24/96 audio (not a random number, but set at 10 less than the Toshiba's maximum) from full charge until the battery ran out, revealed the following. With the Toshiba drive the battery lasted one hour and 46 minutes — just a little less than Apple's claimed five hours! The Seagate drive under the same conditions lasted for one hour and 58 minutes (see the 'Battery Testing' box for the rules of this competition). There's some advantage to the new drive, probably due to the fact that the Seagate was not working so hard to provide the same data flow, but the results are close enough to make me suspect that the main draw on power is more likely to be the screen than the drive. I look forward to checking out the backlit LED displays of the new Macbook and Macbook Pro ranges to see if this is indeed the case.
Conclusion
Given the simplicity of the drive‑swapping procedure, and the significant gains in performance and disk space, with no apparent implications for battery life, the decision to upgrade is a straightforward one based on cost alone. Toshiba and Western Digital offer drives with similar specification to the Seagate Momentus tested here, so shop around and give your Macbook a new lease of life!
Battery Testing
I wanted my battery-life tests to be as 'realistic' as possible, but I didn't want to have to sit at the computer for the several hours that each would take. I thus used a piece of shareware called MiniBatteryLogger (www.emeraldion.it) which, as well as giving me statistics about the health of my battery (very good for a 28‑month‑old, apparently!), is able to track its charge, voltage and current drawn over time.
In Energy Saver, in System Preferences, I set the computer and display to 'never sleep' to simulate constant activity, but left the 'Slightly dim the display when using this power source' option ticked. The 'Put the hard disk(s) to sleep when possible' option was also left ticked. In order to compare like with like, I ran a control test first, where the computer was left on but with no audio‑related disk activity. To compare this with what happened when the disk was being accessed by a DAW, having recharged the battery I set Logic Pro to play back 10 fewer continuous 24‑bit/96kHz audio tracks than the maximum for the slowest drive on test (in this case, the stock Toshiba drive) — a reasonably strenuous test, but hopefully stable enough to leave running for several hours. The replacement Seagate drive was tested playing back the same number of tracks. The battery life with no disk activity was two hours and six minutes. Playing back audio files, the Toshiba stock drive managed one hour and 46 minutes, while the replacement Seagate kept going for one hour and 58 minutes.
Disaster Recovery
 Prosoft Engineering's Data Rescue II.During these tests, large amounts of data were liberally swapped between the various systems and drives at my disposal. At one point I noticed that the four partitions on the Lacie D2 drive no longer had an eject button in the Finder — strange? Obviously not strange enough for me to do anything about it! Carrying on without backing up, I then realised that two of the four partitions were no longer mounted. Checking in Disk Utility, they still existed, but could not be mounted. I was also rewarded with a polite message to the effect that I was only being given limited access to the volumes that were mounting. One of the un‑mounted partitions contained an archive of all the music I had ever produced, which, while all the data exists in other places in various formats, took an extremely long time to compile into one handy location — not so handy any more! After a little research, I downloaded a demo of Prosoft Engineering's Data Rescue II (from www.prosofteng.com), impressed by the fact that it is used by NASA, and by the promise to rescue my data without doing anything destructive to any of my volumes. With a few clicks in Assistant mode (see accompanying screen), I had found the previously inaccessible data, but needed to pay the license fee to overcome the demo's 5MB file‑size limit. Ten minutes and $99 later I had my music library restored to another drive and wiped the sweat from my fevered brow. Data Rescue II differs from other disk utilities such as TechTool Pro and Disk Utility, in that it can restore the data from a disk or volume without initialising or erasing data. It also offers to reclaim data from erased volumes or disks, but I really hope I never have the need to test this feature. Considering how many days it would have taken to rebuild this library, I consider the license fee to be money well spent, but I could have avoided the whole episode with a rigorous backup routine.