 Ray Stroud's studio desperately needed acoustic treatment to help him achieve the guitar recordings he wanted, but he was reluctant to cover the walls of the multi-purpose room with acoustic foam. Unobtrusive Advanced Acoustics panels provided an answer.
This month, we perform some audio alchemy on a home studio room that also has to double for other purposes.
Ray Stroud is a very talented singer and guitarist who has more than his share of gigs under his belt. Since taking early retirement, he has started to do a bit more gigging, as well as some recording. However, he hasn't been satisfied with the quality of his recordings, so he asked us to cast an eye (and a couple of ears) over his studio, which is set up in a spare room within his Worcestershire home and based around a PC running Cubase.
Studio Stroud
The room is a rather compact 9 x 10 feet, and when we arrived Ray had his studio gear set up along the longest wall, which meant that his chair was close to the centre of the room when mixing. This should usually be avoided, as the bass end tends to disappear in the exact centre of a small room, especially if it is nearly square, as in this case. Some kitchen worksurface was set up all the way along the 'studio side' wall of the room, with another piece on the adjacent wall taking the surface round as far as the door.
The studio setup itself was reasonably straightforward, with the PC's in-built soundcard being used to get audio into and out of Cubase. The monitoring comprised a domestic hi-fi amp driving a fairly small pair of Mordaunt-Short hi-fi speakers, and these were set up on the fabric rings normally used to cover Ray's tablas when not in use. By way of microphones, Ray has a Rode NT2 and a pair of cheap TakStar capacitor 'stick' cardioid models that he bought on eBay, as well as an LD Systems 1011 back-electret condenser, a Shure SM57 and a pair of Sennheiser E345 dynamics, for live work.
A cursory listen to some commercial material played back over the speakers confirmed that the bass was unpredictable, the imaging very poorly-defined, and the sound generally coloured — which is not surprising, given that the wallpapered walls had no acoustic treatment. Ray had bought a couple of used office dividers in the hope that these would provide a suitably dead corner for him to record in, but they turned out to comprise a fairly thin layer of fabric over a hard sub-surface, which meant that they weren't very effective as absorbers. We decided to get rid of these, apart from a couple of narrow panels that Ray had joined together to create a notice board. We decided to move this in front of the radiator at the back of the room, as it would be marginally less reflective than the radiator itself and it looked a bit more inviting. However, some serious acoustic treatment would be needed to get the room up to the standard where Ray could make good recordings in it.
Advanced Treatment
Fortunately, Advanced Acoustics had offered us a room treatment kit to use on a Studio SOS project, and because their panels blend in visually rather better than traditional sculpted foam, it meant Ray could still use the room as a guest bedroom without it looking too studio-like. We received four 2 x 4 feet wall sound trap panels, two 2 x 4 feet corner traps and a further narrow corner trap, again four feet long.
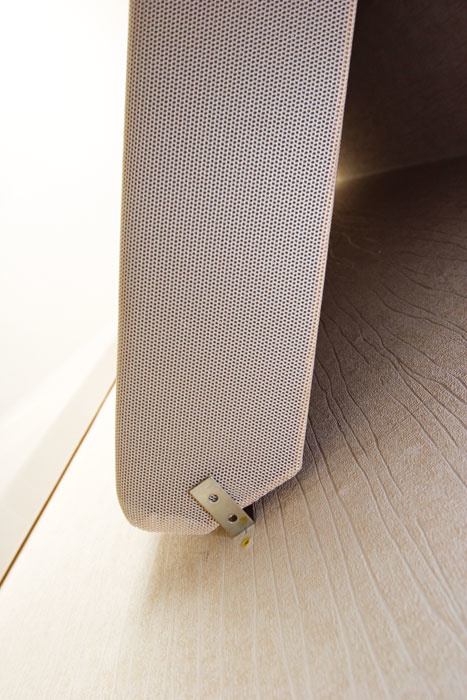
 Ray suggested mounting the Advanced Acoustics panels using some thin aluminium stripping, which he had lying around, in order to minimise the cosmetic damage to the walls — something which worked as well in practice as it did in theory.The wall traps contain solid slabs of two-inch thick, high-grade acoustic foam with an open-weave fabric covering, and a backboard made from 6mm MDF to keep the panel in shape (and also, in some mounting situations, to augment the low-frequency absorption). The foam and covering meet the relevant British and European safety regulations, so flammability shouldn't be a major concern. The corner sound trap panel, which is of a similar construction, but with four-inch foam and angled edges, has an NRC (noise reduction coefficient) of 0.93, providing an absorption coefficient of 0.76 at 50Hz when mounted diagonally across a corner. While these are essentially conventional foam absorbers, the fact that they aren't sculpted means that their average thickness is equal to their full two (wall) or four (corner) inches, whereas shaped foams have an effective thickness somewhat less than their maximum thickness. As with all similar products, the thicker the foam, the more effective the low-frequency absorption.
Before fitting the panels, we persuaded Ray to change the orientation of the studio, such that he would be working down the length of the room with his back facing the window — where we hoped the window blinds would help break up reflections. This would place his mixing position a little distance forward of the centre of the room and hopefully avoid the worst of the bass suck-out experienced in the centre. He'd end up sitting slightly to the left of centre, due to the positioning of the door but we felt this would be an acceptable compromise.
After some thought, we settled on using two wall panels on each side wall, with one large corner panel in one rear corner. We found the space between the wall and window at the other side was too small, and even the narrow panel was too tight a fit, so we used that in the front left corner. The remaining large corner trap we decided to hang horizontally, so that we could use it as a wall panel in front of the mixing position.
Though the panels come with velcro strip for attaching to walls, we didn't want to ruin Ray's walls by gluing anything to them, so after a bit of head-scratching, Ray came up with the simple idea of fixing lightweight aluminium angle strip to the walls above and below the panels, then drilling holes through these, through which could be inserted short masonry nails (taken from some spare phone cable clips) to pierce the foam just in front of the MDF backboard. Ray already had some aluminium angle left over from a kitchen refit, so we tested his idea, and when it worked he went out and bought a little more to finish the job. He also bought some small angle brackets to hold up the corner traps. Ray then lined up the tops of all the vertically-mounted panels and the end result looked very tidy.
 Since a computer upgrade, Ray had been unable to get his Tascam US122B audio interface to work, so he'd been using his computer's built-in soundcard, with less than ideal results. Installing the latest Tascam drivers did the trick.Sonically, the difference between the before and after results was dramatic. Before treatment, the room had a very pronounced coloration, but afterwards it sounded really well controlled, without being oppressively dead-sounding. Checking out material over the Mordaunt-Short speakers showed the imaging to be much more pronounced, and the bass was now quite tight (albeit limited from such small speakers). In fact, it was only after fitting the acoustic treatment that Ray realised he'd need some better monitors (the amp was also a touch underpowered) and before we returned to take the final photos, he'd bought a set of Alesis Monitor 1 Mk2 active monitors, which proved ideal for that size of room, given Ray's limited budget. These were set up on a pair of Auralex MoPads to isolate them from the worktop, and to ensure they pointed directly at Ray's head when he was seated in his normal monitoring position.
We also installed Ray's Tascam US122 USB audio interface — something he'd had around for a while but never been able to get to work properly since having his computer fixed. Reinstalling the latest driver, then going through the setup routine in the manual reinstated the device, which was then selected as the I/O for Cubase 4. I got Ray to do this while I stood on a pile of dry newspaper, wearing a welding visor and rubber boots filled with Vaseline — you know how I feel about messing with PCs!
With the Tascam interface up and running, Ray now had a means of controlling the active monitor level and setting up latency-free monitoring. The interface has a pair of mic preamps built in, along with phantom power for his capacitor mics, and it also provides a decent headphone feed. Ray's Roland XP30 keyboard was connected via the Tascam's MIDI interface and his system was up and running.
Acoustic Guitar
Before finishing up, we made some test recordings, partly to test the system, but also because Ray was unsure how he could get the best sound out of his collection of rather nice boutique acoustic guitars. Now we had an Advanced Acoustics panel across one of the rear corners, it seemed a good idea to try recording with Ray sitting in front of this. We also put an SE Reflexion Filter behind the mic to further reduce room reflections. Ray knew the Reflexion filter could help with vocals but he hadn't considered its use for guitar. One reason I like to use them for acoustic guitar is that it gives me chance to experiment with using omni-pattern microphones, rather than cardioid: I find that omnis always seem to give a more natural sound. Without some type of acoustic screening, omnis can pick up too much room tone, but with a Reflexion filter behind them they are far easier to control.
 This picture shows the studio after we'd sorted the main problems. We'd rotated everything 90 degrees so that the speakers fired lengthways down the room. This, combined with the acoustic panels, Auralex MoPads, and the diffusion provided by the blinds on the window to the rear of the room, made a huge difference to the sound. Now we're ready for the boutique acoustic guitars...Previously, Ray had been advised by an engineer friend to use an X/Y pair of cardioid mics to capture the guitar in stereo, but although this can work well it also introduces problems that can sometimes outweigh the benefits. Firstly, my own experience is that omnis give a better sound and, of course, you can't use these in an X/Y coincident pair. Secondly, with any sort of stereo array that's set up fairly close to the instrument, any movements made by the player cause the stereo image to shift. In recent years I've always recorded acoustic guitars in mono and then used a stereo ambience reverb to add width where I think it is necessary.
For the first test we set up Ray's Rode NT2 mic and made some guitar recordings with it switched to cardioid mode, then recorded the same piece in omni mode. As usual, we moved the mic around to find the sweet spot, and because Ray was sitting over a piece of exposed wooden floor, we got some useful reflections from that source to add life to the sound. Both recordings sounded fine, but Ray and I felt that the omni version had a more natural, open feel to it. Next, we tried the same thing using one of his budget TakStar cardioid pencil mics, which had cost him little more than the price of a set of strings! This turned in a very respectable performance too, given its modest leanings, but it exhibited the somewhat congested character of a low-cost cardioid capsule, and it also had a bit too much presence boost — which may work very well over a drum kit, but made the guitar sound a hint on the grainy side. With care, we were able to get very usable results out of it, but comparing it with the Rode NT2 soon highlighted its shortcomings.
 Paul explains to Ray how to achieve a good recorded sound from a single omni-pattern mic.Finally, we tried my own Rode NT55, with the omni capsule fitted, and if anything that gave the best result of all — though not sufficiently better than the NT2 to persuade Ray he needed to buy another mic. It was an interesting exercise, though, and I think it gave Ray the confidence to experiment in order to find out what works best for each guitar. During the course of our mic positioning experiments, we also pointed out that placing the mic below, in front of and slightly to one side of the guitar, then aiming it up in the general direction of the bridge, can not only give you a great sound but, if you're recording vocals at the same time, also puts useful distance between the two mics. This can be important, not only in reducing spill, but also in minimising the phase errors that occur when the same sound source is picked up by different mics at different distances.
On Reflection
Having the Advanced Acoustics panels really helped us address the main acoustic issues in Ray's room, without the end result looking oppressive, and the difference they made was dramatic. Moving the monitoring to fire down the length of the room also helped resolve the unreliable bass-end issue.
Once again, we'd managed to show that a simple recording system, using modestly priced but well-chosen mics, can produce excellent results, as long as you're prepared to pay enough attention to the acoustics of the recording space.
Ray's Reaction
 Ray Stroud, at home in his revamped studio. Ray: "The room had been decorated and equipped to function as an office, studio, and part-time bedroom, and suffered from the inevitable compromises that entailed. I'd spent quite a lot on recording software and hardware but balked at the thought of covering the walls in grey foam — I didn't want to have a 'cell' or 'bunker' feel to my creative environment and, let's face it, it is hard to get as excited about foam as a new piece of 'kit'. However, the lack of treatment negated confidence in the results I got, and my backlog of compositions remained unrecorded.
"I'm delighted with the Advanced Acoustics panels and with the Auralex MoPad speaker platforms. The aural impact on the room is amazing, and the soft, non-oppressive appearance of the panels blends tastefully with the decor. Fixing them with three-quarter-inch aluminium angle means the panels can be removed in seconds, and if I move house I can take the angle off the walls, leaving holes smaller than picture nails. All round, it is a great result: my thanks to Advanced Acoustics and to Sound On Sound.