The Pentagon I soft synth bundled with Sonar 5 is a powerhouse that even offers vocoding facilities. If you've overlooked it so far, remedy the situation with our tips, tricks and programming guide.
In my Sonar technique articles I've often tried to throw some light on update features that don't get quite as much attention as the 'biggies', and this month I'm looking at rgc audio's Pentagon I synth (PI for short), which had been available commercially for some time before it was folded into Sonar 5. On the surface, PI seems like just another subtractive soft synth, but its capabilities go far beyond that, even including vocoding and filter-response morphing. Let's investigate...
The Dual-filter Architecture
PI has four oscillators and two filters. Thanks to these, and extensive modulation options, the synth is capable of producing some very lively, animated sounds. The two filters can be routed in series or in parallel, used singly (the signal goes through filter one only, while filter two is disabled), or switched off. Set your choice in the filter-mode options to the right of the Filters label, located over the filter controls.
When the filters are in parallel, each oscillator has a balance control, F1-F2, which determines how much of the oscillator signal goes to each filter path. (Note that this does not work when the filters are in series mode.) Another balance control at the Output section (located in the instrument's lower right), also labelled F1-F2, lets you weight the output more towards one path or the other. For example, you could put the two filters in parallel and set one for a standard low-pass response and the other for a band-pass peak. Using the output F1-F2 control, you could route a bit of the band-pass resonance sound into the output.
 Pentagon I offers four possible filter routings.I have two favorite applications for the series filter mode: one is to set both filters to BR (band-reject) and vary their cutoffs independently (for example, controlling one via LFO and the other from an envelope or mod wheel). The other is to set filter one to HP (high-pass mode) and filter two to LP (low-pass mode), then set the low-pass cutoff higher than the high-pass cutoff, to create a band-pass response. This is how band-pass responses used to be created in the old Moog modular synths (the Korg MS20 also had this feature), and it can produce some very useful filter responses. Note that each filter path has independent modulation options — an ADSR (Attack/Delay/Sustain/Release envelope), plus controls that set the response to velocity, keyboard pitch, aftertouch and mod wheel — along with independent VCAs, each with an AHDSR envelope and controls for velocity, pitch-tracking and aftertouch. (The 'H' in AHDSR stands for Hold, in case you're not familiar with this kind of envelope.)
The dual-filter architecture also accommodates a feature that recalls the Korg Radias, which can morph between various filter responses in real time. PI doesn't go quite that far, but it can morph between two filter responses, which produces a variety of sounds — for example, a phasey sort of effect when morphing between low-pass and high-pass types, and a formant-like sound when morphing between two different high-resonance band-pass settings. If you'd like to try filter morphing, set the filter mode to Parallel. Next, make sure that the F1-F2 control in the Output section is at its mid point. The key to morphing effects is the oscillator F1-F2 controls; I assign each of the these controls to the mod wheel via MIDI, so I can use the wheel to do the morphing. To tie the parameter to MIDI control, use the MIDI Learn function: shift-right click on the knob you want to control, choose MIDI Learn and move the mod wheel.
Note that you can assign a single controller to multiple destinations, so you can morph all four oscillators; you can even set individual controls to have a reverse motion, or limit their range to particular minimum and maximum values. To set these values, after assigning the parameter to a particular controller, adjust the control to the minimum value you want, shift-right click on the parameter and select 'Set Min'. Setting the maximum value works identically, except that you set the maximum value before selecting 'Set Max'.
Loading User Wavetables
Pentagon I 's oscillators allow you to load up to 14 stock waveforms, many being the usual suspects — sine, saw, square, pulse, noise, harmonics, and so on. However, you can also load up to four user options from a choice of 51 additional wavetables that come with the program. To do this:
 The MIDI Learn function makes it easy to set minimum and maximum controller limits. 1. Click on the Pentagon logo.
2. Choose 'Load Wavetable'.
3. Mouse to User 1, 2, 3 or 4.
4. Select the desired waveform from the options in the Wavetables folder.
Note that you won't see the name of the waveform anywhere, so you'll have to remember what you chose for the User waveform.
It's also possible to load a custom LFO waveform. Follow steps one and two above, but for step three choose 'LFO' instead. You can select any of the same waveforms used for audio and Pentagon will automatically scale it to the LFO range. To deploy the User LFO waveform in a program, use the LFO Shape control. This is a 'detented' knob with 13 positions; position 12 selects the User LFO waveform.
It's A Vocoder!
PI makes a decent vocoder. I don't know why Cakewalk don't do more to promote this feature, but here's how to use it.
 Each of the oscillators can use a custom waveform in addition to the 14 standard ones. 1. Do not insert Pentagon into a track using the Insert / Soft Synth command. Instead, right-click in an audio track FX bin and go Soft Synths / Pentagon I. We'll call this the audio/instrument track, as it has characteristics of both.
2. Create a MIDI track to drive the audio/instrument track and assign its MIDI output to PI.
3. Assign the audio/instrument track input to your mic audio-input source (ie. from your audio interface).
4. Set the audio/instrument track Input Echo to 'On'.
5. Call up the PI patch you want to use as the vocoder 'carrier'.
6. Click on the PI logo and go Voice Modulator / On.
7. If you want a more 'voice-like' effect, click on the Pentagon I logo and go Formant Filter / On.
8. Speak into the mic, play your keyboard, and voila — instant vocoder!
You're not limited to using a source plugged into a Sonar audio input to do the vocoding. For example, one of my favorite tricks is to load a drum part into the audio/instrument track and use that to modulate whatever patch is selected in the Pentagon I. You can also manipulate the filter, LFO, VCA and other controls while all this is playing. In fact, you can appear to 'gate' the vocoded signal by setting a short amplitude decay time on the PI amplifier. This causes the patch sound to decay rapidly; when there's no signal left, there's nothing for the mic or other input to vocode, so you won't hear what's happening at the input.
Cakewalk News: Free Rapture and Dimension Pro Expansion Packs
The Rapture Expansion Pack 1 includes 350 new programs and over 110MB of new samples and wavetables, while the Dimension Pro Expansion Pack 1 offers 350 new programs and over 120 MB of new samples and wavetables, as well as a great tonewheel organ emulation that includes drawbar levels, percussion level, keyclick, rotary speaker, drive, cabinet simulator, and so on. Registered owners can go to www.cakewalk.com to download the packs.
Preferences & Options
The Pentagon I logo is your gateway to a range of shortcuts and preferences. Click on the logo and you'll be presented with a pop-up menu offering several items.
- Knob Mode lets you choose Circular or Linear motion, as well as enabling 'Knob Inertia' — which is fun, as it duplicates the effect you get with classy, well-oiled hardware knobs. Try it!
- Envelope Mode selects linear or exponential envelope curves. Linear is the type of curve traditionally associated with digital rate/level envelopes, whereas an exponential curve gives more of an analogue synth feel.
- Program has the usual program-based utilities: Copy, Paste, Load Bank, Save Bank, and so on. But it also has an Initialise function, which gets a lot of use when I'm in a programming kind of mood.
- MIDI Config is a tremendously useful facility for those who like to use MIDI controller assignments. You can create up to 10 different MIDI configurations that are 'containers' for controller assignments. For example, suppose you like to have the mod wheel control filter cutoff with bass patches, but with guitar patches you prefer the mod wheel to control the level of oscillator four, to bring in pseudo-feedback tones. It's possible to set up each option in a separate MIDI configuration. Then, whenever you call up a bass patch you can use the MIDI configuration that assigns the mod wheel to the filter, while with guitar patches you can instead use the MIDI configuration that assigns the mod wheel to oscillator four. Note that you can also copy and paste MIDI configurations, as well as clearing all the current controller assignments.
The only option remaining in this menu that we haven't yet covered is the 2x Oversampling one. Enabling it pretty much doubles CPU hit, but does improve sound quality (another way to do that is to enable 'HQ' under the Render Mode function). If you don't notice any improvement with the patches you use for a particular project, you might as well leave 2x Oversampling off, but if your computer has enough horsepower there's no harm in leaving it on.
Make Your Mark: PI Customisation
 The parameters circled in blue adjust brightness, contrast and hue. It's possible to customise the look of PI, including the background, knobs, lights and so on, quite a bit. Go to C:Program Files/Cakewalk/Shared Dxi/Pentagon I/rgcaudio Pentagon I/Skin, and open the folder. You'll find .BMP files you can edit for various graphic elements; just make your mods to the BMP file, save it (you might want to save the original under a different name, in case you want to get it back), and your changes will take effect the next time you load Pentagon I. For example, I added a black border to lights in the off position and a bright-green border to lights in the on position. This really makes them stand out on the front panel.
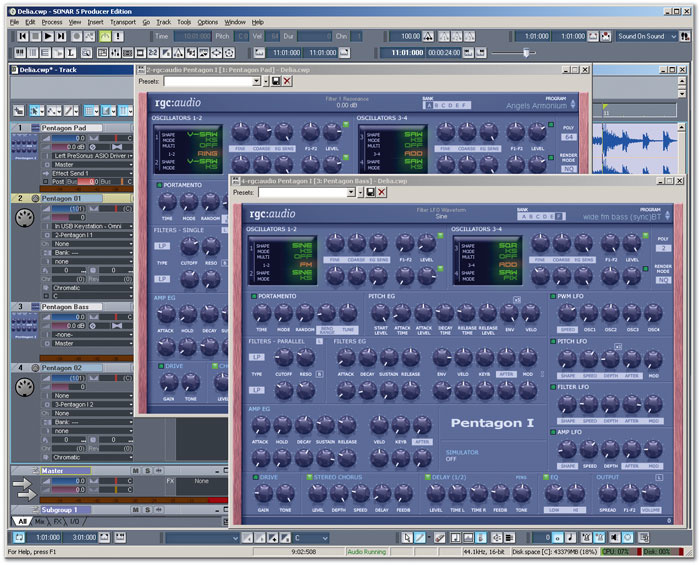
There's also a skindef.txt file, where you can edit the instrument's actual layout. That sounds too much like hard work to me, and anyway the instrument layout works fine as it is, but at the end of the file you'll find parameters for brightness and contrast (0-255) and additional parameters for adjusting the RGB colour balance. I bumped the brightness up to 135 and the contrast up to 150. To give the synth more of a blue vibe, I also set the 'B' in RGB to 40 (you can see the results in the screenshots). Make your changes, save skindef.txt, and you're done.
Oscillator Interaction
You can think of oscillators one and two as one pair of related oscillators, and oscillators three and four as another pair. This is because there are group modes for each pair, as chosen by clicking on the 1-2 parameter just below 'Multi' in the oscillator control panel.
 The Oscillator 1-2 button offers four options that determine how the oscillators in each oscillator pair interact.Click on the 1-2 option to determine how the oscillators in a pair relate to each other. 'Add' simply mixes the two outputs together. 'Ring' ring-modulates the two oscillators, so varying the Coarse frequency control for either one produces that wonderful clangorous ring-mod sound. 'Sync' causes oscillator two to sync to the period of oscillator one. As a result, sweeping oscillator two's Coarse control higher than the frequency of oscillator one's Coarse control produces the hard-sync 'gripping' effect. I like to use the Pitch envelope generator to control oscillator two's Coarse control. One thing I've noticed about rgc:audio's synths is that the hard sync is extremely musical and smooth, like the effect you'd get with analogue synths; it's well worth investigating.
In FM mode, oscillator one serves as the modulator for oscillator two, which provides the carrier. Thus, turning up oscillator one's level control injects audio into oscillator two, producing the harmonically complex timbres associated with FM. I suggest starting out with oscillator two's Coarse frequency set to zero and oscillator one's Coarse control set to 12 or 24 semitones. Bringing up oscillator one's Level control adds a lot of character to the sound without making it too extreme.
The '1-2' button isn't the only option for oscillator tricks. It's possible to thicken the sound of oscillator one and/or three by setting Multi to 'On', which generates multiple 'virtual' voices from each oscillator. This is particularly effective when you want to save CPU power. I really recommend turning the output section Spread control clockwise, spreading out these voices across the stereo field (actually, the Spread control comes in very handy for any kind of stereo effect).

