You might be a virtuoso instrumentalist and a dab hand at programming, but can you get the two skills to work together? Sam Inglis offers some tips.
I have a recurrent recording frustration, and it's this; the songs are written, perhaps on an acoustic guitar, and tried out in the living room on the girlfriend, but the reason that our spare room is full of wires, boxes and cold cups of tea is that I want the finished, recorded tracks to be much more than just me and an acoustic guitar. Some of them are begging for a fresh, modern pop production. Some of them would sound much better rocking out with a plausible‑sounding real band. One or two could use a soaring string arrangement, where interlocking lines of transcendent, ethereal beauty intertwine behind the acoustic guitars and disguise the fact that I can't really sing. So, retreating to the spare room with yet another cuppa, I set about creating some backing tracks, using the synth sounds and samples I've carefully built up over the years.
So far, so good. The drum samples sound crisp and fresh, and a little tweaking in Cubase's drum editor yields a programmed part that might even be described as funky. A synth bass goes down equally smoothly, and in a rare moment of inspiration I might even come up with a nice Rhodes part for my sampler to practise. I've even remembered to drink the tea while it's hot.
The nightmare starts when I pick up a guitar. Now, I freely admit that I'm no Jeff Beck, but my guitar playing sounds fine when I'm in a room with a drummer and a bass player — so what's this sloppy, thin‑sounding, weedy mess that I've spent the last four hours laying down next to my programmed tracks? My guitar tuner isn't broken, so where are those beat frequencies coming from? How come my vocals sound like they're sitting about four hundred yards to the rear of the drums? And why does my lovingly recorded acoustic guitar sound like it was last restrung in 1973?
Like many home‑studio musicians, I'm constantly running up against the problem of getting real instruments to sit well alongside programmed, sample‑based parts. I don't have the space, the mics or the stone‑deaf neighbours to enable me to record real drums, I haven't got room for a piano and couldn't play it if I had, I gave up the violin at the age of 12 as a gesture of mercy to my family, and my bass playing makes Richard Hell sound like Jaco Pastorius. Nevertheless, I want those sounds on my tracks, and I've got samples of all those instruments which sound great — until I try to play a real instrument alongside them. I don't pretend to have solved this problem completely, but the purpose of this article is to offer some suggestions to those who are, like me, constantly running up against it...
Choice Of Sounds
 It's not unheard of for some sample collections to be slightly out of tune. IK Multimedia's Sampletank XL, for example, contains some samples which may need some tweaking if they are to sit within your track.
The most important step in getting samples and real instrument sounds to sit together in a mix is, unsurprisingly, choosing the right sounds in the first place. Samples and synth patches are often designed to sound impressive in isolation, rather than to fit unobtrusively into a mix. This usually means that several things are true of them:
- They are heavily laden with reverb.
• They lack dynamic range, and don't respond to dynamic playing variations in a very natural way.
• They cover a very broad frequency range and, in particular, are often very, very bright.
• Their stereo spread is exaggerated.
 If you want to add MIDI parts later, it's best to record to a metronome click.Getting your samples and real instruments to share both a plausible acoustic environment and an appropriate dynamic range is vital to having them sit properly together in the mix, and I'll be discussing these issues in more detail later on. Messing about with reverb and compressors, however, can be a dirty business, and if you can solve the same problems simply by choosing different sounds on your synth or sampler, you'll probably save enough time to make another cup of tea, and achieve better results into the bargain.
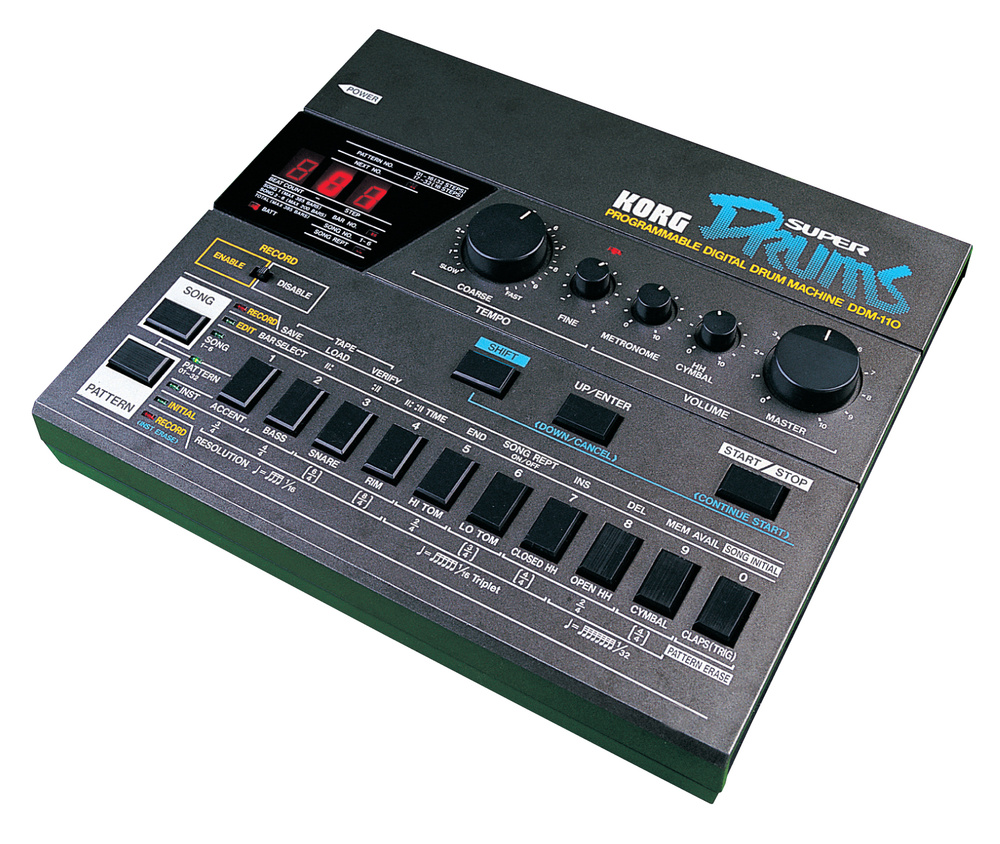
If you start the recording process, as many people do, by roughing out the programmed elements of the track before adding any real instruments, it's easy to simply end up choosing the samples and sounds that are most powerful on their own. It's only when you start to add guitars, vocals, electric bass, and so on, that you find the live instruments sounding feeble by comparison. A heavily enhanced drum loop, for instance, can make the other elements of a mix sound dark and dull by comparison. Be careful about using enormous, layered kick and snare sounds — again, these might sound impressive on their own, but they leave little space for anything else in the mix. In fact, why not take the opposite approach, and choose your samples deliberately so as to make the live instruments sound big and impressive? It's become almost a cliché of modern pop and rock production, but one way of achieving this is to use a rhythm part sampled from some awful, cheesy old beatbox, with a frighteningly limited bandwidth and no guts. When the real instruments come in, they almost can't help but sound big by comparison: check out the Manic Street Preachers' 'The Everlasting' or Lloyd Cole's 'Brand New Friend' for examples. You can achieve similar effects by drastically EQ'ing or band‑pass filtering your samples.
More generally, the planning stage for any track should involve some thought about the frequency ranges of the instruments involved. The sound of any voice or instrument will tend to fall predominantly within one or more relatively narrow bands of frequencies, so if you know where these bands are likely to fall for the real instruments you're using, you should be able to either choose samples that don't occupy the same bands, or EQ your samples and synth patches in such a way as to avoid a clash. In the case of drum samples, you could also try pitching them up or down in your sampler to get the best fit with the other sounds in your mix.
Another important factor in choosing samples is considering whether they're actually up to the role you have in mind. For instance, a string program which has no velocity‑switching, multisampling or response to MIDI controllers may be fine as a background pad, but it'll stick out like a sore thumb when you use it to solo over the top of your real guitars. For some ideas about adding expression to samples using MIDI controllers and the like, check out Philip Meehan's article on working with orchestral samples (SOS March 1999).
Reverb
 The limited bandwidth of older drum machines can make real instruments sound huge in contrast.
Talking of reverb, many synth patches and sample programs are, by default, set up to incorporate large amounts of it from the synth or sampler's internal effects board, apparently because manufacturers believe that we won't buy any instrument on which snare sounds take less than half an hour to die away. Instruments and vocals recorded using a microphone will bear the reverberant imprint of the booth, corridor, cupboard or bathroom in which they were played or sung. Swathes of cheesy spring reverb are often added to electric guitar sounds by amplifiers, preamps and effects units, whereas instruments recorded directly via a mixer or DI box will be completely untainted by early reflections, low‑frequency damping or the noise of passing aeroplanes.
In short, it's not at all difficult to end up with a situation where all of the elements of your mix sound like they're in completely different artificial or natural acoustic spaces, and in such a situation it's hardly surprising if they don't entirely gel. Yet the point of adding reverb to the component parts of a track is, precisely, to make them sound as if they were recorded in a room together. So what can you do?
If, by luck or careful planning, you can eliminate reverberation at source on all of the sounds in your tracks, this should probably be the first approach to try. Turn off the reverb algorithms in your samplers and effects units, cut out the reverb on the guitar amp, and if you can record your live instruments close‑miked in as dead an acoustic space as possible, do so. Then you can use the effects sends on your mixer to treat all the individual sounds with the same reverb program on an outboard effects unit or plug‑in. If you can do this, it should go a long way towards making the different parts sound as though they belong in the same acoustic space, whether you choose to recreate the Albert Hall or to leave everything virtually dry for a tighter, more upfront mix. Unless your song is very sparsely arranged and downtempo, however, you'll probably find that a long reverb swamps the mix; for most material, something like one of Lexicon's Ambience programs will be more suitable.
 Emagic's EVP88 physically models electric piano sounds, and can therefore produce a more realistic response to MIDI note velocity than a sample‑based simulation.However, it isn't always as easy as stripping the reverb off sounds at source and applying another reverb globally. For one thing, there are various reasons why you might not be able to eliminate all the reverb on all your parts at source. It's quite common to find yourself wanting to use individual sounds that are afflicted with a particular reverb signature that you either don't want to, or won't be able to get rid of. If you're going to be recording live instruments that you can't or don't want to close‑mic, for instance, the sound of whatever room you're doing it in will inevitably make its way onto the multitrack. Similarly, you may be committed to using drum samples or loops which were originally recorded with a room sound (yes, you there, with the copy of Led Zeppelin IV...); or you may simply happen to like the sound of your room or of your synth's reverb patch and be unable to reproduce them on any reverb unit that can be patched into your mixer. It can, moreover, be hard to find a short‑decay reverb algorithm that's of good enough quality to use on every element of a mix, especially if you're working with plug‑ins rather than outboard gear. The ideal 'you only hear that the reverb was there when it's taken away' effect can be difficult or impossible to achieve with software or cheap hardware reverbs, and you tend to end up with either a horrible clanging, muddy mess, or no reverb at all.
If you feel your reverb isn't up to scratch, one possibility is to make use of the acoustics of a real room, especially if you're going to be stuck with the sound of your recording room on your live instruments anyway. Create a monitor mix of the elements to which you wish to add reverb, set up your monitors in the recording room, and simply record the reverb. Subtly introducing this reverb track in the mix should help to fool the ears into thinking that the whole thing was recorded in that space — you'll effectively be using your recording space as a reverb chamber, rather than sending to an artificial reverb.
Another alternative is to try using a delay instead of a reverb. Especially on uptempo or busy mixes, I find there's often so much going on that adding any reverb at all inevitably muddies the sound up. Sending everything to a delay instead can yield the same beneficial effect of binding together the sampled and live sounds, without losing clarity from the mix (and with the added benefit for those mixing in software that delay plug‑ins are much less processor‑intensive than reverbs). Another alternative is to keep the individual elements in the mix dry, and then add reverb to the whole mix using an ambience program.
If you're using a percussion sample that has a very prominent reverb of its own which is preventing it from sitting in the mix, you may be able to tone this down using a gate or an expander, or by editing its decay to eliminate most of the inherent reverb. Alternatively, you could try treating the sample in such a way that the reverb no longer sounds like it's supposed to be natural ambience, but just another part of the sound, perhaps by filtering, EQing, phasing or flanging it. (The reason why gated reverb, for instance, can work is precisely because it doesn't sound like natural reverb: its effect is more to increase the sustain of a drum sound than to locate it within a perceived environment.)
Timing Gentlemen Please
One of the most frustrating things about recording real instruments alongside programmed tracks is that playing that would seem perfectly tight in the context of a human band can sound terribly sloppy. Even when programmed backing tracks are not rigidly quantised, they can't follow your playing like real musicians can — and, let's face it, a lot of the time, very tightly programmed backing tracks just sound better than sloppy ones. Much modern commercial pop and rock music, moreover, features this kind of timing precision whether it is programmed or not, so if you're aiming for a modern sound you'll need to confront this problem.
One obvious thing to do is to learn to play your instrument better — after all, the professionals seem to achieve incredible precision whether they're playing with a band or overdubbing to a sequence — and a bit of practise at playing against a programmed backing can definitely help you to tighten up your chops. Rusty technique, however, is only one of the things that can make you struggle to get your playing sound in time with a backing track; and with some instruments, such as strummed acoustic guitar, absolute precision will never be possible (because the plectrum takes a finite time to get from the top string to the bottom).
This is often something that is best sorted out early on, when you're thinking about what real and programmed parts your song is going to contain. If your song is written around a guitar or keyboard pattern, you can often make things hard for yourself by starting with a detailed, busy programmed drum part. That programmed part may sound fine on its own, but it's easy to end up unintentionally mistranslating the 'feel' of a guitar or keyboard‑based song when you come to write a drum part in isolation, ending up with a programmed track that always seems to pull awkwardly against the real instruments when you come to record them. Before you write the drum part, then, why not lay down a guide instrumental part to a click, to make sure you are not going to spend hours honing a rhythm track that won't quite fit the song? Alternatively, if you do come up with a great programmed backing that never quite seems to gel with your guitar, you could ask yourself how vital that particular guitar part is to the song. Would the final mix suffer if it was changed or even dropped altogether?
So what if you're completely happy with both your programmed rhythm part and your guitar or bass part, but you can never seem to get the latter to sound tight? Well, there are plenty of ways you can try to improve matters. If you're having trouble playing in time, the first thing I'd suggest is to try using a prominent click in addition to your programmed backing, especially if the latter involves unusual or off‑beat rhythms. Whether you're adding the click to an existing backing or simply using a click alone to lay down your instrumental parts, moreover, it's worth spending some time to get the click track right. Make sure that the click sounds you're using are clear in your headphones, that the downbeats are clearly differentiated from the other beats of the bar, and that your click track isn't running in double or half time with respect to the song. And watch out for headphone spill!
In much pop and rock music, difficult timing issues tend to be due more to variations in the timing of incidental eighth and 16th notes than to the basic beat of the song. There is an infinite range of variation between straight eight or 16th beats and the extremes of heavy syncopation and shuffle, and it's in having every part in the song reach the same degree of variation that problems can often arise. Most software sequencers now allow you to quantise only the eighth or 16th notes in a drum part to add various amounts of 'swing', so you can often subtly adjust the quantisation of these notes to fit the feel of a live instrument recording more closely. You can also adopt a 'less is more' strategy: two instruments can only sound out of time if they're both actually playing notes that are supposed to fall on the same beats, so why not drop out some of the eighth or 16th notes in your drum part and simply allow them to be implied by the feel of the guitar or bass? The inevitable looseness in the timing of the live part won't be nearly as noticeable if it's no longer playing back against an unvarying hi‑hat or ride cymbal pattern. Another useful strategy is to substitute these parts of the drum mix for percussive sounds with less sharp attacks, such as shakers, scrapers, brushed sounds or even backwards samples. These can be much more forgiving of timing variations in accompanying instrumental parts, but note that you may find yourself having to move them slightly ahead of the beat to achieve the same feel.
Another possibility is to use something like Cubase's Match Quantise function to derive match points from your recorded audio part, then use these to impose its feel upon the programmed drum parts. I've had little success doing this from guitar parts, as the program has difficulty picking up all and only the correct note starts, but it might work more effectively if you take the match points from a more percussive instrumental recording. You could even set up a mic and tap out a rhythm with the feel you want, record this scratch rhythm part as an audio file and derive match points from it.
 or Emagic's Logic, let you tweak the groove of MIDI parts into line with audio tracks.") Sophisticated sequencers, such as Steinberg's Cubase (above) or Emagic's Logic, let you tweak the groove of MIDI parts into line with audio tracks.
Sophisticated sequencers, such as Steinberg's Cubase (above) or Emagic's Logic, let you tweak the groove of MIDI parts into line with audio tracks.
Most programmed backing tracks actually consist of a small number of parts, looped. For instance, you might have seven bars of one drum pattern, followed by a fill, followed by seven bars of a different drum pattern and another fill. Musically speaking, the guitar or bass parts may be equally repetitive, consisting of just a few short riffs or chord sequences played over and over again. So, if you're looping your drums and other programmed instruments, and you're working with a recording setup that permits, why not also loop the 'real' elements? Record a whole song's worth of riffs and simply pick the bars where your playing felt best against the programmed loop, and copy and paste them in your software sequencer or hard disk recorder.
If it doesn't affect the sound of your 'real' instrument too badly, you may be able to artificially tighten up the timing using the old trick of keying a gate from the programmed drum beat, or even from a click. If you're working on a computer, a better approach is probably to get the best take you can, chop it up — either by hand using the scissors tool in a program such as Cubase, or using a program such as Recycle which can automatically detect gaps between notes and snip at those points — and move any out‑of‑time notes into position. This is usually a pretty thankless and tedious task, but one which, done carefully, can work wonders.
Dynamics
There's something about a sample‑based backing track that seems able to turn even the meatiest electric guitar sound into a weedy, wasp‑like drone, and to make aggressively strummed jumbo acoustic guitars sound like the scratchings of a small weevil. The obvious thing to do when this happens is to reach for the compressor, and indeed a healthy dose of squashing will often be a matter of course when recording and mixing guitars, vocals, basses or live percussion. However, it's easy to over‑compress the real instruments in a bid to compete with the samples, which will make the performances and ultimately your mix sound flat and uninteresting, and it sometimes seems that no amount of compression can produce the necessary substance.
 A dual‑channel compressor, such as one of the above units from Mindprint and TL Audio, can help match the sound of recorded mono and stereo sources with samples which have already been compressed.
The power and solidity of sampled beats and instruments is partly down to the fact that they often are compressed, either in the synth/sampler or at source; and to the extent that it is in fact down to traditional compression, you ought to be able to match it by compressing your real instruments. However, sample‑based parts can seem to have an amazing ability to sound loud and weighty which comes in additon to any obvious compression. This is partly due to the way in which their dynamics work.

Although the MIDI spec gives velocity a range of 0 to 127, even the most memory‑hungry sample programs tend to use only a few samples, switched by velocity over this range; and many sampled instruments play back just one sample across all velocities for any given pitch, using velocity merely to adjust the playback level on each note. Thus, many sampled instruments don't respond to velocity in anything like the same way as real ones. This, I think, means that we end up playing them in a different way from real instruments. Compare, say, a sampled Fender Rhodes that uses just one layer of samples with the real thing, where sound is produced by hammers striking metal tines. The dynamic variations you get from hitting the keys with more or less force will, in the latter case, include far more than just changes of volume. Notes struck hard will be brighter, with a more pronounced enharmonic element and, if you're playing through an amp, will tend to distort, whereas quietly struck notes will be rounder, softer, and purer in tone. A dynamically controlled performance thus has much more to it than simple mixtures of loud and quiet notes — and the same is true for almost all real instruments.
This has two consequences that are relevant here. The first is that if you play your sampled Rhodes with the same degree of velocity variation you might use in playing a real one, what you'll get is a Rhodes which just seems to get louder and quieter in a disconcerting way, without any of the changes in timbre that would tell the ear that this was true dynamic variation — and because this often doesn't sound very good, it's easy to end up compensating for it by simply eliminating much dynamic variation from the performance. The second is that when you compress a performance recorded from a real Rhodes, it will sound much more lively and dynamic than a compressed performance from a sampler, because, although the level is controlled, all the timbral changes will still be there to tell the ear that the instrument was being played loudly or quietly. Compressing our sampled Rhodes part, on the other hand, will simply give the impression that all the notes were played with exactly the same velocity.
A third point to bear in mind is that if your samples are themselves compressed at source, the part you play back from your sampler will sound different from a recorded performance that is later compressed, since in the former case the amount of compression applied to each note will be constant no matter how loudly or quietly it is played. This, again, can contribute to making a sampled performance with a wide velocity range sound unnatural.
, can encourage overly rigid performances, so try using a slower‑attack sound such as a shaker (shown in the lower waveform) instead.") Using a fast‑attack percussion sound, such as the top waveform (above), can encourage overly rigid performances, so try using a slower‑attack sound such as a shaker (shown in the lower waveform) instead.
Using a fast‑attack percussion sound, such as the top waveform (above), can encourage overly rigid performances, so try using a slower‑attack sound such as a shaker (shown in the lower waveform) instead.
Of course, our hypothetical Rhodes sample is something of a worst‑case scenario, and most synths and sample collections should provide instruments that respond far more sympathetically to variations in playing dynamics. As well as choosing your samples and patches wisely, you can also do a lot more to improve matters. You could start by checking that the sample program or synth patch you're using doesn't have a compressor patched in, and remove it or turn it down if it does. More sophisticated solutions include assigning velocity to a high‑pass filter to simulate the different tonal responses of loud and quiet notes (on nearly all real instruments, louder notes sound brighter, so set the filter to open more at high velocity values). Another thing you could try instead of compression is feeding the sampler's playback through a processor such as a distortion box or amp simulator, which as well as effectively compressing its output will also add tonal variation between loud and quiet notes.
There are various other tricks you can do to make samples more responsive to playing dynamics — check out the second part of Nicholas Rowland's 'Creative Sampling' series (SOS January 1999) for advice on achieving this. However, there's no reason why the dynamic variation you add to your sampled part must mimic 'natural' playing dynamics. For instance, I find that many sampled keyboard instruments respond well to processing with tremolo, auto‑pan, panning delay and rotary‑speaker emulation effects. All are good for adding life to static samples, and help dispel the impression that these sampled instruments occupy only a very narrow dynamic range. You could also experiment with a processor such as SPL's Transient Designer, TC's Triple•C compressor or the Peak Punch facility of Drawmer's new DS501 gate. In their different ways, all of these can be used to shape the dynamics of instruments and even individual notes in interesting ways.
If heavy compression is making your 'real instrument' parts sound too flat, yet nothing else will stop them disappearing into the background, you could also try what is sometimes called 'invisible compression'. Crank your compressor up as viciously as it will go and set it up as a send effect, rather than on an insert. The combination of the uncompressed instrumental part and the heavily compressed effects return from the compressor can add weight and solidity to a sound without making it obviously over‑compressed. Bear in mind, though, that this will normally only work if you're using an analogue desk and processing — in a digital system, the processing delay usually caused by sending to the compressor will introduce phasing.
If you're using a system with mix automation, you can also achieve very natural results by riding the fader manually to iron out dynamic variations in the part, or drawing in automation data using the vector automation features of most MIDI + Audio sequencers. Another way of bringing more weight to your 'real' parts is to double‑track instruments such as guitars, which adds a natural solidity and weight to the sound. With electric guitars, you can combine two or more different guitar sounds in such a way that, for instance, a clean sound provides the necessary detail and transient response to bring a part to the listener's attention, while a more distorted or compressed sound adds body to it. A personal favourite trick is miking up the strings of an electric guitar while recording a heavily distorted part through a preamp such as the Johnson J Station, then mixing the two signals together. The distorted part provides the necessary power, while the miked signal can improve the articulation.
Yet another possibility is to layer your 'real instrument' parts with samples. Sampled guitars, for instance, don't tend to sound all that convincing on their own, but can help to add weight when layered behind real ones. The same is often true of basses, where rounding out a middly electric bass with a synthetic sub‑bass can be very effective. Similarly, if you're working with real drums in an otherwise largely sample or synth‑based mix, you could try layering an electronic‑sounding snare behind them.
A final consideration is the matter of overall mix compression, which can also help the different elements of a mix to gel. For instance, if you want to base your drum track around a huge snare sample which leaves no room in the mix for your guitars, compression will allow you to bring up the guitars in the spaces between snare hits and thus increase their perceived loudness without diminishing the impact of the drums. Similarly, mix compression can help lead vocals to sit better in a busy track by effectively ducking the instrumental backing parts during vocal phrases.
Is Your Sampler Out Of Tune?
It's worth noting that, just because you've paid 60 quid for a sample CD, there's no guarantee that the samples on it will actually be in concert pitch. Samples of vintage keyboards are especially prone to being out of tune, and there's nothing more annoying than spending 20 minutes between every take tuning up your guitar, only to find that what's flat is actually the Hammond program on your Akai. Not all sampled instruments work over a wide range of pitches, either. This can be because the original instrument being sampled has a restricted range, as most orchestral instruments do, or just because it hasn't been properly multisampled. Let your ears be the judge, and if a part playing back on a MIDI instrument sounds unnatural, it may be worth transposing it by an octave.
Reverb On Bass?!
It's a truism about mixing that you should never put reverb on bass instruments, but don't be afraid to experiment — if you're aiming for the most coherent sound, you don't necessarily want your kick drum or bass synth sticking out from an otherwise wet mix. After all, if you're recording a drum kit in a room, the overhead or room mics pick up reverb from the kick drum as well as the other components of the kit.
Wide Words
If your mono guitars and vocals are staying resolutely in the same narrow corner of the stereo field while your sampled piano arpeggios are leaping around all over the place, the results can be disconcerting. Some sampled instruments and synth patches have a broad stereo spread that places low and high notes almost at the extremes of the left/right stereo spectrum. This makes sense if you're playing solo piano, since you can think of your stereo speakers as being at either end of the keyboard, with the listener close to the piano. In the context of a multi‑instrumental recording, however, the listener's perspective will of necessity be much further away — how often, when you see a band, do you get close enough to the stage to discern any stereo spread at all across the piano keyboard?
If you're aiming to use samples to recreate a 'virtual band', then, you may need to rein in the stereo spread of some of your samples: keyboard instruments and drum kits are the usual culprits. Some sample programs and synth patches may also be treated with effects that exaggerate their apparent stereo spread, or make them sound as though they're moving around in the stereo field.
Of course, there's no reason why you have to try to make your mix sound like a natural recording of a live band playing, and sounds with a wide stereo spread can make for impressive listening. If you want to use such sounds, and find that your live instrument recordings sound static and narrow or distant by comparison, there are various things you can do to improve matters. The most obvious is to record instruments such as acoustic and electric guitars in stereo, where possible. You could also try double‑tracking instruments and panning the two tracks hard right and left, or using both a DI and a mic to record an acoustic guitar part. Using a stereo reverb or some other effect with plenty of motion can also help.