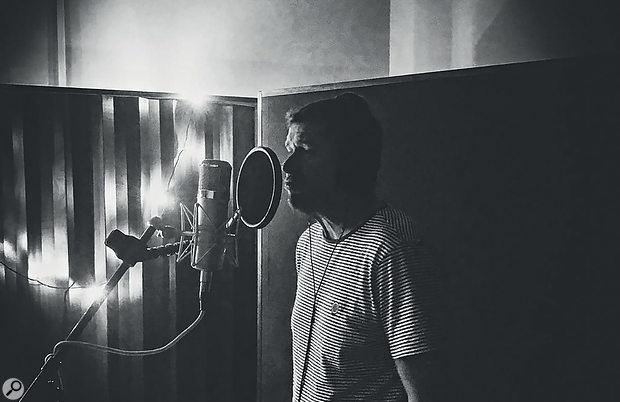
 The New Fools' songwriter/singer Tony Jenkins.
Despite the bewildering array of plug-ins now available, mixing still requires you to exercise good judgement with the basics of EQ and compression.
At its heart, mixing is a series of decisions. Some are big, but most are small and they're made in quick succession, and it's oh so important to retain a razor-sharp focus on what you're actually trying to achieve if you're to keep making good decisions. It's not as easy as it sounds. Recently, I was struck by how, during the 5-10 seconds it takes me to decide which plug-in I'll use to do something, I can become distracted, even if for only a few seconds. Faced with so many choices, my mind wanders — and I lose sight of what I'm trying to achieve.
With that in mind, and in an attempt to speed up my mixing, I've conscioiusly tried to reduce the number and complexity of my mixing decisions by using fewer plug-ins. It encourages me to trust my skills and experience to solve problems, rather than to hope for quick fixes (which rarely seem to materialise). I don't know if my mixes actually sound any better for this, but I'm definitely mixing faster, and seem to be on a nice run of work where clients are signing off mixes with very little fuss!
This month's mix is of the track 'Martine' by Cambridge-based band the New Fools, and it provides a good illustration of many of the changes I've made to my approach lately. As well as mixing 'Martine' I also recorded it, and that's important to note because in the recording sessions we got a lot of material down very quickly, and the band were excited about how things were sounding. It's easy to lose sight of this energy and enthusiasm when it comes to mixing, and feel that you have to reinvent something that actually doesn't need reinventing at all. For this song, there were certainly a few issues to deal with, as I'll explain, but things had been recorded with care and I'd even printed most of the analogue effects I'd played with at the recording stage on the vocals and guitars (see 'Printing Effects When Recording' box). For a project like this, the recording sessions are where the big decisions should be made; mixing really shouldn't require three days in a dark room and hundreds of plug-ins!
Mixed This Month
The track 'Martine' is by Cambridge‑based band the New Fools, which comprises songwriter/singer Tony Jenkins, guitarist Drew Keen, bass player Dave Seabright and Pete Carter on drums. They're currently putting the final touches to their latest album, which will include 'Martine'.
Mixing By Numbers?
One obvious way of getting a mix up and running quickly is to use a well thought-out mix template, which I've written about before. This can make it easier to make creative effects choices because you spend less time on other things. If you're not sure what to put in your template, you can even download various star mixers' templates to use yourself — these can be a fantastic learning resource — but I think it's important to question whether some techniques that templates might steer you towards are actually right for the specific production you're working on.
Many include things like parallel or multiband compression and saturation or distortion effects, and while I use such processes a lot, it's important that you apply them correctly and in the right context. Otherwise they can do the opposite of what you want, like make things sound smaller when you're trying to go big! And even if they do deliver what you want, you can still be left unsure about how to get things right next time; it's important to me that I feel in control of what I'm doing, so I can develop my skills for future mixes and not rely on good fortune every time. So while I do use a template of sorts to save time, I adapt it for each project, and I try to look first and foremost to the basic bread-and-butter tools of mixing — basic EQ, compression and fader moves — before turning to more sophisticated options.
Drum Compression
The drums in this song are a case in point. They did not need to sound huge, or make any special statement when they came in; they just needed to do their job in this song, which was to carry the rhythm and sit well in the low end with the bass guitar. I'd estimate that at least 95 percent of the processing was unexciting, albeit careful, use of compression and EQ. It's also worth pointing out that you don't have to use every track you're given for a mix. In this instance, I had a reasonable selection of drum-mic tracks to choose from, and after spending a few minutes trying things out I had no problem jettisoning both of my room mic options, along with the outside kick and bottom snare mics. All these mics sounded cool on their own, but they were adding very little to the feel of the song and muddied up the low end of the kick drum a little to boot.
So the initial drum-kit sound in this mix comprised just kick and snare close mics and a stereo overhead, all routed into a 'drum group' aux track in Pro Tools, via which I could add processing to the whole kit. The drummer had played quite a busy syncopated hi-hat part, and it worked OK as long as the hi-hat wasn't too loud. So I felt that whatever processing I would look to use on the drums, I needed first and foremost to make the drum performance feel more even and consistent.
In keeping with my new minimalist approach, I did this using fairly conventional compression, but it was quite tricky to achieve without also making the drums sound too 'blown up' for the song. The answer lay in using multiple compressors to apply small amounts of gain reduction: a little in stages on the tracks themselves, and then a little more at the drum bus and the stereo mix bus.
I found using two instances of a compressor in series helped me even out the playing in the most transparent way on the kick and snare mics. The first had a higher ratio and faster attack to catch the louder hits, and the second had a lower ratio with a slower attack and fast release for more general smoothing. (The fast release means the gain reduction can reset before the next hit.) The subtle differences when changing the basic controls of attack, release and ratio on a compressor aren't always immediately obvious (even when you've been doing this a number of years!) but one thing I think helps is to opt for neutral-sounding but functional compression tools to do some of the 'donkey work' — I think this really helps you to understand just what it is you're working on, and it's thus a great way to tighten up your mixing skills.
 Two instances of Pro Tools' stock compressor were used in series on the kick drum.
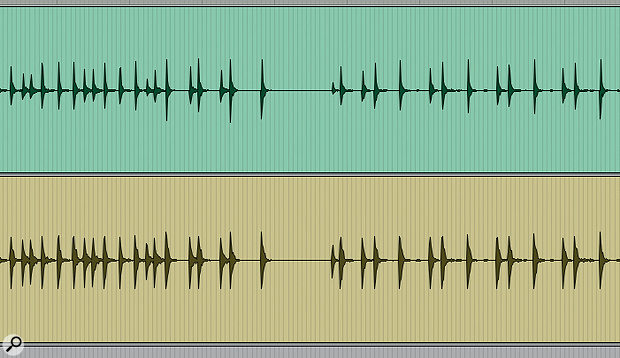
  You can see in the 'before and after' images of the waveform how the compression reduced the difference in level between the quietest and the loudest hits.
In this case, I used the stock compressor in Pro Tools. If you struggle to hear what's going on when you're compressing, a good tip is to push the gain reduction a bit harder than you need until you can hear what the controls are doing, particularly in respect of the attack and release. You can then back the gain reduction off to a more usable level and, hopefully, will have a clearer sense of whether or not it's helping. (If it's not then don't use it!)
After the carefully judged compression, all that the individual drum channels needed was achievable using a single plug-in that I often turn to: Waves' SSL Channel Strip, which as the name implies includes a number of basic mixing tools. Mostly this involved EQ, but I also used a little gating on the snare to reduce the spill from the hi-hat. Like the Pro Tools compressor, I've used this plug-in for so long now that nothing is going through my head when I use it other than if I like how it sounds or not!
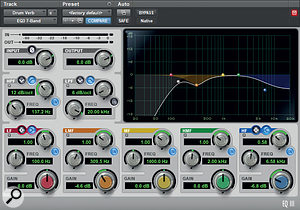
 The send signal was EQ'ed before hitting the reverb to clean up the low end, using Avid's EQ III, to ensure the kick-drum sound remained focused.
 The Valhalla Room reverb plug-in was used to add some extra ambience to the whole drum kit.All that detailed work with my basic mixing tools got the drum sound most of the way there. On my drum bus, I did use a more characterful EQ and compressor to shape the sound towards the later stages of the mix, but I was careful to do this stage listening to the mix as a whole, and not in isolation. I also felt I needed to introduce a little bit of 'space' around the kit, because it was now quite close-mic heavy, and I used reverb for this.
When adding reverb to drums, I tend to find that I get the most natural-sounding results by taking a send off the kit as a whole, and in this instance I fed the Valhalla Room plug-in in this way, with an Avid EQ III pre the reverb to reduce the low end a little.
Bass & Guitars
The bass guitar was very straight forward, and I resisted the urge to experiment; much like the drums, this instrument just needed to sit there and do its musical job. The bass consisted of a single track that I'd recorded via DI, and it had been generously compressed at the recording stage (see box). All I did to it in the mix was 'top and tail' the part with high- and low-pass filters (at 30Hz and 6kHz, respectively), and just apply a little bell EQ boost at 1.5kHz to help the bass sound cut through the guitars. I also sent just a touch of the bass to the same reverb aux I'd used for the drums — it wasn't so much that the bass needed reverb, but as the drums and bass had been recorded together I liked the idea of trying to make them feel like they were in the same room. This was all pretty subtle stuff.
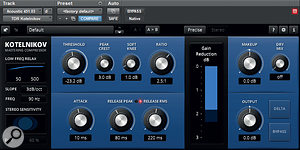
 The main acoustic guitar part was in decent shape, but Tokyo Dawn's Kotelnikov mastering compressor was used to firm it up a little.There was a main acoustic guitar part in the track that, along with the lead vocal, worked to pull the whole track along. I think we captured a great sound at the recording session — and I'm not blowing my own trumpet here, since if I remember correctly the result was more due to auditioning to decide on the right guitar than any mind-blowing recording technique on my behalf! Acoustic guitars can be tricky things to manipulate in a mix, because any processing can quickly become 'heard' if used more than subtly, but I had a great starting point.
It's a good feeling when you pull up a fader, sit it roughly where you think it should be, and discover that it just works — and that was very nearly the case in this mix, except that it felt like the acoustic just lost its place a little when the arrangement as a whole got a little busier. Some level automation certainly helped, but I found that creating a duplicate of the part, which I treated slightly differently, worked great when introduced just on the chorus and outro sections. Again this was subtle stuff, and I used low-ratio compression with a slow attack combined with a little EQ boost around 3kHz.
