With enough time and effort, you can get a reasonable mix from even poor recordings... but proper attention when recording will save you hours of frustration and get you a much better result much more quickly!
 By placing the snare-drum close mic right next to the instrument's top head, the band had ended up with a very unrepresentative sound that was next to useless for mixing purposes — it was mostly just a stick impact followed by a cluster of ugly pitched resonances.
I spend a lot of my time researching the techniques of top producers by trawling through interviews, and one of their most common gripes about the rise of software-based recording is that it encourages musicians to postpone important production decisions. Here's Joe Barresi, for example, sounding narked back in SOS July 2005: "Many people delay their decisions indefinitely. They'll mic the kick drum inside and out and print them separately. But at some stage you have to make a decision: here's the drum sound. Whether you have 20 or four tracks of drums, you have to commit at some point. And the sound of the drums affects the way the guitars and bass will sound. But people buy a computer rig nowadays and they never have to make a decision, because they have Mic Modeler and Sound Replacer and unlimited tracks. When I mix, I get a lot of projects in that have been recorded on Pro Tools and where I spend ages trying to work out what the actual guitar or drum sound is. It bums me out.”
This month's Mix Rescue submission, from a UK band called Flags, was something of a case in point. I was immediately attracted to their song '54' on a musical level, because of its unusual 5/4 rhythms, Jeff Buckley-esque instrumentation, and intriguing sound-design elements, but I had to agree with the band that the sonics didn't yet provide a good platform for presenting all these ideas. Upon receiving their raw multitrack files, the biggest reason for this soon became clear: although (with the very best of intentions) the band had filled up 63 mono and stereo tracks with all sorts of different mic placements and additional overdubs, they'd done this without ever properly committing to the sounds and song structure during the tracking. As a result, they'd effectively ended up with raw tracks that were all but unmixable, even with the help of their decent collection of Waves plug-ins.
 The only mic on Flags' multitrack that captured anything like a usable snare sound was the under-snare close mic, although this still needed some serious EQ notching to rebalance some undesirable pitched resonances.A lot of what I end up writing about in Mix Rescue are mixdown salvage techniques, but I'd like to deviate from this model a little this month and focus instead on how Flags managed to store up so many mix problems for themselves while tracking, because most Mix Rescue candidates usually make at least some of the same errors. More importantly, I'll also suggest how Flags (and anyone else recording their band on a budget) might adjust their recording approach to make mixing easier for themselves in future.
That said, I can understand that some readers may want to know all the gory technical details of what plug-in settings I used for my remix, so for this purpose I've uploaded my complete Cubase 5 project file — it only requires the sequencer's bundled plug-ins to load up, so anyone with a modern version of Cubase should be able to examine it. I've also provided the original raw multitracks, in case you fancy trying your own remix.
Where's The Snare?
 to reduce cymbal spill, limiting to even out the performance (middle), and transient enhancement to lend the sound more punch.") The under-snare mic needed three different dynamics fixes before it would fit properly into the remix: gating (far left) to reduce cymbal spill, limiting to even out the performance (middle), and transient enhancement to lend the sound more punch.
The under-snare mic needed three different dynamics fixes before it would fit properly into the remix: gating (far left) to reduce cymbal spill, limiting to even out the performance (middle), and transient enhancement to lend the sound more punch.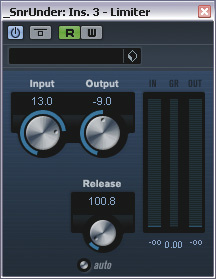

Judging from the track sheet, the drum setup seemed to cover all the normal bases, with close mics for kick, snare (top and bottom), hat, rack toms and floor tom, as well as stereo overhead mics and a mono room mic. However, the first big problem was that none of these nine mics had managed to capture an appealing snare sound — arguably the kit's most important instrument! On the evidence of the room mic, which I usually expect to capture a fairly natural balance, by virtue of its more distant placement, I reckon that the choice of snare drum may have been a big part of the problem, because the snare comes across very quietly compared with the rest of the kit components on that channel. This trend was also apparent in the overheads, although it had been exacerbated by 'textbook' mic placement (namely a spaced pair of mics pointing down towards the cymbals from directly above), which meant that the cymbals were much louder and more present in the mic signals than the more distant, off-axis snare.
The top snare close-mic had been placed much too close to the head, in order to minimise spill from other instruments on the mic, so all it had really picked up was lots of muddy stick thump and a pile of ugly pitched resonances — like someone hitting a saucepan with a wooden spoon! That left only the under-snare mic showing any real promise, because it appeared to have been placed far enough away from the drum to pick up something of its tone, albeit rather heavy on the rattle and bathed in spill from the kick and cymbals. In short, it was the kind of situation where I'd normally hurry off to my sample collection in search of a replacement. In this particular instance, though, the drummer had used a lot of rolls and ghost notes, which I know from experience are very difficult to replace convincingly using samples, so in the end I decided to limit my sample usage to more of a supporting role on the main hits, and build the bulk of the sound from the under-snare signal instead.
It has to be said, though, that it was a bit of a palaver! First of all, I set to work with the EQ, removing kick spill with high-pass filtering and pulling down a series of unflattering narrow-band resonances with narrow peaking cuts. Then I dialled in the dynamics, first gating to reduce the cymbal spill (but later automating the threshold to allow more details from the snare fills through), then limiting to even out the performance, and finally adding 3dB of extra attack using the Envelope Shaper plug-in. Under-snare mics aren't usually great for attack, and even after the transient enhancement I felt I needed a little more bite, so I high-pass filtered and gated the over-snare mic viciously to remove all but its high-frequency onset spike, and mixed a little of that in as well.
To these two tracks, I added my triggered stereo snare sample (using an instance of Halion One triggered via Koen Tanghe's freeware KTDrumTrigger plug-in), removing its attack completely so that it filled in some of that missing snare ambience in the overheads without any risk of flamming. A fairly heavy stereo ambience effect from Cubase's Reverence convolution reverb was also applied for similar reasons, and both these steps helped to blend the composite snare sound better with the kit as a whole. A final touch was to add in a subtle little single eighth-note delay repeat, with all its attack removed using Envelope Shaper, in order to improve the drum's apparent sustain.
Even if you're mixing on a budget, it shouldn't really be as hard as this to get a snare sound — and if it is, then you need to reconsider your tracking techniques. The key to making it easier is to actively decide during the session how you want the drums to sound, rather than trying to sit on the fence too much. That way, you're more likely to change things around if you're not hearing something that sounds as though it belongs on your record. With drums, typically it's the overhead mics that are best placed to catch the snare sound, because they're far enough away to capture a realistic impression of the whole instrument, so my recommendation to most home-studio users is to make sure the snare (and, indeed, the kit as a whole) sounds good in the overheads first. If you can't get the overheads sounding good after 15 minutes of moving mics around, then the likelihood is that the kit needs some adjustment, or the player needs to change the balance of their playing. It's perfectly manageable to get 90 percent of your drum sound out of a well-placed stereo mic pair, and in that happy eventuality, mixing becomes a walk in the park: add a bit of each close-mic if you want extra definition (or if anything needs minor rebalancing) and then reach for a bit of compression or reverb as necessary to supply extra sustain, blend or spaciousness to taste.
Acoustic Guitar
 Here you can see the mic rig Flags used for recording the main guitar part. Although, in theory, multi‑miking techniques can help capture a more balanced picture of the instrument, in practice none of the mic positions used flattered the instrument at all, causing difficulties at mixdown.
From an arrangement perspective, the acoustic guitar part was clearly much more important to this song than you'd expect in a typical band production, because it was being expected to provide the harmonic guts of the rhythm section pretty much single-handed. In this context, it was understandable that Flags chose to multi-mic that instrument too, because this can both capture a fuller tone within a close-miked setup and allow some width enhancement by virtue of panning at mixdown.
Unfortunately, though, none of the three microphone signals actually delivered the goods. The first thing to say here is that this would usually suggest to me that the guitar itself wasn't up to the job, but even had that not been the case, there was also the issue that all the mics were cardioids placed very close to the instrument. This had three main consequences: each was effectively spotlighting a very small portion of the overall instrument, giving an unnatural sound; the proximity effect was unduly tipping up the bass response; and the mechanical noises (fret squeaks and pick noise) that would normally dissipate rapidly with distance were highlighted mercilessly. The location of two of the mics close to the soundhole didn't help either, emphasising the pick noise and also introducing a pronounced air-resonance 'boom' on the lowest notes. Again, this is the kind of situation which would have been unlikely to occur had the band been more focused on creating a finished guitar sound from the outset, because that would have made them keep asking the question 'does it sound right yet?' — a question that needs answering for each and every mic you record.
A better approach next time would probably be to set up a mic (or crossed stereo pair) a couple of feet from the instrument and then to spend a few minutes moving it around to find a sound that filled out the arrangement as required. I'd also expect to beg, borrow, or hire a couple of different guitars to improve my chances of finding the required tone, and to work out which picks and strumming methods came across best. Some experimentation with the room acoustics would likely play a role too, either to tame unwanted room reverberation or to enhance the recorded signal by directing more of the instrument's radiated sound back towards the mics. Once a respectable sound had been achieved in this way, you could always go for bonus points by using additional mics to supplement your foundation timbre. (For more tips, check out my guitar-recording feature back in SOS April 2010.)
As it was, though, I had another big job on my hands trying to find something that would hold its own in the track. My first step was to eliminate one of the soundhole mics (a dynamic), which didn't seem to be offering anything worthwhile — just lots of pick noise and soundhole 'woof'. The remaining two tracks both needed processing to reduce pick noise, in the one case an instance of Envelope Shaper with the Attack set to minimum, and in the other an instance of Multiband Compressor with fast, high-ratio compression operating in the two higher frequency bands. The reason for choosing the latter was that I also wanted it to reduce some fret noise, which Envelope Shaper wouldn't have touched because fret noise isn't a transient signal.
 The high levels of pick/fret noise and sound-hole boom on the multi-miked acoustic guitar part required heavy-handed transient processing and multi-band compression to salvage a usable sound.
 Both mics also needed high-pass filtering, particularly the one close to the soundhole, which was catching a breeze created by the player's strumming hand, generating some alarming sub-sonic woofer excursions. The fretboard mic was EQ'd further with low‑pass filtering and a couple of peaking cuts to tackle a rather abrasive high-end. Mixing the mics together began to approach a more solid sound, but I still yearned for a bit more meat to the mid-range. I tried equalisation to bring this out, but that only really works if the frequencies in question are actually present, and in this case that region proved to be pretty sparsely populated with harmonics.
In order to add density to that frequency range, therefore, I turned to distortion, which generates new harmonics rather than just rebalancing what's there. I fed the guitar mics to an instance of Cubase's Amp Simulator plug-in, emulating a valve amplifier, and then bracketed this into the mid-range with filters. The sound was still a bit abrasive, though, so I watered it down a little using some chorusing, which also served to spread the distortion sound across the stereo picture a little, out of the way of the central instruments. Lashings of stereo tempo-sync'ed delay and my two main global reverbs (an ambience and a hall) filled things out even more, so that the part finally began to function satisfactorily in its intended role.
Bass: Pitching, Timing & Tonal Sculpture
 A considerable amount of timing correction was required to tighten up the song's groove — as you can see here in the drum parts during the song's outro section.
The biggest problem with the band's original bass part was that it was out of tune with the guitar, and although I tried a selection of different tuning tools (including Cubase's VariAudio and Celemony's Melodyne) it defeated them all! I simply couldn't get the tuning correction I wanted without unacceptable wavering and chorusing side-effects, or just general note break-up. The only option left was to contact the band and ask them to re-track the part. My suspicion is that they had trusted the display of their digital tuner over their ears during the initial tracking, which is a trap that a surprising number of people seem to fall into. However, once forewarned of this, they were soon able to turn around a replacement part, which fixed the problem.
Well, for the bass and guitar parts, at least... because the rest of the arrangement had, of course, been overdubbed against a backdrop of ambiguous tuning, and therefore the tuning of many of the other parts had also suffered. Fortunately, the remaining foibles were fixable with Melodyne, so I didn't need any other re-tracking. That said, widespread tuning-correction does take a lot of time (even if you've had as much practice doing it as I have!), so the band could save themselves some work here in future by keeping close tabs on preparatory tuning during future recording dates. The timing of the bass and guitar parts also felt quite loose compared with the drums through most of the track, and detracted from the rhythmic drive of the song. This, again, had knock-on effects for the overdubs, so I did end up doing quite a bit of timing correction across the board for my remix. Although there can be a danger of making the production sound sterile if you get too finicky about this kind of thing, most budget productions usually err a long way in the other direction!
 The first tactic Mike employed to thicken the mid-range of the DI'd bass-guitar part was re-amping it through Cubase's Amp Simulator plug-in.From a sonic perspective, I felt that the bass part had an important role to play in filling out the mid-range of the rhythm section, so I dialled up more parallel distortion processing (using Amp Simulator) to thicken the basic DI sound — otherwise even maxing out my EQ boost wasn't giving me the tone and cut-through I wanted. Despite this, I still couldn't shake the feeling that the mid-range was lacking something, so my final step was to draft in a clavinet sound from Halion One, running through another instance of Amp Simulator. Putting this up alongside the rest of the arrangement, I EQ'ed it fairly brutally into the right frequency pocket, and then diffused it across the mix using a Flanger plug-in and some of each main reverb send. This proved to be quite successful, gluing the guitar and bass parts together into something more cohesive, by occupying the middle ground between them. However, I was careful not to fade the synth part too high in the mix, so that its electronic nature didn't undermine the rock credentials of the overall rhythm-section sound.
More Multi-miking!
For the djembe and percussion parts, the multi-miking was once again out in force. Fortunately, these recordings presented fewer mix difficulties than for the main mix parts, simply because the parts were less prominent in the texture. In most of these cases, I just settled on the furthest mic placement for the most natural timbre, and this didn't cause any real problems, given the fairly reverberant sound of the mix as a whole.
The djembe took a little more work, mostly because all four mics used seemed quite close, so the transient spikes were a bit distracting — nothing that Cubase's Maximiser and Envelope Shaper plug-ins couldn't handle, though. The timing of these parts was a concern too, primarily because it was fighting that of the drum kit, so a lot of slicing and dicing went on here. Luckily, the texture was by now fairly full‑sounding, so I could get away with editing pretty freely without the edits becoming audible. If you listen to these parts soloed, they sound a bit ragged on account of all the cuts, but in context I think I managed to get away with it!
Outro Rearrangement
 For the song's chorus and riff sections, a programmed clavinet was added from the Halion One instrument, to further fill out the mid-range of the bass line, and this was further processed with Amp Simulator and Flanger effects, before being funnelled into the most useful spectral areas using EQ.
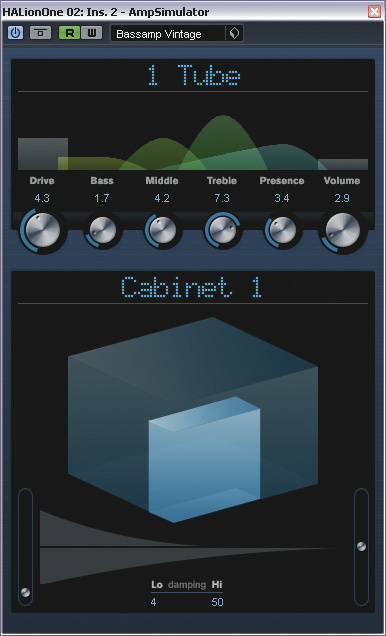


I've discovered with previous Mix Rescue remixes that some arrangement issues only really become noticeable to the artist once the mix in general is more in keeping with commercial expectations. So it was with this song, where the prevailing mood amongst the band following my first-draft mix was that the outro just seemed to be treading water. Although I'd done my best to bring out what interest there was to be gleaned from the added synth effects and percussion parts, the 60-second outro's freeform nature just didn't seem to give any real sense of build-up. A minute is a long time in musical terms, so you need some kind of structure to sustain momentum, even if that structure is less clearly defined than it might be for typical song-form sections such as verses and choruses.
The way I approached it, therefore, was to try to come up with a structure after the fact, and then edit the available parts so they supported that aim. In the process, I decided to shorten things by about 15 seconds as well, bringing the bar-count down to 32 and giving me four fairly standard eight-bar sections to deal with — which felt more logical, musically speaking. Part of the problem was that the rhythmic pulse seemed to be getting slightly bogged down in rhythmic complexities and cross-rhythms, especially from the various different hand-drum parts. While I'm a fan of this kind of thing in general, I think it's important in 5/4 time-signatures for the bar divisions to remain fairly clear most of the time, so that the listener has something concrete to hold on to. My answer to this was to simplify a couple of more complex sections where I felt the pulse was getting lost.
Once I had the rhythmic backbone of the kick-drum and hand-drum parts working, I could start creating a more persuasive build-up by introducing the other percussion layers in a progressive way, reinforcing the boundaries and mid‑points of each eight-bar section where possible. This already began to improve the movement of the outro as a whole, so at this point I redistributed the existing synth effects across this new backing and sent the band another version. Verdict: better, but still no cigar!
Pushing the rest of the outro rearrangement further seemed to be the most likely route to a solution now, but initially I couldn't think how to do this, because it felt like I'd already gone as far as I could with the tracks available. However, it suddenly occurred to me that I'd already migrated some of the outro‑section synth effects to the song's middle section for some added interest there, and that the same idea might work the other way around — in other words, that the main song's musical material might be able to cross-pollinate the outro. So I added in the main bass riff for the last eight bars, added in the guitars four bars later, and capped it off with a flown-in vocal phrase. This suddenly gave an extra lift to the final eight-bar section, allowing the previous three sections to build a little more rapidly and convincingly, and allowing me to put together a remix version that finally seemed to fit the bill.
Less Is More
All in all, this has got to have been one of the most challenging Mix Rescue projects I've had to deal with, but given the quality of the music it really needn't have been — because almost all the problems I encountered are quite avoidable, even in a budget recording situation. You simply need to demand answers to some important questions at the earliest possible opportunity:
1. How should the song be structured? Deciding on a clear structure for each section of your song gets you thinking in terms of arrangement build-up from the earliest stages, making it more obvious when additional parts are required — or, indeed, superfluous!
2. Is the instrument in tune?
Tweaking the bass tuning while overdubbing would have saved a pile of mixdown tuning‑correction work in this production.
3. Is the performance in time?
Addressing small timing corrections with punch-ins or editing after each stage of tracking this song would improved each subsequent performer's timing in relation, thereby obviating the need for wholesale audio editing later on.
4. Do I like the sound I'm recording? Committing yourself to the sound of an instrument while recording might feel a bit scary, but what it does is focus everyone's minds on developing the sonics properly from the outset, and allows subsequent arrangement decisions to be made within the context of how you actually want the record to sound.
If your raw recording doesn't already sound pretty good from a basic rough mix, the bottom line is that you should probably still be arranging, tracking, comping or editing. If you leave these chores until mixdown, not only will the mix be very time-consuming, but you'll also struggle to achieve anything like the polished sonics expected of most commercial productions.
Rescued This Month
 This month's Mix Rescuees, Flag, in the studio.Photo: www.debbieharephotography.co.ukFlags are a London-based band who forge their own distinctive sound by combining alternative rock attitude with an enthusiasm for samples and synths, and then mixing in unexpected rhythms from African tribal music. They cite influences including Dave Brubeck, Jack White, Ladysmith Black-Mambazo, and the post-'66 Beatles, and they can now be found performing regularly in London — watch out for announcements regarding their UK tour later in the year. The line-up includes Marc Girdlestone (vocals, guitars, electronics), David Joyson (vocals, djembe, electronics), and Pete Knapp (vocals, drums), and all three pitch in together for percussion duties. The bass part for this track was provided by friendly session player Kieran Reeves.
Remix Reactions
Marc Girdlestone: "When I first heard the start of the remix, it made me really excited! I'd heard it thousands of times before, but Mike's mastery of those first djembe tones, followed by the swell of the synth, made it sound really fresh. The remix is much more commercial and polished than ours, which is exactly what we were looking for. The subtle way that Mike used compression is an art-form or superhuman ability that I doubt I will ever truly understand. He also worked the elusive frequency sweet-spots of all of the instruments — something that was missing from the original mix.
"The whole band are pleased with the subtle changes to the song's arrangement too. The synth sounds Mike reworked into the four-bar breakdown after the second verse caused me to actually say 'Wow!'. The different approach to the outro did get mixed reactions from us, though. Mike chose to bring the synth sounds forward in the mix at the cost of pushing back the percussion, which is opposite to the arrangement of the original mix. However, because our opinions on this were so different, we decided that it was probably a matter of individual taste: personally, I think Mike's outro sounds more innovative this way. Thanks to Mike for all the hard work!”
Audio & Project Files Online
We've placed a number of files on our web site at /sos/mar11/articles/mixrescuemedia.htm so you can hear the changes Mike made in his remix. These include before and after audio files, as well as the raw multitracks sent in to Mike and the full Cubase 5 project file of his remix.