If you’re struggling to get everything in your mixes coming across loud and clear, read on.
I’m often asked how people can achieve ‘better separation’ in their mixes. Typically, they’re making comparisons with commercial mixes and feel that theirs sound ‘muddy’, or ‘lack definition’. Sometimes they’ve noticed that occasional syllables, notes or drum hits don’t seem loud enough, no matter where they set the fader or how they compress or EQ them. Or they may wonder why they struggle to make synths or guitars loud enough without the vocal losing impact. This article aims to help you get your head around such problems, and equip you to tackle them or, better, prevent them arising.
Making Arrangements
Clarity and separation start with a good arrangement: every mix engineer must be able to recognise when decisions taken when writing and arranging are causing problems. If you’re mixing your own tunes, you can attend to these before they arise, since you have control over which instruments/sounds play which parts, when and in what register. So think ahead to the mix when making these choices.
Every mix engineer must be able to recognise when decisions taken when writing and arranging are causing problems.
Our hearing is most sensitive in the 1‑5 kHz region, and definition here is crucial to our ability to discern lyrics. The main energy of vocal consonants is found around 2‑4 kHz, and the more other sounds occupy this area while the singer sings, the more effort you’ll need to put in to achieve a pleasing balance. A sensible plan, then, is to write parts and choose sounds that naturally leave space. This can be approached in the frequency domain, for example by changing notes, transposing parts or trying different sounds; in the time domain, by making other parts less busy; or both, for instance by shaping a synth’s amp envelope to reduce the clash between its note onsets and vocal consonants. Good musicians will grasp all this instinctively, shaping their sound and performance to best serve the song. Acoustic guitarists or pianists, for example, might play more minimal parts or different inversions during vocal phrases than they do in the gaps between them.
If you’re involved in a separate recording stage, you can also put thought into the frequency real‑estate each sound needs to occupy in the mix. For example, scooped, distorted electric guitars can sound impressive in isolation. But they can eat up a huge amount of space and have real potential to clash with a bass guitar or drown out a vocal. It’s much easier to pile on the dirt and pull down the mids later, when mixing, than to tone down baked‑in distortion or add in frequencies that you didn’t capture! A clean DI track offers an insurance policy in this case, but the more you record with the mix in mind, the fewer compromises you’ll make in the name of better separation.
Mix Prep
Even if you can’t influence proceedings until the mix, you can still make arrangement decisions. On checking out the multitracks, you’ll often find that the artist struggled to let go of musical ideas that don’t really add much to the song. While you must be sensitive to the artist’s vision, you’d be missing a trick if you didn’t try muting these parts, especially at points where they seem to fight with or obscure other parts.
 Don’t overlook your DAW’s basic editing tools: use these to clean up the arrangement and performance, and you’ll need to ask far less of your processing and automation.
Your DAW’s standard editing tools can help you clean up and tighten performances too, which helps with definition. Be on the lookout for sloppy timing and bum notes, which can leave a mix feeling sluggish and unfocused. Everything needn’t be ‘nailed to the grid’ (a quick road to a ‘robotic’ feel) but at least make sure the first beat of each bar is on the money, and trim any notes that obviously ring on too long. Also listen out for how tightly the syllables track in stacked backing vocals, and if they need work, use either scissors, time‑stretches and fades or, if you have one, an automatic tool such as VocAlign to get them working in unison.
You can also go through the multitracks and eliminate undesirable noises. Bumps, thuds and clicks are usually edited out fairly easily — even if that means pasting a note or phrase in from elsewhere in the recording. Cumulatively, this sort of tidying up can have a huge impact on the listener’s perception of clarity and definition, so don’t be scared to get busy with those scissors!
De‑noising plug‑ins can help if there’s prominent hiss, and these work better before you apply other processing, but I suggest using them only where required, since they can have unwanted side‑effects. (On the subject of noise: some modelling plug‑ins have a noise generator to help mimic analogue gear — it’s just one more sound to get in the way, so where possible I’ll turn that off!)
Finally, at this mix‑prep stage you can start your serious EQ work by removing any obvious ugly resonances — I’ll discuss that shortly. Some corrective processes, though, I reckon you’re better leaving until the mix. It’s hard, for example, to judge the settings of de‑breather and de‑esser plug‑ins before you’ve got all your other mix processing up and running.
Who Goes First?
When you’re all set to start the mix, it can be helpful to mentally ‘rank’ the parts in order of musical importance — figure out which sounds need to take precedence over others, and start your mix by getting the most critical elements working together. Then you can assess the remainder as you bring them in, and in most contemporary genres you can sculpt and automate these as much as you like to fit them around that solid spine. This buys the ‘big‑ticket’ sounds all the space they’ll need to come across with clarity and definition. Try to think of effects such as reverbs and delays as separate sources; setting them up as send effects rather than inserts allows you to process them like anything else in the mix. Top of your table will probably be the lead vocal (however loud you prefer it, the lyrics should be heard) and any lead instrumental solos. But just as important will be what drives the song’s groove — usually that’s the kick, snare and main bass instrument, but the hi‑hat or congas could be important, as could a rhythm guitar, a piano, a sequenced synth or whatever.
...mentally ‘rank’ the parts in order of musical importance — figure out which sounds need to take precedence over others, and start your mix by getting the most critical elements working together.
There’s also the question of which part of the song you start building first. When parts clash, you’re often tempted to keep on raising the faders to make things heard, until you run out of headroom (or fader travel) and start overloading any compressors, tape sims and so on that are further down the signal path — again, something which can rob sounds of definition. One way to avoid this is to start by balancing your mix at the loudest and most dense part of the song (often that big, climactic chorus and outro). Work back from there to make the rest of the mix build up to that point, and you can be sure that the mix will deliver its payload with confidence.
Filters: Clarity & Depth
High‑pass filters (HPFs) can do loads to improve definition in the low end and low mids. A 70Hz 12dB/octave HPF on most sources other then the kick and bass can generally clean up any low‑frequency detritus without unwanted side‑effects; even a drop‑D guitar offers nothing useful below 70Hz. But it can often be helpful to use gentler (6dB/octave) HPFs at higher frequencies, to nudge other sources out of the way of the kick and bass — their sonic character is defined more by their attack and the harmonic content of their sustain than by their fundamental frequencies. How high you can roll these filters up will depend on the expectations of the genre and how ‘natural’ an aesthetic you’re aiming for, but the less important the part, the more likely it can work with more of its low end filtered out. (And electric guitars sometimes have way less low end in a mix than you first imagine, with your ears being fooled by the contribution of the bass.)
If you’re not used to making these judgements, a helpful ear‑training exercise is to create a subgroup for everything other than the kick and bass and put a (temporary) 80Hz HPF with a 6dB/octave slope on that bus. With the whole mix playing, slowly roll the filter frequency up, listening carefully for changes in your perception of the kick and bass. Note down the frequency at which these start to gain more clarity. Then repeat, but focus your ears on the other sounds, listening for when each starts to suffer from the lack of low end. It’s important to do this in the mix context, not with instruments soloed.
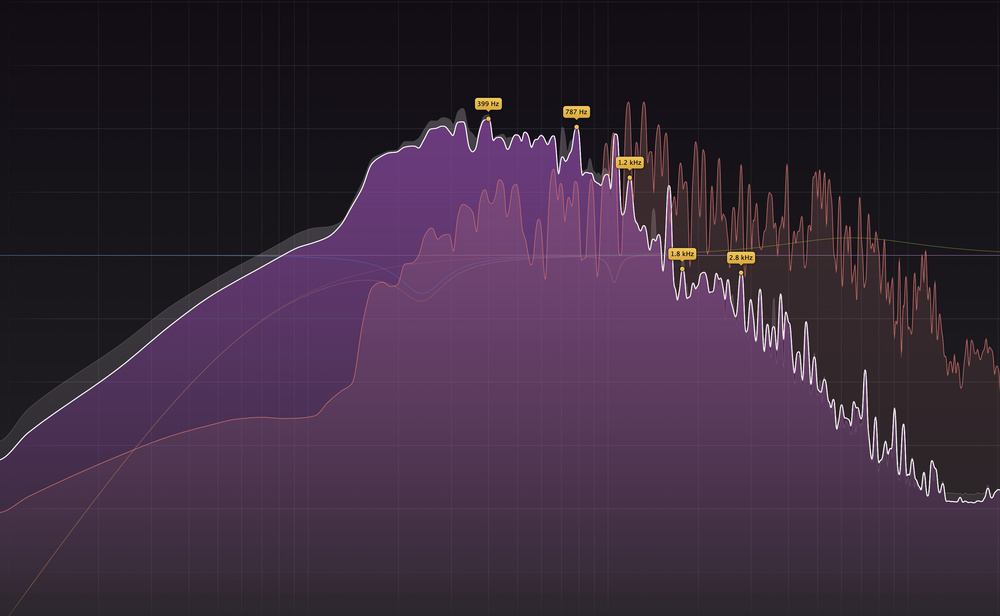
 and low‑pass (high‑cut) filters are useful for different reasons — the former can carve out space in the low end and low mids, while the latter can serve to push sounds back in the mix. Listen more carefully when working with multi‑miked sources, though: as shown here, most filters also change the phase response.") High‑pass (low‑cut) and low‑pass (high‑cut) filters are useful for different reasons — the former can carve out space in the low end and low mids, while the latter can serve to push sounds back in the mix. Listen more carefully when working with multi‑miked sources, though: as shown here, most filters also change the phase response.
High‑pass (low‑cut) and low‑pass (high‑cut) filters are useful for different reasons — the former can carve out space in the low end and low mids, while the latter can serve to push sounds back in the mix. Listen more carefully when working with multi‑miked sources, though: as shown here, most filters also change the phase response.
One word of caution: high‑pass filters generally introduce phase shifts, so when working on one track in a multi‑mic recording (such as acoustic drums or a dual‑miked guitar cab) it’s important that you listen out for undesirable changes in the composite signal. For instance, the kick will spill onto the snare and hi‑hat mics. If you need to apply a HPF to the snare or hi‑hat, don’t do this while they’re soloed. Listen for changes in the tonality of all the drums captured on the mic, whether it’s the main event or spill. If you hear a problem, you can usually roll the filter a touch up or down — anywhere that doesn’t have an audible side‑effect is fine.
Low‑pass filters (LPFs) play a different role. Some suggest using them routinely to keep the high end clear, in much the same way as described for HPFs at the low end. But I think more in terms of their ability to push sounds ‘back’. The lower you set a low‑pass filter, the further a sound will appear to recede in the virtual sound stage. Incidentally, the same goes for level: the quieter a sound is and the less top end it has, the more distant away it will seem. Note that some other processors naturally act as a low‑pass filter, a guitar amp/cab emulation being a prime example — these can be great for getting sounds out of the way, and you don’t have to limit them to use on guitars.
EQ’ing Resonances
Filters won’t help where sounds are competing in the middle of the spectrum. For that you need a parametric EQ, and you should be able to achieve all you need using your DAW’s bundled equaliser.
 With careful listening and good judgement, the humble EQ plug‑in can do most of the heavy lifting when it comes to separating the important sources that you want to sound present and up front. If you’re not sure where to cut or boost, a touch of ear training can help: it can be a good idea to load up some presets for specific instruments, zero the gains and boost/cut at the preset frequencies. Learn what they sound like, and what impact cutting or boosting has on the sound.
When you’re prepping the project for mixing you can tackle any niggling resonances — ‘ringing’ or ‘whistling’ components that don’t seem beneficial to the instrument’s sound — to give the sound more definition and clarity. (As you get more mixing hours under your belt, you’ll probably find that you can do this sort of thing as you mix.) A popular technique is to sweep an EQ bell boost across the spectrum, hunting for such resonances, and then pull them down. This can work well, but you have to tread with care, as a big, narrow boost will sound horrible everywhere, and you can end up with so many cuts that they resemble a comb filter.
Here’s how I’d approach it. First, play a section of the soloed sound on loop, and listen carefully. Can you hear anything annoying ringing out, even if it’s fairly low in level? If you can, try to focus in on it by sweeping a fairly broad boost of 5‑6 dB, which will be enough to act as a ‘magnifying glass’ without misleading your ears. As the irritant comes into view, make smaller sweeps and narrow the bandwidth until you hear only the ‘ring’. It helps if you have an EQ which allows you to solo the node you’re moving, and a frequency analyser can help too, but let your ears be the judge. Keeping the EQ band at that frequency, set its gain to unity and listen again, to reset your ears. Then, bring the gain down to attenuate that resonance. Take it down only as far as you need to make the problem inaudible and the signal won’t suffer. This works particularly well for acoustic drums, including the metalwork, but it can be handy for more obviously pitched sources too — just be careful to focus on the problems, and not accidentally turn down specific notes with narrow cuts.
Hide & Seek
When you’re knee‑deep in the mix, the EQ should also be your first line of defence against any masking problems — whereby when two sounds have significant energy at the same frequencies the louder one dominates, subjectively attenuating the other in that region. Since each source’s energy distribution across the frequency spectrum varies over time, masking can cause sounds to appear uneven, both in tone and level. So even using level automation to bring the affected sound back to the fore can leave you with some tonal inconsistency.
. Another bonus is that its analyser can indicate where multiple sounds might overlap unhelpfully, causing an annoying build‑up of frequencies.") Your DAW’s EQ can almost certainly do all you need, but some paid ones offer convenient features that will help you get where you need to go more quickly. I really like FabFilter’s Pro‑Q 3 for several reasons. For one, you can solo the band you’re manipulating (great for zapping resonances). Another bonus is that its analyser can indicate where multiple sounds might overlap unhelpfully, causing an annoying build‑up of frequencies.Better, then, to tackle the underlying problem: decide which of the clashing sources is more important, and see if an EQ cut in the problem region on the other source restores the desired sense of clarity. If the compromise to the ‘secondary’ sound is too great, consider using EQ to shift its main energy elsewhere (you can also try saturation/harmonic enhancement if EQ doesn’t work). Another option is ‘reciprocal EQ’ing’, where you apply a smaller boost to the primary sound, and a smaller cut to the secondary one. As long as this doesn’t negatively affect the primary sound, you can gain just as much definition as with a larger cut.
Your DAW’s EQ can almost certainly do all you need, but some paid ones offer convenient features that will help you get where you need to go more quickly. I really like FabFilter’s Pro‑Q 3 for several reasons. For one, you can solo the band you’re manipulating (great for zapping resonances). Another bonus is that its analyser can indicate where multiple sounds might overlap unhelpfully, causing an annoying build‑up of frequencies.Better, then, to tackle the underlying problem: decide which of the clashing sources is more important, and see if an EQ cut in the problem region on the other source restores the desired sense of clarity. If the compromise to the ‘secondary’ sound is too great, consider using EQ to shift its main energy elsewhere (you can also try saturation/harmonic enhancement if EQ doesn’t work). Another option is ‘reciprocal EQ’ing’, where you apply a smaller boost to the primary sound, and a smaller cut to the secondary one. As long as this doesn’t negatively affect the primary sound, you can gain just as much definition as with a larger cut.
If you suspect that masking might be causing problems but you’re having trouble hearing precisely where, or which source is responsible, there are some helpful plug‑ins. For instance, iZotope’s Neutron has a ‘masking meter’ and FabFilter’s Pro‑Q 3 also has one built into its analyser. You insert instances on each source you want to compare, and you can see these in a single GUI, complete with a ‘heatmap’ that suggests where such clashes between sources might exist. But you can soon develop a feel for tackling these problems without the meters!
Dynamics
As well as frequency, there’s a time dimension to consider, and you can do a lot to increase the sense of separation using dynamics processors. I tend to use compressors and transient shapers a lot to tuck sounds into place. For example, let’s assume you’re struggling to get a kick and bass guitar to gel, because the note onsets of the bass sound clicky and obscure the impact of the kick’s beater. A compressor with a short attack and release can pull down on the bass’s click, making way for the kick to be heard more clearly. An option I often prefer in that scenario, though, is to reduce the attack portion of the bass sound using a transient shaper. Set a longer attack time for the compressor, and it will let more of the note onset through, before clamping down on the sustain. This sort of setting could be helpful to ‘tighten up’ the bass notes so as to make way for the lower notes of a guitar. Again, you could use a transient shaper to similar ends.
Transient processors can also be wonderful for tightening up ‘stacked’ sounds such as backing vocals. When you stack vocals, you might be greeted with a nice, thick sound, but minute timing differences can cause the consonants to seem smeared, robbing the stacked sound of clarity and impact. If you allow only one or two (depending on how you pan things) parts in the stack to take the lead in delivering the consonants, and pull down the attack on the remaining doubles, you can restore that sense of separation and definition while retaining that lovely thickening effect.
 It can be tempting to think of compressors just as a means of making things louder or restricting dynamic range. But careful use of the attack and release controls will allow you to manipulate a sound’s envelope, to help nudge it out of the way of sources that need to take priority.
No discussion of using dynamics processors for separation would be complete without mentioning ducking, or side‑chaining as it’s often called. In this technique, you use one signal to trigger gain reduction on another. The classic use case sees the kick drum triggering a compressor inserted on the bass guitar, to help the kick cut through when the instruments play hits/notes simultaneously. Popular as this is, I tend to find side‑chained dynamic EQ cuts more useful, since they tend to result in less collateral damage. Either way, while they’re clever tricks that certainly have a place in mixing, I wouldn’t generally reach for them as a first resort — more often than not, regular EQ and compression can achieve what you need.
One last point on compression: it has the potential, if used indiscriminately in an attempt to make sounds ‘bigger’, ‘fatter’ or ‘louder’, to turn your mix to mush, particularly if you misjudge the attack and release times or push the gain reduction too far. For limiters it’s the same but worse! So if you’re not confident that you know what you’re doing with them, take the time to experiment and train your ears — if you need a primer, check out Sam Inglis’ SOS Nov 2021 article: https://sosm.ag/make-compressors-do-what-you-want
Increasing Separation With Effects
Effects can also be used to increase the sense of separation between signals. Reverb is an obvious candidate, though it’s capable of doing more than many people imagine. Obviously you can use it to make sounds seem more distant — broadly speaking, the ‘wetter’ a sound is, the shorter the pre‑delay, and the more the balance of the reverb is skewed away from the early reflections to the tail, the further away a sound will seem to be. Combine this with the fact that LPFs and lower levels can also push a sound ‘backward’, and you have a powerful toolset for moving less important sounds away from those you choose to make up‑front and present. Combined with panning, you can also use reverbs and delays simply to emphasise the size of the sound stage, which in itself can be helpful for creating a sense of spaciousness.
But reverb can also help to ‘decorrelate’ related signals. Take the example of a singing guitarist, captured with two mics, one targeting the guitar, the other the vocals. Both mics capture a different balance of both sources. If you want to compress the guitar, or automate its fader, then, you could find it tricky to do so — the balance between source and spill on both channels will change, causing level and tonal changes. One tactic that might give you more control is to trust the vocal mic’s guitar spill to provide the ‘dry’ information, and route the guitar mic to an early‑reflections reverb patch, set 100% wet (so as an insert effect, or pre‑fade send with the fader on the guitar channel pulled down). This can cause enough of a change in the character that you’re able to ride this ‘reverb’ fader to give you more or less of the guitar without compromising the vocal.
Another effects tactic you could file under ‘separation’ is to use them to draw the listener’s attention to quieter sounds — this can enable you to get away with a lower playback level, reducing the risk of those sounds obscuring others. For instance, you can use automation with delays to emphasise certain phrases, just to make the listener’s ears prick up. Similarly, modulation effects — phasing, flanging and rotary speaker effects and, my favourite, tremolo can make sounds grab the ear at lower levels than without the effect.
Effects channels, by the way, and particularly reverbs and/or delays, are great candidates for the sort of dynamics processing I described earlier. You can get pretty radical in pulling down the attack of or de‑essing the signal being fed to the reverb, and applying high‑ and low‑pass filtering after it; generally the effects want to sound somewhat tucked away. This brings us back to the idea of ducking: ducked reverb or delay can be really helpful — it allows you to set the effect channel higher in the mix without obscuring the source(s) you send to it.
Splendid Isolation?
This being a magazine article and not a book, there remain plenty more details and ideas that I could throw at you. But hopefully I’ve provided food for thought. Really, if you’re asking how to achieve ‘better separation’, the best answer is a good dose of planning and self‑discipline. But there’s plenty you can do to remedy problems that arise while you’re mixing too. What you can and can’t get away with will vary from genre to genre and track to track, and denser arrangements will always pose more awkward questions. But if you line up your ducks when writing and arranging, fashioning a mix that comes across with confidence and clarity will be so much easier.
And whether it’s through arrangement decisions or EQ, edits, processing and effects, once you have all those different sounds sitting in their own space and pulling in the same direction, you’ll be able to take your mixes up another notch using level automation — you’ll be able to tease out every detail and articulation, all secure in the knowledge that competing sounds won’t have you chasing your tail.
Monitoring & Levels
 The quality of monitoring is important, naturally, but so too is the listening level.Without decent monitoring, you can’t make the sort of judgements I’m talking about in the main text. We’ve discussed the quality and setting up of speakers, the importance of acoustic treatment and the pros and cons of headphones in Sound On Sound many times so I won’t dwell on that here. But it’s worth pointing out that if your speakers or cans are too loud, you’ll likely end up with a mushy‑sounding mix — partly because of the way our hearing system works and partly because it leads more quickly to listening fatigue. So while you do need to be confident your track works when you crank the volume, don’t make ‘loud’ your default setting!
For more on reference monitoring levels, check out Hugh Robjohns’ monitoring article in SOS May 2014: https://sosm.ag/reference-monitoring
Panning
 Panning decisions are definitely important in mixing. But specifically when it comes to achieving greater separation, you’re better off using other tools.It’s tempting to use panning to improve separation, because moving things to one side or the other leaves space in the centre of the stereo image. I’d advise against this being your first port of call.
Panning decisions are important, but if you rely on panning specifically to separate sources that clash, you’re not really solving the problem. It will have zero effect when the mix is heard on a mono playback device and be of limited benefit for those listening where acoustic summing and room reflections result in a very narrow image. Furthermore, why let this specific concern dictate where you can pan the different elements?
If, instead, you can make things work using EQ, you can pan anything wherever you want it! Stereo wideners and Mid‑Sides processing can be a useful ally in your struggle for separation, though.
Mid‑Sides EQ
In the main text, I’ve talked largely about EQ as if it’s only ever applied to a whole source. But you also have the option of EQ’ing just the left or right, or Mid or Sides channels of a stereo signal. One option this opens up for stereo sounds that are not so crucial to the song is EQ’ing the Mid channel to create space in the centre, while leaving the Sides untouched. If you work with a lot of stereo synths, loops or effects returns this can be really helpful.
Sure, anything that’s in the Sides channel will drop out when you listen on mono playback devices — but that doesn’t really matter. The stereo mix should sound more impressive, and as long as all the critical elements still work well in mono, everyone’s going to be happy!