The addition of comprehensive support for right-clicking in recent versions of Pro Tools has revolutionised the user experience. We explain how to get the best from the new functionality.
For along time it was debatable as to whether a two-button mouse was worth having when working with Pro Tools. However, since Digidesign introduced versions 7.2HD and 7.3LE, right-click enhancements have appeared all over the place, and now each new feature seems to be making full use of that second button on your mouse or trackball. So in this month's workshop we are going to look at what you can do with that right-hand mouse button. And remember: whereas Ctrl-click in the Mac Pro Tools world was once equivalent to right-clicking, this is now not the case, and Ctrl-clicking now often accesses separate functions. For instance, right-clicking a Region in the Edit Window with the Selector tool used to enable you to scrub with the cursor. To do this now you must Ctrl-click (Mac) or Start-click (Windows).
Edit Window
 Right-clicking a Region in the Edit Window brings up a number of familiar options, plus one or two less obvious ones. Right-clicking on a Region in the Edit Window now brings up a contextual menu. Most of the options are available elsewhere in Pro Tools, but right-clicking puts them right under your fingertips.
 The Matches option allows you to substitute one Region for another that was recorded in a different take or on a different channel.As you'd expect, Cut, Copy, Paste, Separate and Clear all duplicate the functions in the Edit menu, which have keyboard shortcuts anyway. Delete Fades enables you to delete a fade Region, and becomes active when you have made a fade selection. More useful is Matches, which has two possible functions. After recording multiple takes with loop or punch recording, you can replace the take currently on a track with one of the other takes (Matches Alternatives). This only works if each Region has an identical start time. You can select and audition alternate takes from the Matches pop-up menu while the Session plays or loops.
When working with audio files imported from a field recorder, you can use the Matches feature to replace a mono Region on a track with a matching segment of an alternate channel that was recorded simultaneously (Matches Channels). Any fades performed on the original Region are automatically recalculated against the replacement Region, and any pre-existing automation on that track is left unchanged. The details of this feature are complex, and if you want more information, I would suggest you start by reading the Field Recorders Workflow guide, which you should find in the Documentation folder, inside the Digidesign folder in your Applications folder. The same applies to Expand to Tracks, another feature that comes into its own when you have multi-channel recordings acquired using a field recorder.
![]()
![]()
![]() Snap to Next and Snap to Previous provide very useful ways of lining up Regions on a track.Snap to Next and Snap to Previous extend the idea of shuffle editing in a very useful way, especially since you don't have to be in Shuffle mode to use them. The screen below shows a vocal track I am editing. If I right-click on the middle Region and select Snap to Next, you will see in the next screen that it has snapped to the next Region to the right, something you could never do with Shuffle! Conversely, Snap to Previous will move the middle Region to butt against the Region to the left, which is what you would expect to happen when moving a single Region using Shuffle.
Snap to Next and Snap to Previous provide very useful ways of lining up Regions on a track.Snap to Next and Snap to Previous extend the idea of shuffle editing in a very useful way, especially since you don't have to be in Shuffle mode to use them. The screen below shows a vocal track I am editing. If I right-click on the middle Region and select Snap to Next, you will see in the next screen that it has snapped to the next Region to the right, something you could never do with Shuffle! Conversely, Snap to Previous will move the middle Region to butt against the Region to the left, which is what you would expect to happen when moving a single Region using Shuffle.
Spot brings up the normal Spot Region dialogue box, and Group and Ungroup Regions are the same as Group and Ungroup in the Region menu. Likewise, Loop and Unloop enable you to create, remove or flatten Region loops and are the same as Loop and Unloop in the Region menu.
Once More With Modifiers
 key held preserves any selection in the Edit Window, and brings up some additional options.") Right-clicking a Region with the Command (Windows: Ctrl) key held preserves any selection in the Edit Window, and brings up some additional options.
Right-clicking a Region with the Command (Windows: Ctrl) key held preserves any selection in the Edit Window, and brings up some additional options.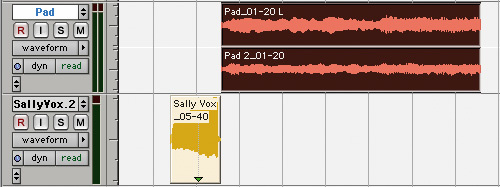


 Here you can see the various 'Move Region...' contextual options in action. The topmost screen shows the Regions in their original position. After selecting the upper Region, the next three screens show the lower Region Start moved to Selection Start, the Region Sync moved to Selection Start and the Region End moved to Selection Start, respectively. Right-clicking on a Region with Command (Mac) or Ctrl (Windows) held down brings up a slightly different contextual menu. The reason for this is so that you don't lose your selection when accessing this version of the contextual menu. A couple of additional elements are available, including Rename, which brings up the familiar Rename Region dialogue box. Why isn't this one also in the normal right-click contextual menu?
The Move Region options, along with the Snap To options on the normal right-click menu, are really useful, and save having to remember a series of complex shortcuts. Make a selection first (or simply place the edit cursor somewhere within the track), hold down Command (Mac) or Ctrl (Windows) and right-click on a Region, then choose the appropriate selection from the set of three options. In the example at the bottom of the page we can see what will happen to the 'Vocal' Region when we use the 'Pad' Region as the selection and choose, respectively, Move Region Start To Selection Start, Move Region Sync To Selection Start, and Move Region End To Selection Start.
Elastic Right-clicking
 With Elastic Audio enabled, you can right-click to change a Region's Warp settings.When Elastic Audio is enabled and a track is in Warp view, you can right-click anywhere in a Region and select Add Warp Marker from the pop-up. If there is an edit selection, Warp markers will be added at the selection start and end. To delete a Warp marker within a selection, right-click and then select Remove Warp Marker from the pop-up menu.
Transport Window

 Contextual options are also available on the Transport Window, which can save a visit to the menus.There are contextual menus on four of the transport buttons, accessible by right-clicking. These work within the Transport window itself and also the Edit window, if you have the Transport function option selected from the View menu.
There are four contextual options for the Play button. Half Speed playback is the same as you get by pressing Shift and the spacebar. When a Session contains a large number of tracks, Pro Tools can take a little while to actually start playing back audio. The Prime for Playback option ('play pause') ensures that when you do hit play you get an instant start. Loop and Dynamic Transport do the same as the equivalent options from the Options menu. For more on the Dynamic Transport functionality, see the Pro Tools workshop article in the May 2007 issue of SOS (www.soundonsound.com/sos/may07/articles/ptfeature_0507.htm).
Although there's no additional functionality, right-clicking on the Record button allows you to get to any of the record modes from one contextual menu. Likewise, the HD-only right-click options for Return to Zero and Go To End enable you to access automation commands that you would otherwise access from the Automation window.
Mix Window
There are quite a few right-click options within the Mix Window. This first one will be familiar, as holding down the Ctrl key (Windows: Start) would achieve the same result: it temporarily suspends whatever you've clicked from any groups. So right–clicking on a channel fader, pan, mute, solo, record enable, track input (HD only), send fader or send pan control will allow you to adjust that control separately from any group it is in.
Right-clicking also makes it possible to rename channel input and output selectors without having to open up the I/O Settings window, a feature that really contributes to better Session management. Right-clicking on a send routing selector offers a similar set of options, plus the ability to mute the send without having to view it, while right–clicking an insert selector offers a range of options, all of which are available elsewhere too: Make Inactive disables the plug-in, Automation Safe protects its automation from being overwritten, and Automation Dialog brings up the standard plug-in automation enable dialogue box.
Groups
When you click on a group name in the Groups List, the group's contextual menu pops up. Again, there are no new features here, but a very useful set of shortcuts for getting to a range of group display and editing functions much more easily. Meanwhile, right-clicking on a group indicator in the Mix Window allows you to enable or disable any group to which that track belongs, while right-clicking a group indicator on a VCA master gives you the Group Edit contextual menu.
What's In A Name
?
 Track names also have their own contextual menus. Scroll Into View is particularly useful if you are working with a small control surface.Right-clicking a track name in the Edit or Mix Windows or the Show/Hide Track List brings up yet another contextual menu. Again, most of these functions are available elsewhere within Pro Tools, but some are worthy of further comment.
Scroll Into View scrolls the selected track to the top of the Edit Window or the left of the Mix Window. This also moves any control surface selections so that the selected track becomes the first channel on the control surface. With a small surface like the Command 8, this feature is much easier to use than the scroll buttons on the control surface itself.
Expand to New Tracks requires HD or LE with the DV Toolkit 2, and expands all matching channels recorded by a field recorder to new tracks, so that every channel resides on its own mono audio track. Pro Tools also automatically conforms all expanded tracks to the edits in the guide track.
Region List
 The Digibase Browser offers a huge number of contextual options. Right-clicking on an item in the Region List brings up its own contextual menu, which also has a few notable entries alongside the familiar options. Replace Region requires HD or LE with the DV Toolkit 2, and replaces multiple instances of a Region with another Region. This is useful in post-production if you use a sound effect many times in a Session, and later decide to replace it wholesale. Alternatively, in music production this is great if you want to replace a much–used loop or sample with a new one.
Compact is a feature I used to have to use a lot when hard drives were much smaller. The Compact Selected command deletes unused portions of audio files to conserve disk space, or to prepare for cleaner hard drive back-ups in situations where you might be only using 30 seconds of a 10-minute file. It is destructive, as it permanently changes the original audio files, so there is no way to recover data deleted by this command. Nowadays, with large drives, this feature is rarely used.
Export Region Definitions can be used when exporting files where you need to have access to the Regions created within a file. An example of this would be a live concert CD. You may well mix the entire CD as one file, but somehow you need to know where each of the songs starts and stops. One way is to create Regions for each of the songs in the mixed file. Then, when you open that complete file in a CD authoring package that supports Region Definitions, you can program it to see the CD track markers that relate to the song Region definitions.
Export Regions as Files is a feature I use a lot now as I 'bounce to track' rather than 'bounce to disk'. For more, see the Pro Tools workshop article in the July 2008 issue of SOS (www.soundonsound.com/sos/jul08/articles/ptworkshop_0708.htm).
Recalculate Waveform Overviews redraws waveforms for selected Regions, while Select Parent in Workspace highlights the parent file of the selected Region in the DigiBase Workspace Browser.
Digibase Browsers
Right-click on any column title within the Digibase Browser and another contextual menu will pop up. From here you can see which columns are enabled, and it is possible to select None, All or the Default set of columns. You can also right-click the Preview button to change the Preview mode and set whether or not the space bar toggles file preview. If you are previewing loops and tempo-related samples, you can select Audio Files Conform to Session Tempo from the pop-up menu to preview the loops at Session tempo. You can also right-click on any item in the Name column to access the commands in the Browser menu.
Get Clicking
I have tried to cover most of the right-click options currently available in Pro Tools, but it's always worth trying an experimental poke of the right mouse button in any likely–looking place!


