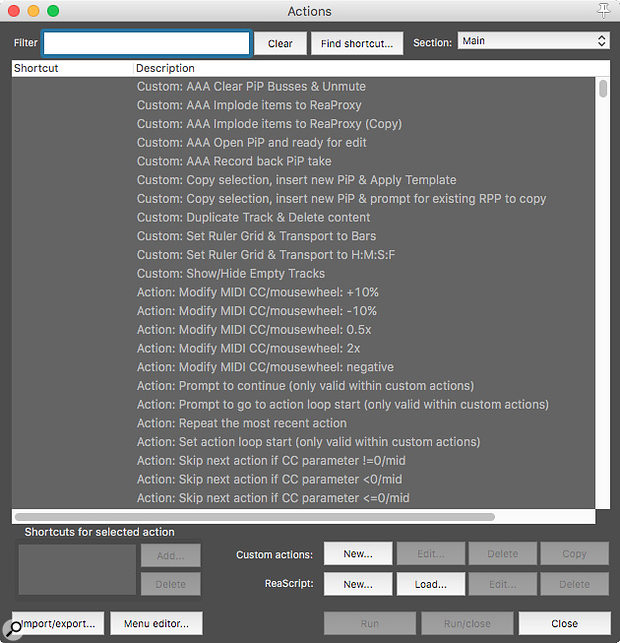
 The Actions window. This is the starting point for diving into Reaper’s powerful keybinding and macro features.
Reaper’s Custom Actions facility allows you to automate pretty much anything. We show you how...
One of Reaper’s great strengths is its ability to be customised to fit the user’s workflow. It’s perfectly capable out of the box, but the software really starts to sing when you’ve dug in and moulded it to your own specific requirements. In this month’s Reaper column, I’ll take a closer look at Reaper’s Actions menu, the central hub of a lot of this workflow customisation. The example in this article requires the SWS/S&M extension to be installed. I’d thoroughly recommend you have this anyway — it’s completely free and adds considerably to Reaper’s feature set. If you don’t have it, go grab a copy (www.sws-extension.org) before you work through the examples.
Keyboard Shortcuts & Actions
Actions are the mechanisms that underpin all of Reaper’s keyboard shortcuts, and there’s really no limit to how you choose to assign them — if you want to assign the space bar to mute track 13 and Control-Shift-Q to play, there’s nothing other than perhaps ergonomics and common sense to stop you! Actions also afford you the ability to assign commands to custom toolbar buttons and MIDI note events, and even to map MIDI Continuous Controllers to things like track/send volumes, pans and so on. There’s plenty of power on tap here, and plenty we can come back to in more detail in a future workshop. For now, though, we’ll concentrate on the keyboard shortcuts.
You can see how things are set up by heading to the Actions menu and selecting ‘Show action list...’, which will bring up the Actions window. Click on the ‘Find shortcut...’ button at the top of the window, then press a keyboard shortcut key (let’s say the space bar) and it’ll locate the currently assigned Action in the Actions list. In the case of the space bar, it’s mapped to ‘Transport: Play/stop’. Every single keyboard shortcut is mapped in this list, so at its most basic you can use the Actions window to modify those default shortcuts. Some people coming from other software platforms like to re-assign them to match what they’re used to elsewhere, while others may want to remove shortcuts to features they have no use for, and reassign them to those they do.
Mapping a command to a keystroke is simple. Let’s say we have a lot of audio to slice up, and we want to set up a shortcut for ‘Item: Split item under mouse cursor’. First find it in the Action list. There are several thousand Actions in the list, so the keyword filter at the top of the window will be of considerable assistance here! Now click to highlight the Action, and click on the ‘Add...’ button. A window will pop up prompting you for an input. Just press the key you’d like to assign that Action to, and it will show in the Shortcut window. If you’re happy to continue, click OK, close the Actions window, and you’re done. If the shortcut key you enter here is already in use you’ll be presented with a pop-up warning at this point, telling you which function it’s already mapped to, and asking if you’d like to override it. It’s best to exercise some caution, as it’s all too easy to accidentally break functions that you might need later. If you do get into trouble, though, you can always reset the bindings to their factory settings: from the Actions window click ‘Import/export...’ and select ‘Restore all shortcut bindings to factory defaults’. You can also get Reaper to generate a nicely formatted HTML list of all your shortcuts and mappings by selecting ‘Key bindings and mouse modifiers’ from the main window’s Help menu. Also in this menu, you can export a copy of the entire Actions list incase you’d like to refer to it when you’re not in front of Reaper. Just select ‘Action list as HTML’.
There are many features lurking in the Actions list that you won’t find on Reaper’s default toolbars or menus, which means it can be well worth hunting through the list for ideas to enhance your workflow. It’s also worth taking a look at the additional Actions lists for other parts of Reaper, like the MIDI Editor and Media Explorer. From the Actions window select an entry from the ‘Section:’ dropdown to see the relevant actions.
Custom Actions
Even if shortcut tweaks are as far as you go with Actions, it’s a very useful customisation tool — but it’s just the tip of a wonderful iceberg! Things really start to get interesting when you use the ‘Custom Actions’ feature to combine multiple Actions. A Custom Action is basically a macro consisting of two or more Actions which run sequentially. Most of mine consist of selecting a set of tracks/items according to a rule, and then performing some action on them. We’ll start with something super simple as an example. Let’s say you want to be able immediately to show/hide any empty tracks from the mixer and TCP windows. If you work with a big composing template, like I do, this can be useful to reduce visual clutter and home in on your active tracks without actually having to delete anything you might want later. To do this manually you’d go to the Track Manager window and toggle the visibility track by track, but that could potentially require hundreds of clicks. Once you set up this custom Action, you can achieve the same result with a single keystroke!
 Creating a Custom Action. You can see the search filter in action here — I’ve typed in “unselect all” and it’s showing me all of the available Actions with those two words in their title.
From the Actions list window, click on the Custom Actions ‘New...’ button to bring up the Create Custom Action window, which has two columns. On the left are all the Actions that Reaper makes available, and on the right a blank column where you’ll build your shiny new Custom Action. Start by typing a name for the Custom Action in the dialogue at the top right of the window — ‘Show/Hide Empty Tracks in TCP/Mixer’ or something similar makes sense. Now, it’s just a matter of finding the actions in the left column and dragging them in order to the right. Start with ‘Xenakios/SWS: Select tracks with no items’, then ‘Track: toggle tracks visible (hide) in Mixer’, and ‘Track: toggle tracks visible (hide) in TCP’. I recommend also adding ‘Track: Unselect all tracks’ to the end of the list, otherwise you’ll end up with all of the hidden tracks still selected, which could create havoc if you’re not careful! If you drag the wrong thing in by mistake, just select it in the right column and press the ‘Remove selected’ button. You can also click and drag to re-order items.
That’s almost it, but there are still a couple more options you can consider. Down at the bottom of the right-hand column you’ll see a couple of tick boxes. The first is labelled ‘Consolidate undo points’, and controls how your Custom Action will behave in response to Reaper’s ‘Undo’ feature. Tick this box and the elements of your Custom Action will all be grouped together as a single instance, and can thus be undone with a single command; with the box left unticked, each action within your Custom Action list is treated separately by the undo command. In this example, that means you’d have to hit ‘undo’ four times to unpick the Custom Action’s changes. There’s no right or wrong setting here, it really depends on what you’re trying to achieve, but let’s tick it for now.
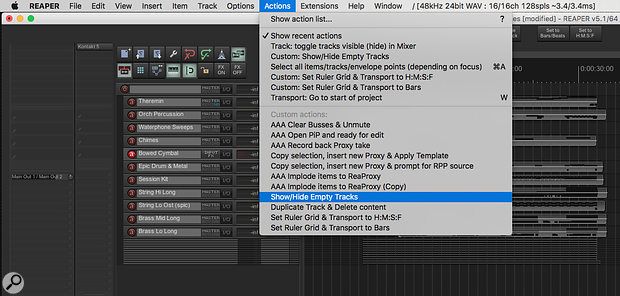
 The Custom Actions drop-down menu with some of my work-in-progress Actions listed.
The other tick box allows you to show your new Custom Action in the Actions drop-down menu. This can be a good spot to put your Custom Actions while you’re testing or fine-tuning them before committing to a keyboard shortcut. Again, let’s tick it in this instance, then hit OK, then Close, and you should find yourself back at the main screen. If you like, you can also assign a keyboard shortcut for your new Custom Action using the steps we followed earlier.
And that’s it! With a single keystroke or menu selection, you can now toggle the visibility of any empty tracks in your project. Granted, this is only a fairly basic feature, but it’s potentially a very useful one, and it’s a good illustration of the principles and process of putting together a Custom Action. You can chain together as many commands as you like, so the possibilities are extremely wide ranging.
Of course, everybody is going to have slightly different requirements, so the best way to learn is by experimenting, remembering to back up your configuration first, of course! You might like to start by thinking of a task you repeat a lot, then try putting together a Custom Action sequence to automate it.


