With MIDI playing an ever greater part in music production, there's a danger that the art of using microphones will be lost. Paul White describes the valuable techniques of miking acoustic instruments — something he recommends every studio user should learn.
A couple of decades ago, even the most junior studio engineer would know which mics to use for any given job, and how to arrange them in the best possible recording positions, but now that so much music is sequenced or sampled, some of the newer engineers get very nervous when confronted by a 'real' sound source. Perhaps this is understandable — after all, a drum kit bristling with mics is a pretty awesome sight — but there are still basic rules which, if followed, will enable you tackle most miking jobs with confidence.
General Points
Capacitor mics capture the sounds of acoustic instruments most accurately, working much more effectively at the high end of the audio spectrum. Excellent results can also be obtained using back‑electret mics or PZMs (boundary mics). Dynamic mics can be used to make acceptable recordings, but their lack of sensitivity may cause noise problems with weaker‑sounding instruments. All the techniques described here are based on cardioid pattern mics, but whichever microphones you use, give the following techniques a try — you'll still learn a great deal, and in most cases, the results will be quite good enough for demo work.
 To achieve the best results, not only should the instrument you are miking be properly maintained and tuned, it should also be played in a sympathetic acoustic environment. If the instrument sounds good, then there is no reason why a good mic placed correctly in the same room shouldn't capture the sound quality for you. If the acoustics turn out to be unsuitable, use a long lead and try another room!
How far away should the microphone be placed from the instrument? There are standard distances and positions for most instruments, but it must be stressed that these are just starting points — the longer you are prepared to experiment, the more successful your recording is likely to be. For example, the acoustic guitar is normally recorded from the front, but I've also miked it successfully from above, over the player's shoulder, working on the theory that if it sounds good to the player, it should also sound good to the mic!
Bass Guitar
Most people now record the bass guitar using a DI box or recording preamp, but I've yet to come across one that produces the authority and punch of the real thing. Before you tell me that the bass guitar isn't an acoustic instrument, which is undeniably true, the guitar's amplifier can be considered in exactly the same way as any other acoustic instrument — the fact that the energy behind the sound comes from burning coal or splitting atoms rather than from chip butties isn't really important!
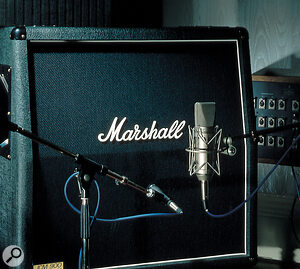
The best miked bass sounds are usually achieved by putting a good dynamic mic 200 or 300mm from the speaker grille and playing normally. If the cabinet has more than one speaker, listen to them all and if one is better than the others, put the mic close to that speaker. The choice of mic can have a big effect on the sound, and if you want a really deep bass sound, try using a bass drum mic rather than a vocal one. A tip when recording either bass or electric guitar is to put the amp and mic in a separate room, so that you can hear the resulting recorded sound over the studio monitors.
Electric Guitar
 At one time, no serious engineer would record the electric guitar any other way than with a microphone (or two), but now guitar preamps seem to be just as popular. Even so, there is a real difference in the resulting timbre, and miking the amp usually produces the best rock sounds.
When you mike an amp, you'll notice the sound changes as you move the microphone around the speakers. For rock sounds, put a dynamic mic right up against the grille, or for a more mellow sound, move it away from the centre of the speakers. Try to record without additional EQ so that your options are still open when you come to mix, and, as with recording the bass, try to monitor the to‑tape sound in the control room, because you'll invariably find that the miked sound is a lot brighter than the perceived sound of the amp. I'd recommend you adjust the tone controls on the amp prior to recording so that the monitored sound is correct, rather than simply accepting what you get and then trying to EQ it afterwards.
Acoustic Guitars And Other Stringed Instruments
Acoustic guitars, especially steel‑string models, cover a very wide frequency range, so you need to use a fairly sensitive mic, with a good high‑frequency response, if you're to do them justice. You can produce usable results from a good dynamic mic, but a capacitor or back‑electret model is far preferable. I always used to mike my acoustic guitars in stereo, but the image seemed to lack solidarity. I've now come to the conclusion that if you're going to add stereo reverb anyway, then you might as well record the guitar with a single mic and relay on the reverb to give it space.
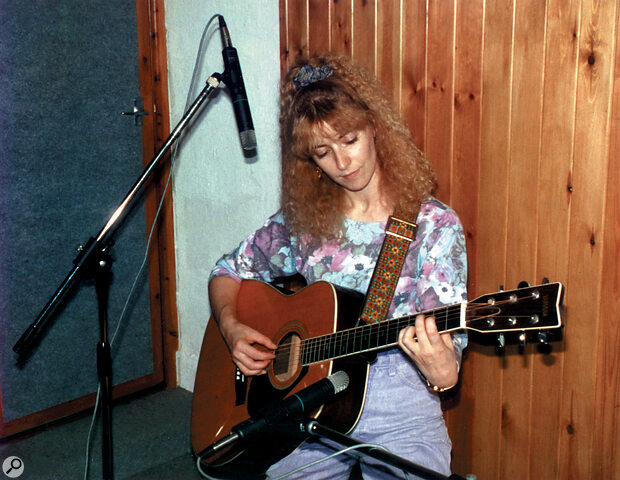
Position the mic around 400mm from the guitar, and aim it either at the point where the neck joins the body, or at the bridge. Some people aim the mic at the soundhole, because that's where most of the noise comes from, but in practice, this usually results in a boomy or boxy recording that needs a lot of EQ to salvage it. The only exception is if you're working with a small‑scale guitar or one with a very thin sound, in which case working closer to the soundhole may help to fatten up the sound. If you want to try recording in stereo, try a second mic pointing at the centre of the neck from 300 or 400mm away. It is usually vital that the two mics are identical when recording stereo, but as the method described isn't a very accurate one, the fact that the mics may be of different types is not so important.
A live acoustic environment is essential for a good acoustic guitar sound, so if your studio is too dead, place a piece of hardboard on the floor or against the wall to reflect some of the sound, as suggested in the box on recording drums.
Keyboards
Keyboards, drum machines and samplers may be recorded by plugging them directly into the line inputs of your mixer, but miking an amp can sometimes produce a warmer sound that can be useful to take the edge off these digital instruments. In general, keyboard amps are miked a little further back than guitar amps, so that the sound from the tweeter is also captured. If it's raunchy rock sounds you're after, you can use a guitar amp to add overdrive to the sound, and then mic the amp up in exactly the same way as for the guitar.
Miking up a keyboard is now the exception rather than the rule, though if you're using a Leslie cabinet, you'll need to use mics to capture the sound. There are many documented ways of miking Leslie cabinets, but the trick seems to be to work in stereo with one mic either side of the cabinet, facing the speaker grilles. It is important not to set the mics too close, otherwise wind noise may be picked up from the rotors, and the benefit of the room reflections will be lost. An initial distance of 300 to 400mm should get you in the right area.
Most commercial pop recordings are made by miking all the drums separately...
Wind Instruments
Most wind instruments can be recorded successfully if the microphone is positioned around half a metre in front, and angled down from above, so that it isn't pointing directly down the bell or mouth of the instrument.
If you're not sure as to the best position for the mic, refer to my universal mic rule and start from there (see 'General Mic Theory' box). I've used this simple rule to make successful recordings of many different instruments, including accordions (best use a mic on each side of these), Irish pipes and even (you guessed it) a digeridoo.
Powerful instruments, such as the saxophone, respond well to both capacitor and dynamic mics, while flutes seem to sound more open and natural when recorded with a capacitor or back‑electret mic. In a pop context, you may find the more punchy, less toppy sound produced by a dynamic mic cuts through the mix better than the more accurate sound of a capacitor mic, so once again, it's a matter of picking what works best on a subjective level.
And Finally...
No amount of written material will turn you into a recording expert overnight, but at the same time, following a few sensible guidelines can produce very reasonable results. If you play a musical instrument, you probably practise on a regular basis, and the same should be true of your recording techniques.
Don't wait until you have a record to make to try out mic techniques — set aside an hour or two and experiment for a while. Try to assess the effect of changing the mic type and distance, for example, and monitor the results via enclosed headphones as you physically move the mic. With just a little persistence, you can maintain the more traditional recording skills, as well as making the most of what modern synth and sampler technology has to offer.
Beat It — Miking Up Drums
GETTING YOUR SOUND
A good drum sound starts with a decent‑sounding kit and a competent drummer. This means having a drummer who knows how get a happening sound, and a kit fitted with good quality heads that have been properly tuned. If the room is too acoustically dead, you might get better results by putting hardboard sheets beneath the kit and around the walls.
If a drum rings too much, or if the toms resonate every time you hit the bass drum, the sound can be dampened by using pads of folded Jaycloth taped to the edges of the heads using Gaffer tape. Be careful not to completely kill the sound — what might seem like a lot of ring in isolation may be completely hidden in a full mix.
A 'LIVE' SOUND
It is possible to get a good drum sound by setting up a pair of mics a few feet in front of the kit, and because this produces a very live sound, it has become a very fashionable alternative to the close‑miked drum sound of the '80s, and the clinical precision of drum machines. Position the two mics (known in the trade as overheads) between one and two metres from the kit (either in front or above) depending on the acoustic of the room, and space the mics about one to one and a half metres apart. As a rule, the more reflective the room, the more exciting the sound will be. Capacitor or back‑electret mics are good for this simple approach, and you can also get a good sound from the budget Tandy PZMs by taping them to the wall behind the kit or by placing them on the floor in front of it. If the kick drum and snare drum seem to be getting lost, use additional close dynamic mics and bring their level up underneath the stereo mics until you hear a good balance.
BASS DRUM
Mic the bass drum through a hole cut in the front head, and place a folded blanket or feather pillow inside the shell to provide some damping. The mic should be about 200mm from the beater, suspended inside the drum shell on a boom stand that isn't physically touching any part of the shell. You can also try laying the bass drum mic directly on top of the damping material inside the drum. Pan the kick and snare drums to the centre when mixing.
SNARE
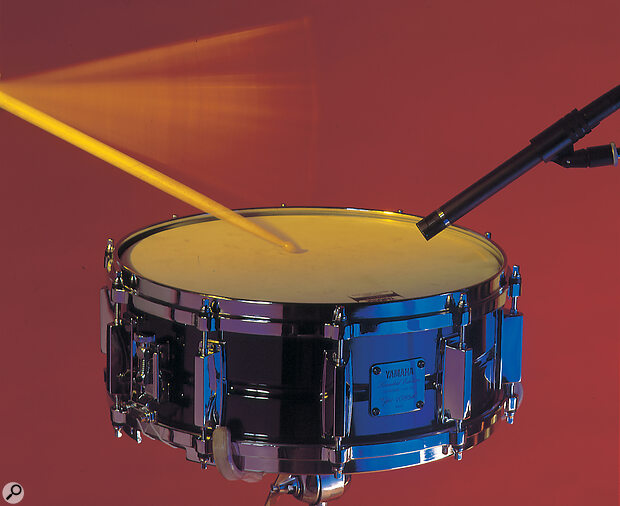
For the snare, use a dynamic mic around 50mm from the edge of the drum, and about 50mm above the head. Try to arrange it so the mic is pointing away from the hi‑hat, otherwise you might find the hi‑hat overpowers everything. Some engineers like to add a second mic to the snare, pointing at the snare head from underneath. I've never had great results doing this, but if you want to give it a try, I suggest you switch the bottom mic out of phase with the top, otherwise the two mics will be trying to cancel each other out.
CLOSE MIKING
Most commercial pop recordings are made by miking all the drums separately, in which case the toms may be miked in exactly the same way as the snare drum, using a single dynamic mic close above the head. If the hi‑hat needs more prominence, a capacitor or back‑electret mic can be set up around 200mm above (or below), and a little to one side. Take care not to angle directly at the hi‑hat's edge, otherwise you risk picking up the wind noise as the cymbals close. Whichever way you set up the mics, try to make sure they're where the drummer isn't likely to hit them!
MIXING DRUM MICS
If you're short of tape tracks, at least try to keep the overhead mics on separate tracks. The way these are mixed in with the close mics has a profound effect on the final drum sound. For example, to get a tight, close‑miked drum sound, you first get the drums balanced using the close mics, then bring in just a little of the overheads to add air and definition to the cymbals. For a more live sound, on the other hand, you usually start off with the stereo overheads and then use just a little of the close‑miked sounds to fine‑tune the balance between the various drums.
A WORD ON EQ
Close‑miked drums may need some EQ to get the sound just right, and if you have to mix some of the drums as you record, you may have to EQ during recording. If you have the luxury of keeping the drum sounds separate, however, try to save the EQ until your final mix.
General Mic Theory
While physicists have struggled to come to terms with a general theory of relativity, I've tried to come up with a general theory of miking, and though it doesn't take into account the gravitational effects of black holes or the high‑xfrequency transmission characteristics of a methane atmosphere [I used to know a drummer like that — Assistant Ed], it does seem to work in most real‑life situations.
A real instrument is not a point source of sound — what we hear is a blend of an infinite number of sounds emanating from all parts of the instrument. This means that if the mic is too close to the instrument, you only capture part of the sound, but on the other hand, if you put the mic too far away, not only will you be struggling for level, you'll also pick up more reflected room sound than you do direct sound. In some rooms, this can sound good, but in most cases, you end up with a boxy, distant sound that is lacking in detail and presence.
A good compromise is to space the mic away from the instrument by a distance similar to the longest dimension of the instrument. In the case of a guitar, you can say that the sound‑producing part of the instrument is just the body (not strictly true) and put the mic around 400mm from the body, or you could accept that some sound comes directly from the strings and neck and put the mic at up to 800mm from the guitar.
If you're working on a drum kit or other collection of percussion instruments and you want to record them with a single mic or stereo pair, then again treat the whole thing as one instrument and space the mic accordingly. In the case of a typical drum kit, the mics would be placed 1500mm or so in front of the kit. Though this rule isn't perfect, it will usually get you into the right ball park very quickly, and it's come in very handy when I've been asked to record unusual instruments for which no textbook method exists.


