 Here you can see the microphone setup Mike used for recording two audiobook narrators in his control room. The mics were placed at a fair distance from the narrators, so as to minimise any tonal changes that might result from the speakers moving around.
Audiobook Recording: spoken word in the project studio presents a different set of challenges to most music productions.
It’s tricky to be a specialist in Project Studio Land. Once people in your local area find out that you can record stuff, they’ll tend to come to you for anything audio-related, regardless of whether you’ve had experience of their specific task. I’ve turned down quite a few requests to handle live sound, for instance, simply because I know my woeful ignorance of that field would make me more a liability than a help! That said, I think there’s something to be said for stepping outside your comfort zone once in a while, because there’s nothing that expands your skillset quicker than fresh challenges.
It was in this spirit that I agreed to help out with recording an unusual audiobook for children, a project which involved interweaving a capella choral recordings with spoken narration. As regular readers will know, I’m fundamentally a music-production guy, so I was fairly confident I’d be able to handle recording and mixing the choral sections. However, my experience of recording voiceover amounted to nothing more than doing a few self-produced screencasts. Fortunately, the choir were happy to give me a shot at recording the narration as well, on the understanding that I wouldn’t charge them for it if they later decided to redo it at a specialist voiceover studio instead.
Voiceover In The Project Studio
Compared with vocal capture for music production, recording speech for an audiobook presents additional technical challenges. First of all, audiobook narration is typically presented extremely ‘dry’ as a final product, so it’s extremely important to minimise reflected sound within the recording room. Yes, with pop vocals you’re normally trying to keep them pretty dry while tracking, but it’s not quite as critical, given that a touch of room sound will, in practice, usually be lost amongst the effects you typically add during a music mixdown. Whereas with a solo voiceover, even a smidgen of unwanted room sound has nowhere to hide! Minimising extraneous noises is equally vital, because these are ruthlessly exposed when a voice is heard in isolation. One of the things you pay for in a commercial voiceover studio is an environment purpose-designed to give a super-low noise floor, and it’s a struggle to compete with that when you’re working (as most project-studio recording engineers are) in what are more-or-less glorified domestic surroundings!
In our specific scenario, both of these challenges were compounded because we had not one, but two narrators, and the need for natural interaction between them meant that recording the performers simultaneously was the only viable option from their perspective. So here’s how I approached these challenges...
Minimising The Room Sound
 To reduce the amount of room ambience as much as possible, Mike put up a selection of thick quilts around and above the performers, suspending this improvised room treatment from hooks strategically placed around the room.Choosing a recording location was easy: I wanted the driest-sounding room I could get my hands on, and my own basement mix room certainly fits the bill there. Because my room’s all-concrete construction causes no end of bass resonance problems, I deliberately went overboard with rockwool-panel bass trapping. While this makes the room a usable mixing environment, it does mean it’s very dead-sounding — so much so, in fact, that I’ve had to reintroduce some high-frequency reflection with hardboard panels, so that conversing with visiting clients feels more natural! However, I decided to push things deader still in this case, by hanging my collection of quilts (usually reserved for location-recording duties) around the performers and selecting directional mics into the bargain. This is something I find myself doing often enough that I now have a series of little hooks fixed all round the room specifically for that purpose!
Another crucial question was whether to work with one mic or two. On the one hand, a single mic wouldn’t capture as much room sound as two, and there’d be no worries about phase-cancellation affecting the vocal tone on account of spill between the mics. My concern with that approach, though, was that I wouldn’t be able to get close enough to the two narrators (in order to minimise room reflections) without moving each speaker unacceptably off-axis to the microphone, and I also felt it would be useful to have more independent control over their relative levels on a couple of occasions in the script when they spoke simultaneously. So in the event, I went for a two-mic setup, my idea being to remove the indirect mic signal during the editing process wherever only one narrator was speaking — in other words, 99 percent of the time. This also had the ancillary benefit that I had more leeway to choose mics that suited each individual’s voice (a selection process I carried out with the co-operation of the performers prior to the first proper tracking session), rather than having to find one mic to suit them both.
Noise Job
The other main concern was avoiding unwanted noises on the recordings. I chose large-diaphragm condenser mics for this reason, as signal-to-noise ratio tends to be one of the strengths of such designs, especially when working with budget models. My room uses the ‘star’ mains-wiring configuration Paul White and Hugh Robjohns are always recommending in their Studio SOS articles, with the whole rig fed from a single wall socket via a Furman power conditioner, and I also use balanced audio connections throughout the system, so fortunately mains-hum and other induced noises don’t cause me any real concerns day to day. Mind you, I still insisted that everyone had their mobile devices switched off while we were recording, to further reduce the risk of capturing a burst of the dreaded ‘blippeties’.
For all its acoustic foibles, one advantage of a basement room with concrete walls is that the inherent isolation from external sounds is pretty good, and my mix room is far enough from road and rail traffic that low-frequency rumble doesn’t trouble any mic with a suspension shockmount. In that respect, the main sources of unwanted noise were within the building itself. For example, I usually have an internet-capable laptop sitting alongside me on the desktop while I work, and that generates a small amount of fan noise, and my loudspeakers also emit a small amount of electrical hiss even with my monitor controller’s volume control all the way down, so those devices were all switched off while recording. Fortunately, I’ve been able to remove my main desktop PC to a separate storage ‘corridor’ alongside my main mixing space, which reduces the audibility of its fans and liquid cooling system somewhat, but I went an extra mile here too, blocking up the corridor’s accessway with a foam mattress and another quilt to quieten things further.
Of course, there are some things that are better worked around. No DIY soundproofing would have rescued us from the thunderous tramplings of my kids charging up and down the stairs above us, so it made sense to limit session dates to schooldays and later evenings! Similarly, a quick conversation with the neighbours allowed us to coordinate schedules so that the hammering from their (immaculately timed) home-renovation work wouldn’t be preserved on CD for posterity...
Setting Up The Performers & Mics
 On the session itself, I set the two narrators up at the rear of the room, with quilts above and behind them. For spill-rejection purposes it would arguably have been better to position them face to face, a configuration which would also have benefitted communication between them. However, I decided instead to have them at about 90 degrees to each other, so that they both also had eye contact with me and an additional choir member who had come along to fill the role of producer (evaluating things like enunciation, accent, and phrasing).
Although, as I’ve already mentioned, I was keen to record as dry as possible, I nevertheless avoided placing the microphones too close — each was a good 25cm from the performer’s mouth. There were several reasons for this. Firstly, I find speech quickly gets unnatural if you record it too close. With singers, somehow you usually seem to be able to get away with recording closer up, but with speech, close-up recording seems to become rather imbalanced and disembodied. Secondly, positioning the mic a little further away meant that the sound would change less (on account of the mic’s proximity-effect bass boost and off-axis tone) if the performers moved mid-take, the idea being that this would make it easier to keep a consistent vocal tone. That said, I anticipated that this might be one of the challenges of this recording job, so I warned both performers about this, and kept my eyes open for them changing posture between takes. And, thirdly, keeping the mic at a reasonable distance and a little above the performer’s eye level meant that a pop shield was unnecessary — plosive wind blasts tend to be pretty directional, usually firing straight forward from the lips. In this way, I was able to make the miking feel less intimidating to the performers, as well as less of a visual obstruction to communication.
It was clear to me that we would not complete the whole recording in one session, so I made a point of photographing the first-session setup in order that we could recreate it reasonably closely on subsequent occasions. However, despite that, I made sure to alert everyone that punching in to replace small sections of a previous session’s recording might not work, owing to timbral inconsistencies between different days, so longer sections might have to be replaced to maintain a convincing illusion of a single fluid performance.
 Maximising the signal-to-noise ratio on the final recordings involved taking advantage of specialist processing from restoration specialists iZotope, in the form of their RX2 plug-in.Once all the preparation was behind us, the recording process itself was actually fairly straightforward. As on a sung session for music production, we did a number of takes and comped together the best performance out of sections of those. What you can’t normally do on a music session, though, is immediately re-sing a mistaken note, because the singer has to stay in time with the backing track. With a voiceover session, on the other hand, the performer can at any time go back over a line, without dropping out of record (or, indeed, stepping out of character), because there’s nothing they need to stay in time with and it’s easy to delete unwanted sections after the fact.
Technical Edit
For the purposes of confirming take decisions and arriving at a final comp of the narration, the editing was fairly simple. All the snipping points were either in gaps in the audio, or else at moments where tiny crossfades are easily concealed — just before strong stop consonants (eg. ‘t’, ‘d’, ‘p’, ‘b’), for instance, or during noisy sibilant (‘s’, ‘sh’, ‘ch’) or fricative (‘f’) sounds. After those decisions had been made, though, I also carried out a second layer of editing to improve the end result from a technical perspective.
The first thing I did was use a dedicated denoising algorithm (in my case iZotope’s RX2 plug-in) to further reduce the audibility of our recorded background hiss. This kind of restoration processing tends to work best if you can feed it a ‘background noise only’ sample from which the algorithm can learn appropriate processing parameters, so I’d been careful to record a few seconds of ‘silence’ (ie. with everyone in the recording room remaining absolutely quiet and motionless) at some point during each session for this purpose. As a result I was able to bring the apparent noise floor down by around 12dB without unacceptable sonic artifacts. Incidentally, it’s worth noting that you need to record a new noise signature for every new session, as the level and nature of the background noise will inevitably vary a little, no matter how much you try to match the recording setup between days.
 The processing chain for final mixdown was fairly minimal: 20Hz high-pass filtering from Cockos ReaEQ; de-essing from ToneBooster’s TB_DeEsser; and the lightest of limiting from Sonalksis MaxLimit to catch occasional overbearing signal peaks.Once I’d accomplished the noise reduction for each of the two microphones, my second step was to edit out spill signals wherever possible, which immediately made both voices sound more solid and well-defined, and I also chose a sensible polarity/phase relationship for the mics on those few occasions when both voices spoke together — although the latter stage proved to make a lot less sonic difference than I’d feared, in the final analysis.
The final stage of editing involved going through the comped and noise/spill-reduced recording listening for lip noises, odd-sounding breaths, and other unwanted noises between words, and removing or replacing those. This was another activity where having my ‘background noise only’ recording paid dividends. You see, if you simply delete, say, a section of lip noise between two phrases, you also remove the background noise, and the resulting moment of abrupt digital silence draws attention to the edit in a subtle, but rather unsettling way. If, instead, you replace the section of lip noise with a section of background noise, the edit becomes much less obvious, and the speech seems to flow more naturally.
 (Amongst this month’s Session Notes media resources, which you can find in the righthand Media sidebar's Zip file and in the 'Audio Examples' box, I’ve included some comparison files which demonstrate this in practice, and there’s also an audio walkthrough of the whole editing and mixing process so you can evaluate the success of my techniques for yourself!)
Mix & Match
Because the voices weren’t miked that close and we’d taken the time to try a few mics in advance (settling on an affordable ADK A6 and a Groove Tubes GT55 large-diaphragm condenser mic), the mix turned out to be all but a formality: a 20Hz high-pass filter just to guard against infrasonics; a few decibels of de-essing from ToneBoosters TB_DeEsser to combat the sibilance-enhancing properties of the condenser mics’ inherent on-axis high-frequency boost; and an instance of Sonalksis’ MaxLimit limiter to catch any overbearing peaks. This latter plug-in was a safety measure and effectively remained inactive most of the time.
 I did also employ a little level automation to better match levels between some phrases, although this was nothing like the detailed syllable-by-syllable work I frequently get involved in when working on chart-style music mixes — after all, the voice in this case rarely had any kind of backing texture to compete against for intelligibility.
 A little level automation was used to even up differences between different phrases, but this was much less in-depth than might be expected for lead vocals in a music production.In a few instances where I’d not been able to prevent a performer changing their distance from the mic, I also applied a little low-frequency shelving EQ to compensate for the concomitant change in proximity-effect bass boost. Fortunately, that only amounted to maybe a dozen phrases in the whole project, so overall I don’t think we did a bad job in heading off that particular problem while recording.
But the proof of the pudding is in the eating, of course — and fortunately the choir professed themselves happy with the end results! So if you’ve also been considering recording voiceover in your own project studio, this session clearly demonstrates that it’s possible to get marketable results without calling in the specialists, as long as you take extra steps to squeeze the best technical performance out of the recording environment and equipment you have available.
The Voice Of Experience
As already noted, voiceover isn’t exactly my stock in trade, so I’d fully expected to cock some things up along the way — and my expectations were certainly met!
Top of my list from a technical perspective was that I think I could have done more to combat lip noises at source. I remember thinking during the tracking that only one of the vocalists was drinking regularly (despite my providing drinks for them, as I always would on any vocal session), but I failed to put two and two together and remember that this tends to exacerbate lip noises. Again, this was definitely a lack of voiceover experience showing — I’d not normally pay nearly as much attention to lip noises on a sung vocal session, given that they rarely create an audible problem in music mixes. Indeed, I was more concerned during this session with avoiding proximity effect variations.
Still, I wasn’t entirely asleep, because I did spot that the leather sofa one of the performers was sitting on was squeaking slightly when he moved, and was able to remedy that by laying a thin blanket over the top.
Featured This Month
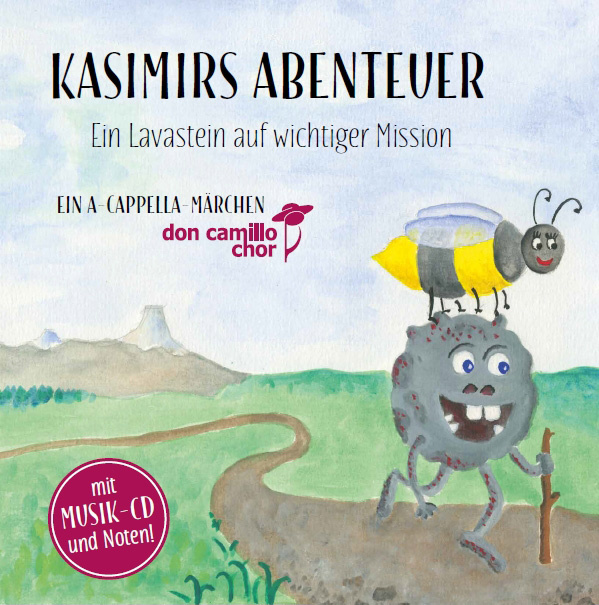 If you’d like to hear the finished CD version of the audiobook featured in this month’s column, it’s called Kasimir’s Abenteuer, and can be ordered direct through the Don Camillo Choir’s web site at www.doncamillo-chor.de.
Audio Examples
These audio files accompany my Session Notes article in SOS December 2016 about recording two narrators for an audiobook project. The filenames are fairly self-explanatory, but here are some additional notes to describe exactly what you’re hearing in each case.
Download | 16 MB
Voiceover01_RawMic1
To start with, let’s listen to a short section of the raw voiceover session recording, without any processing applied to the mic signals at all. This file is for the Groove Tubes GT55 cardioid large-diaphragm condenser mic I used for the first of the two speakers in this extract. This mic was placed around 25cm from the performer, a little above eye level and pointing downwards towards the speaker’s mouth. Notice not only how the first speaker sounds directly through his own mic, but also how the spill sounds from the second speaker. Now compare this with the Voiceover02_RawMic2 audio file.
Voiceover02_RawMic2
The second voiceover mic I used was an ADK A6 cardioid large-diaphragm condenser, again placed around 25cm from the performer, a little above eye level, and pointing downwards towards the speaker’s mouth. Again, you can hear not only the second speaker’s direct sound through this mic, but also the spill from the first speaker, who was sitting about three feet away about 120 degrees off-axis. Compare this with the Voiceover01_RawMic1 audio file.
Voiceover03_RawMicsBalance1_SpillIn
This audio example demonstrates the sound of balancing the two raw mic signals against each other. One of the problems with recording the two narrators simultaneously, but with separate mics, is that the spill from each mic made the signals undesirably roomier, and also coloured the dry tone by dint of combfiltering between direct sound one one mic and spill on the other. Compare this with the Voiceover04_RawMicsBalance2_SpillOut clip.
Voiceover04_RawMicsBalance2_SpillOut
In response to the unwanted roominess and timbral coloration you can hear in the Voiceover03_RawMicsBalance1_SpillIn audio example, I deliberately deleted the spill signals from each of the mics with my audio editing tools whenever that mic’s designated performer was silent. This immediately made the vocal tones more solid and natural, and also increased the degree of direct sound in the mix, rendering the results drier and more upfront-sounding.
Voiceover05_EditingNoise01_NoiseOut
As mentioned in the main text, editing out lip noises between phrases helped improve the apparent production quality of the final result. However, you can’t just delete those sections, otherwise the abrupt loss of background noise makes the edit seem unnatural, as you can hear in this example, where I’ve deliberately removed the lip noises between the two speech phrases in this inadvisable manner. Compare this with the better result in the Voiceover06_EditingNoise02_NoiseIn audio file.
Voiceover06_EditingNoise02_NoiseIn
The unnatural abruptness of the digital edit in the Voiceover05_EditingNoise01_NoiseOut audio file can be smoothed by replacing the deleted lip noises with a section of background noise taken from elsewhere in the session — in this case, in fact, I’d recorded a section of noise specially for the purpose.
Voiceover07_RawMicsBalance3_TechnicalEdit
Here’s a balance of both mics after my additional noise-reduction processing and editing stages. If you compare this sound with that of the Voiceover04_RawMicsBalance2_SpillOut audio file, you can hear the degree of difference this made to the apparent production values.
Voiceover08_MixedMics
Here’s a final mixed version of the same section of narration, featuring a 20Hz high-pass filter from Cockos ReaEQ, a little de-essing (to compensate for the on-axis high-frequency boost inherent in most large-diaphragm condenser mics) from ToneBoosters TB-DeEsser, and the lightest touch of limiting from Sonalksis MaxLimit to control the odd overbearing peak (although this latter plug-in is effectively inactive most of the time). If you compare this example to the Voiceover07_RawMicsBalance3_TechnicalEdit audio file, you’ll hear that the differences are pretty small!