Many users probably never venture into Pro Tools's Calibration Mode, but you could be compromising the sound quality of your Pro Tools rig and external gear if you don't think about lining up your analogue connections correctly.
Different audio gear works at different voltage levels, so part of audio engineering has always been making sure that when you connect two things together they operate at levels comfortable to both. Connecting two devices with a digital audio connection is usually much simpler than it is with analogue systems, because they are exchanging abstract data rather than signals that directly represent the sound. It's pretty obvious, though, that your Pro Tools system has to be connected via analogue signals at some time, even if it's just to a power amp and speakers. It's likely that you also connect to instruments, mic preamps or a mixer, and thinking about your signal levels at these points is not just an academic beardy thing — it has a very real effect on your audio.
Quick Tips
- If you have a mixture of interfaces such a 192 and a 96, or 888/24 and 882/20, it sometimes makes sense to calibrate the 192 or 888 to -14dB headroom to match the other units that are hard-wired to this setting. This way the levels will match across your inputs.
- While you can have multiple playlists for audio (or MIDI) in a track, you can only have one version of the automation. You can, however, use the Duplicate Track command to try out different automation and effects. Make the original track Inactive so that you don't waste DSP power.
- In the Click Options (MIDI Menu) you can set an internal plug-in instrument, such as the free Sampletank SE, to be the click sound source. However, this is a pretty bad idea, as your click will suffer from the normal latency associated with virtual instruments. Use an external MIDI device that isn't patched through Pro Tools, or safer still, just use an audio track with an imported click sound and forget about MIDI clicks altogether.
Gain Structure On The Input Side
Imagine a mic preamp unit that is connected to an input on an 888/24 interface (which has no built-in preamps). Being a good student of digital recording, you know that you should get a nice high level showing on your Pro Tools mixer channel to make full use of your 24 bits. However, you might find that you have to boost the gain on the preamp until it's going way into the red on its own meter before you get a good level in Pro Tools. This will mean your preamp is distorting the signal before it even gets to Pro Tools. The opposite could also be the case, where you have to turn the preamp right down to avoid a red clip light in Pro Tools. Either way, one or another of the pieces of equipment in the recording chain is being compromised; what you want is for a signal that meters around 0VU (optimum level) on the preamp to equate to a healthy recording level in Pro Tools. Typically this is achieved by adjusting the preamp's output trim, but if your interface is connected fairly permanently, say to a mixer, you should consider setting your Pro Tools trim controls to match well with this piece of kit. This process is known as 'lining up'.
Before we get down to the specific considerations of lining up, we should recap the idea of headroom as it relates to analogue and digital gear (please skip this if you've heard it a hundred times before!). The preamp in the example we just looked at has a VU meter that measures the voltage of the signal passing through it, calibrated with values both above and below a zero point (its 'best' operating level). As signals go above the zero mark they will become progressively distorted and compressed (which can sound OK or even pleasing) until you reach the maximum voltage the gear can handle and get nasty 'clipping'. This zone between zero and maximum is called the headroom and varies from one piece of equipment to another. In digital audio equipment, headroom in this sense does not exist, because the 'optimum level' is the maximum it can represent. As this is the only meaningful point of reference, it's marked as the 0dB point (called 'full scale'), and all levels in the system are measured in dB below this level.
When you line up two pieces of analogue gear, you normally adjust their trim controls so that a signal that measures as 0VU on the first piece also measures as 0VU on the second. When you line up a piece of analogue gear to a digital device's inputs, you adjust the point at which the voltage gets measured as the maximum digital level (0dBFS), but what level should that be?
Given the above, a sensible approach is to adjust your gear (typically using the input trims on your interfaces) so that the maximum level your analogue gear can kick out lines up with the digital maximum point. So if the preamp in the example has a headroom value of +14dB, you would adjust your interface so that a 0VU signal from the amp registers as -14dB in Pro Tools. This creates artificial headroom in PT to match that of the preamp.
While this is standard practice, there are other options. For example, if you prefer not to push your preamps or mixer channels much above the 0VU point, it might make sense to set a smaller artificial headroom in Pro Tools so that you get a higher recording level. If you do this you have to be careful when recording, because you will be able to clip the inputs. This, by the way, is one of the main reasons for using 24-bit recording: you can allow more headroom in Pro Tools (have lower average recording levels) without compromising the quality anywhere near as much as when using 16 bits.
Calibration Mode
Calibration Mode is Pro Tools's built-in tool for helping adjust interface I/O levels. The 192 and 888/24 Calibration Guides go through the steps (www.digidesign.com/support/docs) of one method, although it's a little confusing so here's some clues.
 Digi's outline suggests that you connect the outputs of your interface to a VU meter, then output tone from the Signal Generator plug-in and adjust your output trim controls until the meters read 0VU. They then suggest you connect your interface's outputs directly back into the interface's inputs, and use the same tone to line up the input trims. The screen shot shows four channels from one of Digi's calibration template sessions. The Signal Generator is on the first channel, and is distributing tone to tracks that are feeding outputs on the interface. The tone has been set at -18dBFS, a common headroom level, and the output trims have been adjusted using a meter. The last four channels are now getting tone from the inputs, which have been cabled to the physical outputs.
Calibration Mode has been selected from the Operations Menu, causing the numeric display below each channel's I/O selector to display the level of the incoming signal, and the track names to flash. The small up and down arrows at the bottom of each channel indicate whether the input gain needs to be trimmed up or down to reach the headroom level you've set in the Preferences.
As you can see in the screen shot, all the channels are reading slightly higher than -18, so my input trims need to be tweaked down. When you achieve the right level the track name stops flashing. This method is perfect if you are lining up all your I/Os to a mixing desk, but depending on your configuration, you may choose to have different input and output levels, or even differences between channels where you have particular bits of gear connected.
Outputs From Pro Tools
The other side of the coin is lining up your analogue outputs from Pro Tools. The theory is the same but you should consider how you are working before deciding where to set your interface's output levels. Here are some scenarios to consider.
Using an external mixer, where you're mainly using Pro Tools as a recorder: In this situation you should probably line up Pro Tools so that there is, again, 'artificial headroom' that matches your mixer. This way, a track at maximum volume in Pro Tools will just be at the maximum level on the channel in your mixer. Again however, use your judgement: if you have high levels in Pro Tools, you might want to trim your outputs lower so that you're not overdriving your desk all the time. Anyway, if you want to line up to a desk that has headroom of +14dB, use the Signal Generator plug-in to output -14dBFS tone (see also the Calibration Mode box above), and adjust the output trims until the signals to your mixer's tape returns read 0VU.
Mixing in Pro Tools, monitoring via a mixer: In this case your main stereo mix outputs are likely to be pushing the maximum (0dBFS) level fairly often. You should probably use much less artificial headroom so that outputs close to maximum level are near to the 0VU level in your mixer.
Mixing in Pro Tools, outputting straight to amp/speakers: Your amp may not have meters to reference here. The best approach is probably to play a finished mix in Pro Tools and adjust the interface's outputs so that you get your normal monitoring level when the amp's or speakers' volume controls are in a middle position. Listen carefully for distortion, and reduce the outputs further if you hear any.
Broadcast standards: In certain industries, particularly broadcast, your interfaces must be lined up to a specific level. Hugh Robjohn's Metering FAQ article in SOS June 2000 charts all the common standards and, together with his article in SOS May 2000, goes into more detail on some of the technical issues we're touching on here.
Trimming Digidesign Interfaces
Interfaces with trim controls: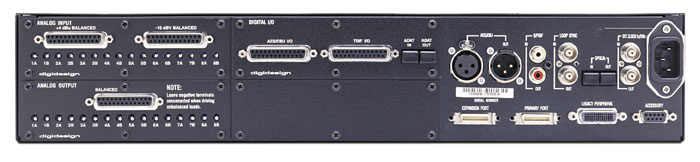
- 888/24: Inputs and outputs have trim pots for adjusting levels. Each input and output can be individually switched between the -10/+4 dB standards by lifting the lid and moving jumpers (so you only want to do this once!), and the unit is factory calibrated at -18dB headroom.
- 192I/O: If you have this box (right) you have separate physical inputs for -10 and +4, which can be selected between from Hardware Setup in the Pro Tools software. There are also two different trim pots (A and B) per input, allowing you to set up two calibration levels and choose which is active in the software. The outputs are always in the +4dB range, but again with two trim pots each for storing settings. The 192 is also factory calibrated at -18dB headroom.
Interfaces without trim controls:
- Digidesign interfaces for LE systems have input gain controls that are designed to accept a wide range of levels. It's generally assumed that you are using these interfaces without an external mixer permanently connected in a particular configuration, so the Calibration Mode is not included. It's still important to remember to select the right inputs for the type of equipment and selct -10/+4 where available. On some units there are separate outputs for -10/+4 destinations.
- The 96, 96i, 882/20 and 1622 TDM interfaces are hard set to a headroom of -14dB. They can all be switched between -10/+4 standards. The 96i and 1662 have software-adjustable input levels for even more flexibility.


